Showing posts sorted by date for query revco. Sort by relevance Show all posts

Sunday, 4 September 2022

Baffling 1970s British Wheel Engineering

I had a go at mounting new tires on the 1971 Bonneville project rims today, and what a pain in that ass that has turned into.  The rear tire is a mess of strange engineering decisions, including 3 holes for the inner tube valve, two of which are filled with rubber/metal pads with valve stem sized bolts sticking out of them.  Why they would do this is beyond me.  It creates a needlessly heavy wheel just where you don't want it (where centrifugal force amplifies it at the rim when it spins).  Perhaps it has something to do with the spokes and creating a true (round) wheel by adding weight?  The rear tire went on easily enough, but the inner tube was a pain to get the valve in place and it doesn't seem to be taking air.  I'll have to take that apart again and figure out what the hell is going on.

Also in bizarro British '70s engineering world, the front wheel has the valve stem hole drilled in the worst possible location, right near two spokes, which makes putting the compressor's tire inflation nozzle on it impossible.  There are spaces all around the rim where the hole could have been drilled to allow for easier access, but the Meriden Triumph 'technician' threw it in there.  If there is an engineering reason for it, it's beyond me.  Putting the hole in the space between more distant spokes shouldn't hurt the durability, but they didn't do that.

I've done inner tubes and tires for my modern Triumph Tiger recently, and just did a tubeless tire on the Kawasaki (complete with tire sensor hack), so this shouldn't have been the faff that it has turned into.  I ended up leaving both rims sitting in the garage.  I'll come back to it another day when I'm less frustrated by it.

Period tires from Revco look good on the rims, but the rear won't take air and I can't get any into the front.  Damn it.

Here's some old Triumph 'character' and a bit of moto philosophy to remind me why I'm doing this...

Wednesday, 24 August 2022

Getting a Flat Tire on your Motorcycle

I've been riding for over a decade now on a lot of different bikes and I've never had a flat tire.  A work colleague got one once and it made her quit riding, so the terror of riding a motorcycle with a flat has always had an inflated (ha!) place in my mind.

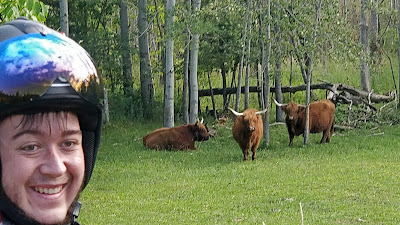
Last week my son and I went to look for hairy cows (highland cattle up by Creemore) on two wheels.  The mission was a success and after a quick lunch in Creemore we headed home.  A stop for a stretch in Grand Valley must have picked up a nail as once we were back in motion the tire sensor started flashing on the dash.  It should have been more obvious that a catastrophic tire failure was under way except the Kawasaki was also in a panic about being low on fuel.  Whoever did the dash layout for the C14 didn't have a good grip on digital ergonomics (a rapid tire decompression shouldn't be vying with early low-fuel warnings on the screen).

I started to feel the back end get squishy so I slowed down and pulled over once I'd sussed out what the panicky dash was trying to tell me.  With a 200lb+ passenger on the back this was the worst possible getting-a-flat scenario, yet I found it very manageable.  I like to think all that time at SMART Adventures getting used to a bike moving around on loose material helped.  We pulled over, the tire was very flat, so we unloaded and then I pushed the bike off the side of the road and into the grass.  We were on a country road so there wasn't much of a shoulder and everyone was steaming by at 100kms/hr.  I then got on the phone trying to find anyone local who could give us a hand.

Nice spot for a breakdown, as long as you can manhandle the bike away from the verge. No one stopped to check on us or even slowed down or moved out of the lane to avoid us. Country living ain't what it used to be.

No point in being all long faced about it :)
My wife was heading out to ballet but a friend in town, Scott, was around and offered to come out with some spray filler to get us home.

It was a nice day for a flat in a lovely part of the world.  Potatoes were growing behind us and cows grazed across the road as the sun streamed down.

Scott was there in a flash.  I removed the topbox and Max and it went with Scott in the car (no point in putting more weight on a bad tire than necessary).  The spray filler went in and bubbled out of the hole and the bike's pressure sensor said I had 5psi.  Perhaps the foam expands as the tire spins and heats up?  Scott and Max followed me as I took it slowly down the road toward the village of Belwood, but the fill-in-foam did bugger all.

I was only a few minutes in motion but the tire pressure fell off to zero again and the tire was starting to come off the bead, so I pulled over on the edge of the road in Belwood.  Scott and Max went back to Elora to see if he could borrow his neighbour's trailer to get the bike home, but I was in my hood now.  Belwood is the edge of the catchment area where I teach and teaching generations of people here means I'm connected, even when I don't know it.

The guy mowing his lawn across the street came over and said he had a portable air compressor and some tire plugs and would I want to give it a try?  He came back a minute latter with a rusty old plug kit and the air pump and as he plugged the hole we discovered that he was the uncle of one of my top students (the kid's going to German to do IT this fall!).  He waved me off when I offered to pay, but a bottle of Glenfiddich is coming his way next time I'm passing through there.  Scotch is cheaper than a tow and I'd like to cultivate what little small town spirit is left in our rapidly urbanizing county.

Plug kits are the way!

The Concours uses tubeless tires on alloy rims, similar to a car, so the plug did the trick and the portable air compressor he had put 20psi into the tire which held all the way home.  I stopped half way and texted Scott that I was in motion and they met me at the house.  I took it slow and steady but the bike felt fine even at half pressure.  If you're frantically worried about getting a flat on a motorcycle get some off road training, it'll make you comfortable with the squirming.


Lessons learned?
This wasn't my first time seeing
biker 'brotherhood' fall on its face
.
It's all a load of nonsense, isn't it?
I stop, but it has nothing to do with
this fictional B,S, designed to make
the loud  pipe crowd feel good
about themselves.

  1. Flats feel like riding on gravel.  If that freaks you out, so will getting a flat.
  2. Pressure filler goop doesn't work, it's a waste of money.  This was only a nail puncture and it did nothing to solve it.
  3. Plugs are the way!  There are moto-friendly options that aren't big (or expensive compared to getting towed) and can get you back in motion.
  4. Don't expect Kawasaki's tire air pressure system to prioritize the danger in any kind of way that makes sense.
  5. Don't expect the biker brotherhood (or anyone else) to pull over and see if you need a hand, they all just potatoed by while we were on the side of the road.  In fact, no one stopped to check on us.  How's that for country hospitality?
  6. Because of 5, be self sufficient in sorting your own flat.


Jeff the motorcycle Jedi suggested getting an all-in-one micro-sized puncture repair kit and suggested the Stop And Go kit which includes all you need for plugging including a mini pump that you can clip onto your battery for under $100.  Packs up nice and small too so throwing it in a pannier is no problem.
I got mine from Fortnine, but Amazon has 'em too.

As for tires, I ended up going with Revco and getting a single new rear tire rather than doing both.  When I got the C14 it had a relatively new (2019) front tire and much older rear on it.  The front was still nicely rounded (no flat spots), so it stayed on.  I didn't want to mismatch tires so I stayed with Michelin Pilot Road 4s.  If you want a COVID inflationary kick in the head, the rear tire cost $235 when I looked it up last summer.  Your latest inflationary price (Aug, 2022)?  $274.  That's a 16.6% price jump, aren't economics fun?  I can't imagine what the dealership is asking these days, probably five hundred a tire installed.

All that shitty milk in the bottom of the tire? That's courtesy of the utterly useless 'tire repair' foam filler - don't bother with it!

Revco did its usual excellent job getting the tire out (it was here less than 48hrs after ordering).  Installation was straightforward and gave me a chance to clean up the rear end and shaft drive which I hadn't been into yet.

Here's where things get even craftier (or Norfolk stingier if you like).  I like mechanics, but like my dad before me, they also scratch a why-spend-money-when-you-don't-have-to itch.  The tire pressure warning system has been flashing low power warnings at me since I got the bike.  I looked up replacements and they are an eye-watering three hundred bucks or more a piece, then I did some research and found this handy video where the guy dismantles the sensors and solders a new lithium battery in.  Recommended?  Not unless you're really handy soldering (lithium batteries don't like a lot of heat).  Fortunately, I'm handy with soldering.

The TPMS (tire pressure measurement system) is a wireless sensor screwed into the valve stem and held in place with a big hex bolt.  It sends a wireless signal to the dash once the bike is in motion which gives you your tire pressure in real time.  Removing the sensor is easy enough and taking it apart equally so (there is a torx head bolt under the sticker).


Disassembly is straightforward.  There are plastic clips on the sides that can't have much to do in a thing spinning round and round inside a hot, pressurized tire.  The hidden fastener is a tiny torx head bolt under the sticker.

I removed the old battery and picked up a pack of 4 of the Energizer C2032 batteries (we use them all the time in motherboards at school) for under $10.

I soldered wires onto the extensions from the PCB and then soldered them onto the battery.  Solid connections all around and it all went back together nicely.  For a hack around a non-repairable high-expense replacement, this went well!

The new tire went on without any headaches.  Compared to the winter install of the tubed tires on the Tiger, it was a much easier summer job.  No inner tubes to wrangle and (after leaving the tire in the sun for 10 minutes), everything was pliable and easy to stretch over the rim using tire spoons.

I was worried about the tire not inflating if I didn't have a tire installer with rapid inflation on it, but I needn't have worried.  Perhaps the Armour All helped (I used it on the rim edge as a lubricant), but the tire started to take in air with a bit of jiggling and once it started filling, at about 20psi the edges popped out onto the bead and were airtight.

I set the tire pressure to 42psi and went for a ride around the block and then up and down the river (about 20kms).  Everything it tight and working well, including the tire pressure sensor - no more low power warnings!  I'll do the front one when I eventually replace the front tire the same way.  A new tire always feels fantastic (like a newly sharpened pencil if you're older enough to know what that feels like) with the bike feeling friskier and more willing to drop into corners.  The new tire is a 190/55 rather than the stock 190/50 and it subtly shifts weight forward by lifting the back end up a touch - it felt good, and is a bit less crashy on bumps too (a bit more sidewall means a bit more flex).

Thanks to Steve A on YouTube for some genuinely useful help researching the tire pressure management system and how to hack a fix.


Wednesday, 16 March 2022

1971 Triumph Bonneville Project: Engine Out

The weather's all over the place at the beginning of March this year.  Last weekend I had both road-ready bikes out for a shakedown, this weekend we're skiing in -20°C windchill; that's the road I was riding on last week.

As GP from Hammy Hamster would say, 'the elephants are against us.'  With the outside trying to kill us again, I'm focusing on doing a complete tear down of the 1971 Triumph Bonneville project.  I was originally going to see if I could get the bike in motion as it is, but a combination of factors including 1971 Triumph build quality and the early 80s muppet who tried and failed to turn the bike into a chopper's spannering skills have me now approaching this as a frame up restoration.

I've been working around the edges which has been good for reconnaissance in determining what state the bike is in, but now that I'm committed to doing the bike from the frame up the first job was to remove the bottom end of the motor and clear the way for a frame restoration:

The bottom end was surprisingly light and easy to lift out of the frame and none of the frame to engine bolts caused any problems.  Some were quite loose, so a frame up resto is making more and more sense as I don't trust anything the chopper muppet did to the bike circa 1983.

It was my first time into the rear drums and, like the fronts, they were age seized but otherwise not in terrible shape, though whenever I get into the dark places on this bike it looks like a scene out of Indiana Jones.

I've left the frame on the bench as I continue to strip it of accessories.  The last time I did some coating work on a project bike it was with Fireball Coatings in Elora but seven years on they seem to have evaporated.  I've been looking for alternate (and hopefully better) options and KC Coatings in Guelph looks promising.  I intend to get in touch with them and see if we can shot blast and powder coat the Bonneville frame, I just have to make sure they can do it on a complicated oil-in-frame design like this one.  Powder coating adds thickness and can cause problems with fasteners and fitting things back together so I need to find out if KC understands that and can can work with this one so that its mechanical pieces will still fit back together.

Following the frame I'll sort out both wheels (bearings, tires and inner tubes) before getting the rolling chassis back together and then rebuilding the motor with my swish new 750cc head.

Motor out and on a pop up workbench by the window.  It's lighter than it looks.
I set up the Black & Decker WorkMate by the back door to the garage to give me somewhere to work on the bottom end of the motor.  With the engine split and out of the frame, I can lift the parts off the bike around easily.  I might put the bench away and make some space while the project is in pieces.


Resources & Links


Power-coating Specialist in Guelph for the frame:

https://www.kccoatingsltd.com/contact


Where to find tires:

https://revco.ca/

Revco is fantastic at shipping (even during a pandemic) and very transparent and communicative with delivery times.  Everything I've gotten from them has been expertly packed, is new stock (no old/new tires).  They know what they're doing with motorsport tires.


How to DIY your own fender: 

https://purposebuiltmoto.com/how-to-make-a-diy-motorcycle-fender/

If I had more space I'd have welding kit and an English Wheel set up in the workshop and get into a lot more fabrication.  I'd go digital too.  A industrial sized 3d printer would make me dangerous:  https://tkmotorcyclediaries.blogspot.com/2015/11/iihtm-digital-workshop.html

1971 Oil In Frame Triumph Bonneville Restoration: Tire Choices


The old Bonneville needs new tires and inner tubes so I'm wrapping my head around olde fashioned, pre-metric motor-bike tyre sizes.

Those would be the Dunlop K70s that came with the Bonnieville back in the day.
Fortunately Dunlop is still looking after the bike they designed the tire for.


The '71 Triumph Bonneville came with 3.25 X 19″ front & 4.00 X 18″ rears and used Dunlop K70 tires as standard equipment.

It looks like there are modern Dunlop options for vintage SAE (non-metric) wheels at Revco where I've gotten my last two sets of tires.  The handy chart below shows metric and imperial conversions but after some digging I was able to find SAE/pre-metric modern Dunlop K70s that are the exact fit for the bike.  Using recent versions of original equipment that give me the benefit of modern rubber durability and grip while still keeping close to the originally engineering intent in Triumph's tire choice is fantastic.  I'm not trying to recreate riding in 1971, I'm trying to start with that technology and update where prudent for 21st Century use.


  Tire Charts                               Motorcycle Street Tire Size Conversion Charts

Metric

80/90

90/90

100/90

110/90

120/90

130/90

140/90


Alphanumeric

- NA-

MH 90

MJ 90

  ML 90

MN90/MP90/MR 90

MT 90

MU 90


Inch-(Series90)

2.75

3.00/3.25

  3.25

3.50

4.00/4.25

5.0

- NA-


Inch-(Series82)

- NA-

- NA-

3.60

4.10

4.25/82/4.40

5.10

- NA-


Front Tires:

Metric

80/90

90/90

100/90

110/90

120/80

120/90

130/90

Alpha

MH90

MJ90

MM90

MN90

- NA-

MR90

MT90

Inch

2.50/2.75

2.75/3.00

3.25/3.50

3.75/4.00

4.25/4.50

4.25/4.50

5.00/5.10


Rear Tires:

Metric

110/90

120/90

130/80

130/90

140/80

140/90

150/80

150/90

160/80

180/55

200/60

230/50

Alpha

MP85

MR90

- NA-

MT90

- NA-

MU90

MV85

MV85

- NA-

- NA-

- NA-

- NA-

Inch

4.50/4.75

4.50/4.75

5.00/5.10

5.00/5.10

5.50/6.00

5.50/6.00

6.00/6.25

6.00/6.25

6.80/7.00

7.00/7.25

7.90/8.00

9.50


Size

120/80V16

130/90H16

130/90V16

500S16

MT90H16 3.00

130/90H16 3.00

140/90H16

140/80VB16

140/90H16

150/80V16

160/80H16

160/80H16

200/60VB16

120/80V18

120/90V18

120/90H16

130/80V18

130/70VB18

150/70VB18

140/70V18

170/60VB18

180/55VB18

230/50 X 15

Rim

2.75

3.00

3.00

3.00

3.00

3.00

3.50

3.50

3.50

3.50

4.00

4.00

5.50

2.75

2.75

2.75

3.00

3.50

4.00

4.00

4.50

5.50

7.00 to 8.00

Overall Width

4.7

5.00

5.2

5.2

5.3

5.4

5.8

5.9

6.0

6.2

6.4

6.8

7.9

4.8

4.8

4.9

5.2

5.4

5.9

6.1

6.9

7.0

9.5

Overall Diameter

23.8

25.4

25.0

26.4

25.3

25.6

25.6

24.8

25.8

25.4

26.1

26.1

25.9

25.9

26.4

26.3

26.3

25.4

26.2

25.7

26.0

26.3

25.3

Note: Measurements are based on the given rim widths. A rough rule of thumb: Each additional 1/2-inch of rim width will be approximately 1/4-inch more in each tire width.


The K70s at Revco are just over a hundred bucks a pop and Counteract Balance Beaded inner tubes are actually cheaper than name brand plain old rubber inner tubes. I've been using the Counteract beads for years to great effect so they'd be my first choice even if they weren't cheaper. All in I'm looking at about $320CAN ($250USD) for new rubber for this vintage restoration project, which considering the price of some of the other parts is pretty reasonable.

In order to rebuild the wheels I'll need to replace the bearings and clean up the brakes before putting new pads and hydraulic brake cylinders back in them. All that and getting the frame sorted out will get me back to a correct rolling chassis ready for the upgraded engine.

Somewhere at the end of all of this will be a road worthy '71 Triumph Bonneville, but it's a lot of parts to find and get in and then a lot time in the garage to get there. I'm hoping it'll be on the road for next year's riding season.  As we thaw out here in Canada I'll be out on the Tiger and GTR and not spannering so much.

Meanwhile, here are some more motorcycle tire sizing reference charts found on the interwebs:


Wednesday, 24 February 2021

You're Doing It Wrong: the pain of dealing with dealers who don't like what they do

My local dealer is one of the biggest 'power sports' dealers in the province and they're only ten minutes down the road from me, but they aren't who I think of when I think about motorcycles.  When I was all Kawasaki I found dealing with them challenging at best.  Now that I'm Triumph and Honda (two brands they don't represent) I'm glad I've had an excuse to experience more positive customer service elsewhere (Inglis Cycle and KW Honda have both been positive, engaging and enjoyable to work with).

Pack 'em in tight and no one can sit on 'em...
This local dealer is the only one I've ever used for servicing, but again and again I've found them dismissive and quite arrogant, as though my paying for service was a favour they were doing me.  I've been in the showroom of all three dealers.  The best I can hope for at my local is benign neglect.  The bikes are parked close together on purpose so you can't sit on them and the sales people in there are so focused on the sale that they don't even particularly seem to like bikes, let alone want to talk about them.  Even when I see other people sitting down to sign deals everyone looks like they're sitting in a bank getting a second mortgage rather than purchasing joy.

When I first went to Inglis Cycle the year I got the Tiger the owner of the place stopped and had a chat and then encouraged me to sit on the latest model of my bike.  Even though I wasn't there to purchase one that day (the only thing that seems to matter at the local dealer), he had time to provide a positive impression on his customers.  Inglis isn't some big, fancy, new bike-mall, but the people there seem to genuinely enjoy motorbikes and take the time to treat you like a fellow enthusiast rather than a wallet with legs.  I hadn't intended on buying anything but that positivity prompted me to buy a t-shirt with the Inglis logo on it; something I couldn't imagine doing from my local.  Since then I've bought thousands of dollars of parts and gear from them.

It ain't fancy but they love their Hondas
and encourage you to sit on 'em.
When I went over to KW Honda the first time I didn't own a Honda and just popped in to see what they were about.  The senior salesman on the floor was amiable and chatty and encouraged me to throw a leg over a beautiful new VFR800.  We then had a good chat about the CBX 1970s six-cylinder they had on display.  I made a point of going back there for parts when I finally became a Honda owner and there too the parts guy was chatty, curious about what I was doing and came out to see the old Fireblade.

Last time I was at my local looking for Kawasaki parts, I put my Roof Helmet on the counter and the woman who was new there displayed curiosity about it, so I showed her how it works.  She was enthusiastic about both the style and functionality of my strange, French lid and it left her wondering out loud why they didn't carry such a thing.  The old guy next to her said they were no good and wouldn't sell - in front of the guy who owned it.  That kind of caustic culture must be what takes the shine off everyone there so quickly.

Being a bygones kinda guy I contacted them by email the other day as they have a nice looking C14 Concours and I'm casting about for just such a thing.  We're in the middle of the winter of COVID and it's -20s with six foot of snow outside, so I don't imagine they're very busy, but getting the salesman to have a conversation over email was like pulling teeth... again to the point of rudeness.  I understand that dealers have to mark things up to pay for the premises and I wasn't expecting to pay what private sellers are, so I (foolishly) assumed that starting with offers at over 90% of the value of the bike would prompt a haggle, but emailing this guy was like playing a joyless game of 'no' tennis against a brick wall.

When I asked if there was a possibility of a trade he said he'd consider it, so I made an offer and got a no.  Then a I made a better offer and got a no.  Perhaps I've been watching too much Henry Cole doing Shed And Buried, or perhaps this is a cultural thing (Canadians don't barter), but I'd think a customer offering close to the value of the bike as advertised would be worthy of a conversation and a counter bid rather than series of terse 'noes'.

I was going to reply to the last email and ask why this business would want to turn such an enjoyable thing as the possibility of getting a new motorcycle into such a dreary experience, but I think I'll just cut my losses and finally learn my lesson, bygones be damned.  This latest experience, in line with all my previous ones, will have me looking elsewhere for parts, service and bikes... which is a shame.  I'd love to support a local business and talk them up positively (I do this whenever I can), but these guys can sit in their mega-edifice in misery.  I'll take my enthusiasm for my hobby/sport and my purchasing power elsewhere.


Some awesome local motorcycling businesses in Southern Ontario (from first hand experience):

Mostly Ironheads (my real local motorcycle service provider): in Elora, Ontario - if you want passion and customer service (along with quick turnaround times on work done), this is where you go

Inglis Cycle in London, Ontario

Kitchener Waterloo Honda in Waterloo, Ontario

NCK Cycle Salvage in Woodstock, Ontario

Perth County Moto in Stratford, Ontario

Revco - located in Ontario but found online

Wednesday, 27 January 2021

Trials And Tribulations: trying to find a trials bike in Ontario

I was just thinking this morning that our backyard is basically designed to be a trials bike playground (it's all hills, stairs and rocks), and after giving them a go last summer at SMART I'm still interested in developing those skills - it'd also turn my backyard into a gym!

One of the Bike Magazine writers set up a trials track in his tiny, British backyard to stave off the COVID madness.  I've got more yard than he does that's better suited to trials... so why not get one?


One just came up on Kijiji for under two-grand.  It needs clutch work.  I'm not sure what GasGases are like in terms of finding parts, especially for one that old (it's almost 30!).  GP Bikes in Whitby is a GasGas dealer, so there's at least one dealer in the province.

That'd be get fun to get muddy and sweaty on come spring, but it doesn't work and repairs are uncertain... and he still wants nearly two grand for it!  I've half talked myself into going for it.  The Tiger's almost done its winter maintenance and the 'Blade is ready to rock, so I even have the bike stand free to work on it.

Some GASGAS Research:

Links on where to find GasGas service and parts
GasGas parts!  
Another GasGas parts source
Trials Bike Buyers Guide
Canadian source for trials bike tires
Revco does Trials tires, it's about $400 for a new set of rubber.  I know I can install them myself now.

"the main nut that holds the clutch on the shaft let go, and trying to find that nut was a thorough nightmare. It's some bizarre thread that I could only find from a vespa shop in Italy."

That's worrying in a nearly 30 year old bike that I'd need to source parts for.

Good online chat there about old trials bikes.  1990s era bikes are $1k up to $1500US for a later 90s bike, and the ones they talk about work.  The 93 GasGas was a big step forward technically, so that '92 for sale on Kijiji is asking premium for a bike that doesn't work that isn't particularly desirable.

https://www.hagerty.com/apps/valuationtools/1992-gas_gas-contact_gt25  valued at $1600US ($2000CAD) in excellent condition.  Fair condition is $700US ($900CAD).  The one on Kijiji don't work right and needs major repairs.

An exciting thread from 11 years ago when he was selling his partially rebuilt but otherwise complete '92 gt25 for £500 ($870CAD).  At under $900 for a complete bike partially rebuilt I'd have already picked up that bike from Georgetown.  As it stands, I think I've talked myself out of it with a bit of research.

In the world of unlimited funds a fully electric trials bike would be an awesome thing to have, but the ones I'm seeing are north of ten grand, which seems like a lot to pay for a toy.  It'd be a lot even if I was competing on it.

Electric trials bike research:
... maybe one day.


I should watch this again, then I'd be going down to Georgetown to pick up that GasGas (I'd also be able to show up at SMART Adventures next year and wow Clinton Smout with my mad skillz!

Sunday, 22 November 2020

Triumph Tiger 955i Winter Maintenance List

2003 Triumph Tiger 955i winter maintenance list


Chassis Maintenance


Swingarm remove and check/lubricate, replace bearings if necessary.

That's a tricky job because removing the bearing destroys them, so if things get that far along I need to make sure I can get new needle bearings... and a press?


Parts List (that I hope I don't need)

  • Triumph BEARING NEEDLE 2526 Part # T3800014
  • Triumph SEAL, SD 25 32 04 Part # T3600170
  • Triumph SPINDLE, SWINGARM Part # T2056007
  • Parts List


Front fork oil change and refresh.
Steering hub check, clean, replace if necessary

  • Forks & hub parts list
  • Triumph FORK SEAL Part # T2040283
  • Triumph 'O' RING Part # 2040081-T0301
  • Triumph GAITOR,FORK Part # T2040288

Triumph FUEL INJECTOR, F-TYPE, LONG
Part # T1240891
 
Fuel System Maintenance

  • clean fuel injectors?
  • how to do that except the first comment is not to backflush a fuel injector as they almost never go bad and this can wreck them
  • Royal Purple FI PEA Cleaner
  • I think I'm going to go with the SeaFoam I've been using if they aren't showing any signs of leaking
  • Motion Pro makes a clamp that lets you force cleaner through injectors, but it's expensive (for a clamp) and I'm not sure it's necessary
  • Another FI cleaning how to
  • And another is removing and cleaning injectors necessary?  Evidently
  • I think I'm going to draw some PEA cleaner through with a vacuum pump and let it soak rather than trying to pressure force cleaner through the system
  • I balanced the injectors in the spring with an FI vacuum/mercury system, but I'm going to try it again using the TUNEboy diagnostic system I've got.


LED Indicator Light Upgrade

  • replace existing LEDs with heavy metal update
  • got the parts in
  • kept the original flasher relay so if these aren't LED they'll still work
  • put LEDs on it aside

Tire Change


Brake Fluid Flush And Fill

  • Read the BIKE article on braided brake lines
  • done this before on the Concours
  • Tiger needs new fluid anyway (3 yrs since last flush)
  • Get DOT4 fluid
  • replace lines with DISCO HEL lines


Other

Touch up work on body panels (I have Lucifer Orange touch up paint)