Showing posts with label motorcycle restoration. Show all posts

Sunday, 27 March 2022

1971 Triumph Bonneville Restoration Project: Frame Breakdown & Rear Brakes

I'd initially planned to do a rolling restoration of the 1971 Triumph Bonneville project, but the state of the engine and my desire to get it back to a place where I can enjoy an updated, dependable but mechanically sympathetic restoration (I want the bike to retain its patina, but I also want it to be dependable) made a rolling restoration impractical.  The engine is lined up for a new 750cc head and electronic ignition system, but before all of that I have to get the frame and wheels sorted out so that I can put the upgraded engine back into a sorted rolling chassis.

To that end, it was finally time to take it to pieces, which also gave me a lot of space back in the one car garage once the bike stand was stacked to the side:

The frame out means I don't need to fill half the garage with the bike stand.

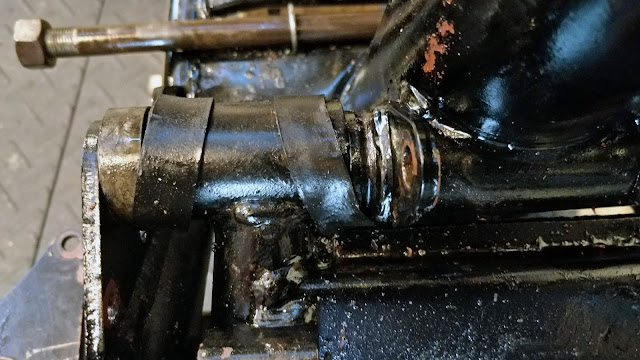
Black rubber bands cover the frame to swingarm joints (to prevent water getting in?).

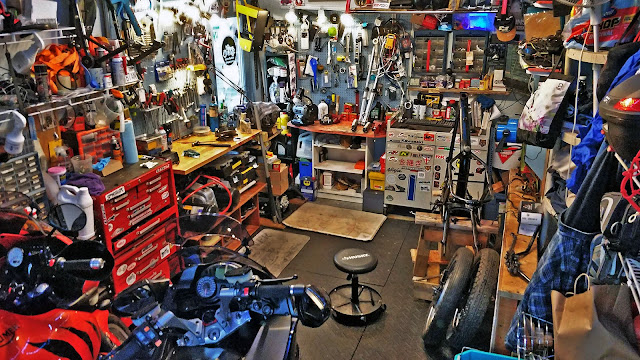
Way more space in the garage with the Bonnie in pieces.

With the bike in pieces, I'm restoring all parts that I can reuse.  This usually involves some WD40, a toothbrush or wire brush depending on how filthy it is, and then a dip in a hot ultrasonic bath for small pieces to get them back to fresh.

The front wheel Smiths speedometer.

Into the rear brakes. Like everything else on this old bike they are much simpler than modern hydraulic brakes.

Bringing old parts back from the brink is very satisfying.

The entire rear brake system - the brake lever is so long because it is the only mechanical advantage you have when applying the rear brakes.  Instead of using hydraulics to amplify your push on the pedal, the old Bonnie is a simple mechanical system.  You press the brake lever which pulls that long metal bar which rotates the top of the drums, pressing them into outside of the drum.  No hydraulics, and I bet you have to press that lever like you mean it to lock the rear wheel.

Wednesday, 16 March 2022

1971 Triumph Bonneville Project: Engine Out

The weather's all over the place at the beginning of March this year.  Last weekend I had both road-ready bikes out for a shakedown, this weekend we're skiing in -20°C windchill; that's the road I was riding on last week.

As GP from Hammy Hamster would say, 'the elephants are against us.'  With the outside trying to kill us again, I'm focusing on doing a complete tear down of the 1971 Triumph Bonneville project.  I was originally going to see if I could get the bike in motion as it is, but a combination of factors including 1971 Triumph build quality and the early 80s muppet who tried and failed to turn the bike into a chopper's spannering skills have me now approaching this as a frame up restoration.

I've been working around the edges which has been good for reconnaissance in determining what state the bike is in, but now that I'm committed to doing the bike from the frame up the first job was to remove the bottom end of the motor and clear the way for a frame restoration:

The bottom end was surprisingly light and easy to lift out of the frame and none of the frame to engine bolts caused any problems.  Some were quite loose, so a frame up resto is making more and more sense as I don't trust anything the chopper muppet did to the bike circa 1983.

It was my first time into the rear drums and, like the fronts, they were age seized but otherwise not in terrible shape, though whenever I get into the dark places on this bike it looks like a scene out of Indiana Jones.

I've left the frame on the bench as I continue to strip it of accessories.  The last time I did some coating work on a project bike it was with Fireball Coatings in Elora but seven years on they seem to have evaporated.  I've been looking for alternate (and hopefully better) options and KC Coatings in Guelph looks promising.  I intend to get in touch with them and see if we can shot blast and powder coat the Bonneville frame, I just have to make sure they can do it on a complicated oil-in-frame design like this one.  Powder coating adds thickness and can cause problems with fasteners and fitting things back together so I need to find out if KC understands that and can can work with this one so that its mechanical pieces will still fit back together.

Following the frame I'll sort out both wheels (bearings, tires and inner tubes) before getting the rolling chassis back together and then rebuilding the motor with my swish new 750cc head.

Motor out and on a pop up workbench by the window.  It's lighter than it looks.
I set up the Black & Decker WorkMate by the back door to the garage to give me somewhere to work on the bottom end of the motor.  With the engine split and out of the frame, I can lift the parts off the bike around easily.  I might put the bench away and make some space while the project is in pieces.


Resources & Links


Power-coating Specialist in Guelph for the frame:

https://www.kccoatingsltd.com/contact


Where to find tires:

https://revco.ca/

Revco is fantastic at shipping (even during a pandemic) and very transparent and communicative with delivery times.  Everything I've gotten from them has been expertly packed, is new stock (no old/new tires).  They know what they're doing with motorsport tires.


How to DIY your own fender: 

https://purposebuiltmoto.com/how-to-make-a-diy-motorcycle-fender/

If I had more space I'd have welding kit and an English Wheel set up in the workshop and get into a lot more fabrication.  I'd go digital too.  A industrial sized 3d printer would make me dangerous:  https://tkmotorcyclediaries.blogspot.com/2015/11/iihtm-digital-workshop.html

Tuesday, 8 March 2022

1971 Triumph Bonneville Restoration: Gudgeons, Johnson Rods & Cylinders out! (oh my)

I've got a degree in English, but working on the old Bonneville is stressing out even my vocabulary:

That'd be your gudgeon pin right there.

Gudgeon: one who will bite at any bait or swallow anything, credulous or gullible person Mer. V. I. i. 102.  (that might apply to this project)

Definition of gudgeon
1: PIVOT sense 1, JOURNAL  (we're getting closer)
2: a socket for a rudder pintle (a rudder pintle?)

Definition of gudgeon pin: WRIST PIN

Definition of wrist pin: a stud or pin that forms a journal (as in a crosshead) for a connecting rod (that's it!)

They can make up anything! Nobody knows!  Well, you need a new Johnson Rod in here!
A few people know, George.  Consumer ignorance is expensive, but who has time
to understand the machines they depend on?


Gudgeon pins?  After the massive fight that was removing the seized cylinder head, I was bracing for misery, but I was able to pop the circlips (!) out and tap the gudgeon pins (!) through with no sweating and swearing.  Pink Floyd was playing on the computer and I think music from its era calms the old Bonneville down when I'm working on it.

The circlips popped out easily and a 3/8 inch socket extension was the perfect size to tap out the 'wrist' pins.  I thought the one on the seized side might cause more problems because it had been stuck in place with moisture but it didn't and both came out easily leaving a motor bereft of its pistons.


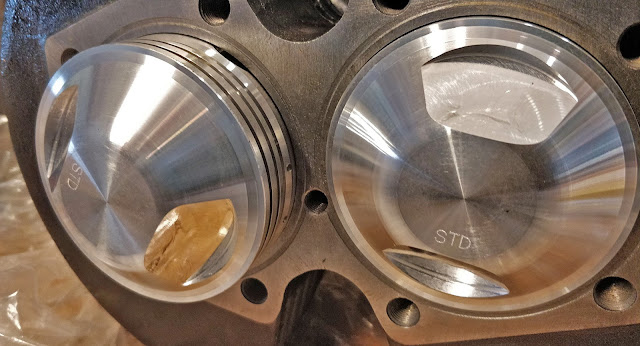
British Cycle Supply Co. delivered my 750cc kit quickly and without any headaches (and also for about $200 less than comparable kits out of the USA), so I got the shiny new bits out and had a look:


You'd think a 750cc head would look significantly different to the stock 650cc unit, but you have to look closely to see a difference in size.

I had a close look at the connecting rods and they appear to be in good shape and the bottom end of the motor moves freely.  I think next steps are to remove the rest of the engine from the frame, give the oil-in-frame a deep clean and then recoat it with some quality paint.  With the frame cleaned up and sorted I'll strip the rest of the motor and clean everything out to ensure nothing's whacky before I begin the great rebuild.

I could just chuck it all back together now and hope for the best, but if it ends up having other niggles rushing things at this point is just false economy.  I'm not worried about making the bike look mint, but I do want it to be dependable and that wouldn't be the case if I haven't checked it over completely after such a long (30 year?) layoff.  An engine out deep restoration was always the intention here and I'm not in any kind of rush since the other two bikes are both five by five and felt fantastic on their first rides of the year this past weekend.

The gudgeon pin itself looks to be in good shape, which is good because the head kit didn't come with new ones.  The circlips came out nicely too but the kit did come with those.  It amazes me that even specialized material like that in these cylinders can withstand the extreme forces they operate in.  This Bonnie had done at least twenty thousand miles on these cylinders and they're still in remarkable shape considering they were face to face with more than 17 controlled explosions every second (a spark plug typically fires about 17 times per second at 2000rpm!).  You'd think all that heat and violence would cause more wear than I'm seeing in the beating heart of this motor.


This is the 3/8 inch socket extension I used to tap the gudgeon pins out.  Nothing grabbed or slowed the process down and I barely had to apply any pressure.  I might have even been able to push them out had I been so inclined.  
I caught the pin as it came loose and the cylinder lifted off the connecting rods easily.  Again, considering the extreme conditions the heart of every engine operates under, I'm impressed by the engineering and metallurgy that makes all this possible.


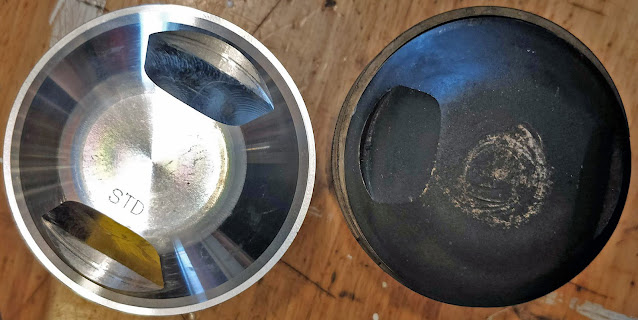
The new cylinders don't have the carbon build up from all those combustion cycles and look pretty spectacular in their pristine newness:


Here's the whole kit from British Cycle Supply.  It includes the cylinder head, cylinders, piston rings, circlips for the gudgeon pins and a head gasket.  I swiped the last one they had in stock for $688.75CAD ($535USD - told you I got a good deal).  Unfortunately I might be the last person on the planet to get a 750cc kit that cheap.  Prices will be going up on the new stock and probably even higher than that as we're in an inflationary spiral thanks to Putin overreaching and years of pandemic fueled broken supply chains; we live in interesting times.

Another tool came in that's interesting.  I was reading Practical Sportsbikes last week (highly recommended if you love bikes and getting your hands dirty on them), and editor Chris mentioned an endoscope smartphone camera he was using on a project bike to inspect the internal parts of an engine.  I found one on Amazon for under $40CAD and it came in on the weekend.  It lets you see parts of the engine that haven't seen light before.  It's an exciting thing that offers you a look into the secret life of engines.  I'm looking forward to using it as i continue to work on the Bonnie.

Through an inspection hole inside the engine - it's disco in there!

That look on my face after the first ride in a long, long time.

The 12 year old Kawasaki (left) and the 19 year old (!) Tiger (right) were keen to turn a wheel after a long hibernation.

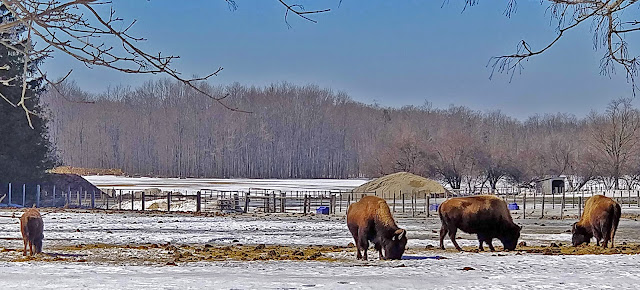
Bison were out bisoning at Black Power Bison Co. when I was out for a ride in balmy 6°C March Sunday.


Monday, 17 January 2022

How Bespoke is Too Bespoke?

Owning a Fireblade checked a box, taught me
many things and was a zero cost experience!
I always try to balance out bike projects so that I land in the black on them.  I've gotten pretty good at this.  The Fireblade Project cost me about $2300 all in and then I got to ride it for a season before selling it for $2500, which I then put towards the Concours14.  Even with fancy seats, windshields and other gubbins, the Connie only owes me about $7000.  Older model, double the mileage bikes are going for eight grand, so I'm still ahead there too.

People who throw big money down on customization that they like seem to think other people will pay extra to adopt their choices and tastes, which never made a lot of sense to me.  This goes for houses or in vehicles - just because you're willing to pay a premium to get a certain look, doesn't mean anyone else is, and expecting them to shell out for your choices is a bit naive.


The Concours was a cagey purchase that
still has me well in the black.
What does always sell is functionality.  As much as I'd like to get all romantic and throw money at the old Triumph I'm restoring, I'm more interested in making it work, and then riding it.  To that end, I'm not interested in creating a perfect replica of a 1971 Triumph Bonneville to put in shows, so modern touches (especially when they're more cost effective than stock-at-all-cost options) are something I have no trouble with.  A bike that starts easily and runs sweetly sells itself much more quickly than a cantankerous but period correct trailer queen.  One's a motorcycle, the other is art, and art is notoriously in the eye of the beholder.

One of the reasons I've always gravitated toward cheap and cheerful 80s and 90s Japanese restos was because the parts are usually easy to find, including hard parts from a breaker if needed, and they're as cheap as chips to buy because people tended to use them rather than put them up on a pedestal.

My first brush with 'vintage' (I think a 51 year old air-cooled Triumph from before the collapse of the British bike industry qualifies as vintage) has me wondering if my approach still works.  The cost of parts is much higher than more recent Japanese bikes and this particular Bonneville was half taken apart by a muppet who wanted to be in Easy Rider, so I'm constantly finding parts missing or incorrect.  I'm also struggling with missing non-metric tools after having owned metric bikes my entire life.

When I'm reading Practical Sportbikes I enjoy the articles on DIY and the stories of scratchers who got a machine put together with their own hands.  When they run one of the 'specials' articles where it's a rich guy with clean hands throwing money at a project, I lose interest quickly.  Classic Bike Magazine is similar.  When they're talking about an owner keeping an old machine running on ingenuity and guile, I'm all in, but the minute it's a millionaire adding to his collection with another bespoke machine put together by someone else, I've lost interest.

I just finished Guy Martin's new book, Dead Men Don't Tell Tales, and Guy ends the latest one talking about trying to find what makes him happy.  This requires a fair bit of self awareness - something that most people don't have.  Guy's particularly difficult in that he will often act on an urge that turns out to be incorrect, but, as he says in the book, he's evolving.

There's a scene in Guy's Garage where Cammy, his professional race mechanic mate, knows how to fix the car they're working on but Guy has his own ideas and keeps bashing away at it wrong.  Rather than push the point, Cammy backs off and waits for Guy to realize he's using the wrong tool for the job.

Guy is critical of Cammy for being slack in his approach to work in the book, but I'm left wondering if the truth isn't somewhere in between:  what looks like a lack of effort from Guy's point of view is actually a better use of his energy from the professional race mechanic's point of view.  There's more to all this than just jumping in to the physical labour, you need to be exercising the grey matter too.

What I'm taking from this latest round of Guy Martin media is that you're more likely to stay engaged with and finish big projects if they make sense to you.  To that end, I spent yesterday working out why the kickstarter on the Bonneville wasn't working (the muppet had put it in backwards).

The goal is still to have gone through the whole bike and have it back in working order without breaking the bank.  The amount spent on it matters less than whether or not the project is in the black.  If a functional '71 Bonneville is worth about five grand, then that's what I'll work to on the budget, while keeping an eye on what engages me most about all this:  putting a sidelined bike back into service again... and then riding it!

This morning I'm looking at Motogadget's mo.Unit Blue and considering how to best tackle a 51 year old wiring loom that looks to be in good shape but should probably get rebuilt if dependability is the goal.  An ignition powered by bluetooth on a smartphone is just the kind of steampunk anachronism that a riding focused buyer would dig.  That it's also invisible means it won't hurt the look of the bike (the only change is the ignition key isn't there).
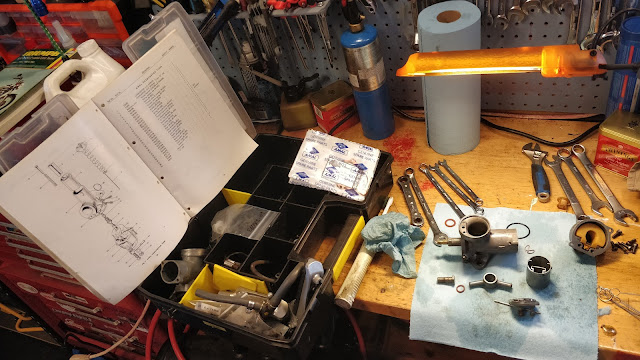
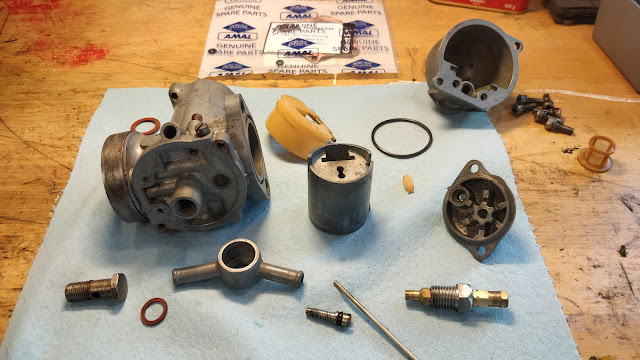
Got into rebuilding the Amal carbs only to discover the muppet who took them apart before didn't install any of the air slider hardware for the choke, so now I'm hunting for hard parts for 51 year old carbs... in a pandemic.  Note my anemic imperial socket wrench set.

Ready to go and then stopped - neither carb has the air slider or hardware in it.  I'd normally call around to the local breakers, find a donor set of carbs and then keep them handy for situations like this.  That isn't an option with a 51 year old British bike.

It's coming along - slower than I'd like, but it's coming along.  When it seems too much I remind myself why I'm doing it: one day soon that engine will turn over for the first time in decades and shortly after that I'll be out riding the thing!

Sunday, 28 November 2021

1971 Triumph Bonneville Restoration: Front Fork Rebuild

It's all snow and wind outside so I spent a good six hours in the garage this weekend rebuilding the front forks and the triple tree on the '71 Bonneville winter project.


The forks on the bike had been 'choppered' with massive fork tubes and spacers in them.  The bike came with new stock fork tubes so after a cleanup both front forks got rebuilt with stock fork tubes.  I'll put the chopper ones up for sale and see if it'll make a dent in the new parts order I got in.

The internals on the forks were in good shape (it has always been stored inside).  After a cleanup they went back together again nicely.  The picture on the right gives you an idea of just how long those fork tubes were (almost as long as the whole shock!).

The right side front fork went right back in no problem, but  the left side one won't fit in the lower triple tree mount (it has a bolt that squeezes it on but the circular clamp is too tight.  I've tried heating it up and wedging a screwdriver in the gap to respread it enough to accept a fork.  I shouldn't complain, this is the only thing that's being difficult on this fifty year old machine so far.

The lower fork unit as it came out of the giant chopper tubes.

The same piece cleaned up.

Parts diagram from the '71 Triumph's parts manual.

Meanwhile, the first parts order came in from British Cycle Parts.  They were great helping me clarify what I needed to get started.  The order was about $450 including shipping and got here quickly (within a week), one box from their Canadian warehouse and the other from their U.S. one.  I haven't started installing anything yet, but I now have what I need to rebuild the Amal carbs, sort out the electrical system and take apart the motor to prep it to run for the first time.

Motor gasket set!

Electronic ignition system and coils!

Amal carburetor rebuild kits!

Rubber bits!  This time 'round I got a new kickstart rubber & the gear shift rubber.

That's a stock style new rubber to replace whatever the f*** was on it.

The monkey who was choppering the bike put massive footpegs on the rear peg position,
but that doesn't make any sense on a chopper (they're usually feet up and forward).
These are the stock footrests.

Stock foot rests (and hardware)!

The plan is to rebuild the carbs, get the motor sorted, install the upgraded ignition system (which I suspect will also involve creating a new electrical loom) and then see if I can get it all to run.  Once I've got it a step closer to running I'll be back in touch with BritCycle to get the other bits and pieces I need to get it rideable.  The plan is still to get it to a place of getting a safety and putting it on the road next season.

I'm not a big fan of lost causes and I wrench to ride, so the point is to get the Bonneville back into service. After watching a lot of Henry Cole on TV, I like the idea of a 'rat bike', which also means I can focus on the mechanics rather than how it looks.  If I can get the mechanics sorted to the point where I can ride it, I'll do a season with it rough but rideable and then consider my options.  I got the bike and spares for $1500 and I've just put another $450 into it.  I think I can get it roadworthy for under $4000 and a non-running barn find bike of similar era was going for a grand more than that a few weeks ago online, so no matter what the Bonnie project won't ever drip red.

In a perfect world I'll get it sorted and some one will offer me more than I've put into it (cost, not time, I'm happy to put time in keeping bikes on the road).  Whether that's once it's roadworthy or once it's been cleaned up too, I'm easy.  Meanwhile the Bonneville is doing what I wanted it to:  giving me an opportunity to go deep on a motorcycle restoration and learn a lot in the process.

The motor's getting cleaned up and recommissioned.

Once the (now stock) forks are back in I'll wheel it out for a deep clean on the motor
and then start with the electrics before rebuilding the carbs.  With any luck the old Bonnie
will be to the point of starting by the new year.

Somewhere in between all this deep surgery, the Concours needs new brake pads and the Tiger has some new sprockets and a chain to install.  To be honest, these minor maintenance jobs are something to look forward to after the deep diving into the restoration project.

Last winter was a deep maintenance round on the Tiger, but even that pales in comparison to the scale and scope of the Bonneville restoration.  Practical Sportsbikes and Classic Bike are both magazines focused on hands-on motorcycle mechanics and both have talked about the dreaded project stallout that can happen when it all gets too much.  I'm taking the advice of both mags and breaking this up into chunks and then solving things subsystem by subsystem.  The small wins help me feel like like the project is progressing and prevent the dreaded project-stallout from being overwhelmed by the whole thing.

On the upside, the fact that we got 15cm of snow over the weekend isn't really on my mind as I'm keeping track of many things-to-do in the garage.