Sunday 9 January 2022

Brake System Maintenance on a C14 Kawasaki Concours

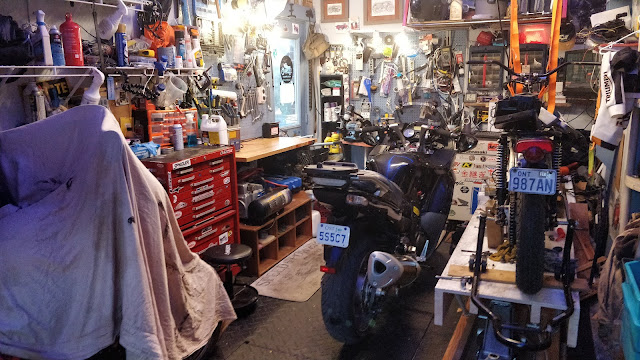
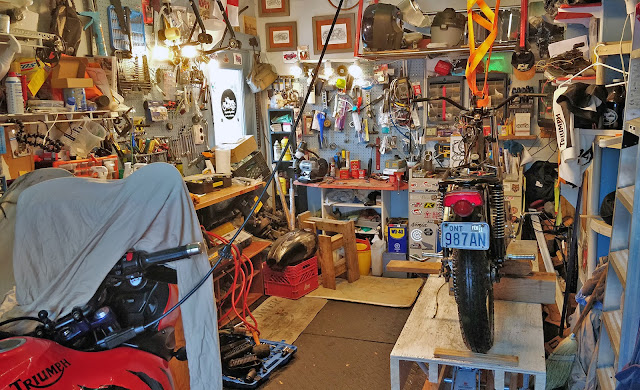
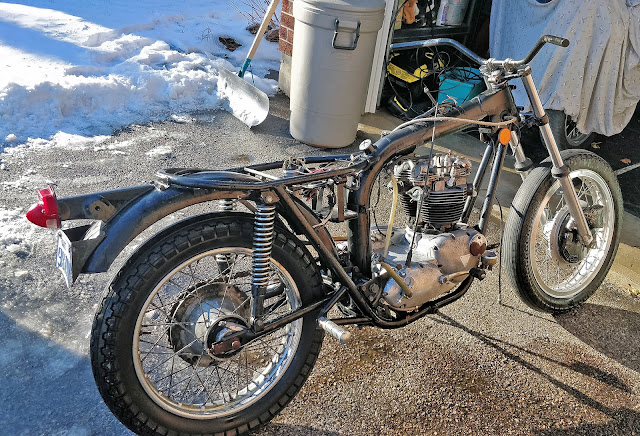
 I'm busy in the garage these days with the on-going 50 year old Triumph Bonneville restoration project.  It's a big project that will take some time to sort out, but it's -20°C outside with snow squall warnings of 20cm of snow coming, which means it's also regular maintenance time on the two running bikes in the stable.

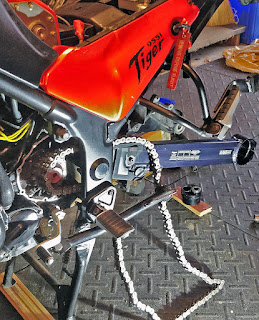
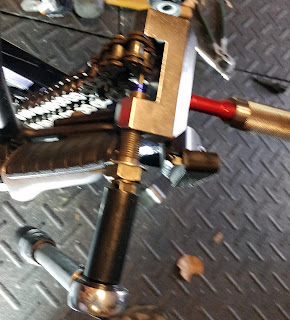
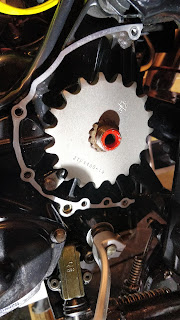
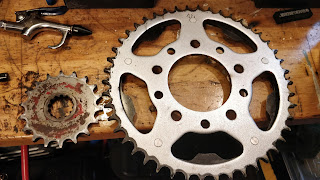
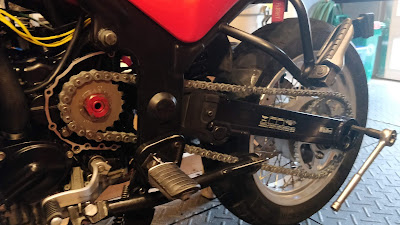
Tiger's back in hibernation after last week's sprockets & chain maintenance, waiting for a break in another never-ending winter of COVID for a chance to ride.

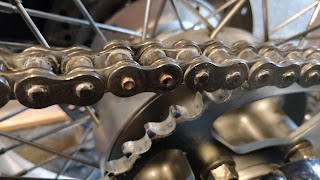
Last week the Tiger got new chain and sprockets.  I hadn't done the sprockets on it since getting it over 5 years and 40k ago, so I figured it was time when I noticed the latest chain had stretch in it that made it impossible to set the sag properly.  This week it's all about the Concours.

I got the Connie last spring in the middle of the second lockdown.  My son and I rented a van and drove down to The Beaches in Toronto and picked it up from its second owner who hadn't been riding it for several years.  It's a very low mileage bike (under 30k when I picked it up), but I like to cover all the basic maintenance so I can set a 'zero point' for future work.

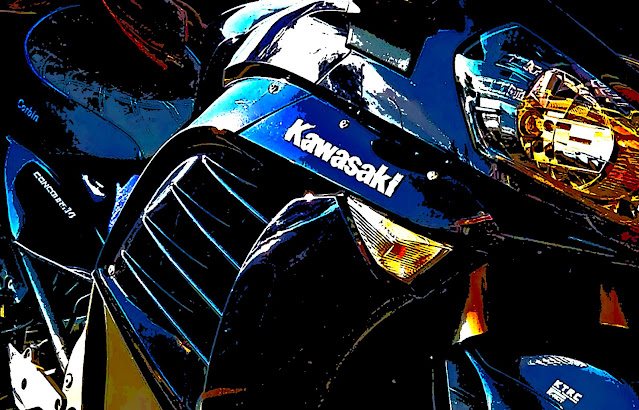
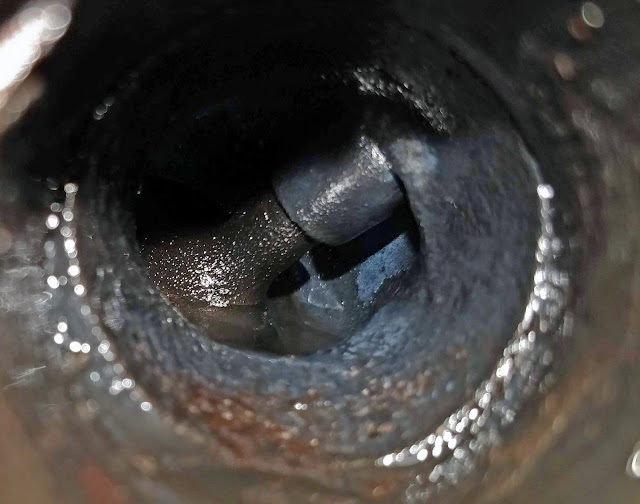
As you would expect from Kawasaki Heavy Industries, the brakes on the GTR1400/C14 Concours are superbly engineered Nissin calipers.  I'd picked up the pads last summer but they hung on the wall until now because I was putting miles on the thing.  I did find the brakes were squeaking a bit, suggesting the calipers weren't releasing properly - something that can happen in a bike that sits for several seasons.  Like I said before, I don't like riding a bike where I'm not sure of the maintenance, especially on brakes, so it was due.

Doing the pads on the Concours is remarkably easy.  You don't need to remove any body panels and everything is very accessible.  Undo the pin that holds the pads and spring that holds them in and then everything comes apart in your hands.  The pins were rough and there was some odd gunk stuck in the front right caliper.  I cleaned everything up and lubed it and then slotted the new pads into place with the now lubed pins (I think it's a #5 hex head that does the trick).  All very logical.

If you're looking for torque settings for the
brakes on a Kawasaki GTR1400/Concours
C14, here they are.
The rears are just as easy and a similar design with the same pin and caliper bolt sizes (everything is hex metric).  The back was as mucky as the front and I went to lengths to clean up the pressurized caliper slider and lube the pins and areas where the pads move.  The action immediately felt better afterwards.

Last spring when I got the bike I had to sort out a leak in the hydraulic clutch which resulted in entirely new DOT 4 brake fluid (what the Connie uses in both clutch and brakes).  Changing up your brake fluid removes impurities and moisture that can eventually cause real corrosion headaches in your brake system, so after doing the pads I changed up the brakes fluid on both front and rear systems.  The only fluid change left now on the Concours is the antifreeze.  I'll do that at the end of next season.  When I tested it the fluid it was still bright green, looked new and showed good temperature range.

Getting all the air out of the hydraulic clutch so that it felt tight and had positive action was a real pain in the ass last spring.  The good new is that this air-line powered vacuum system did the trick then (it's not crazy expensive) and takes the headache out of bleeding anything with steady, controllable suction.

In the case of the brake system, I set up the vacuum bleeder and then kept adding fluid in the reservoir at the top until it came out clear (the used stuff was darker and cloudier - it looked almost like water once the new stuff made an appearance.

Just a note:  don't keep brake fluid laying around open.  It collects moisture and goes off pretty quickly.  As with all brake fluid changes, I opened the bottle and then immediately used it this time.

The front brakes took less than 10 minutes to completely bleed of old fluid and the rears even less.  If you're doing your own brake/hydraulic fluid maintenance with any kind of regularity, let that hand-pump go and get one of these things (assuming you have an air compressor of course).

With the brakes sorted on the Concours and the sprockets and chain on the Tiger, both are waiting for a break in the weather for a cheeky winter ride to kick off the 2022 season.  As long as I'm not trying to navigate ice on the road, I'm good to go.  An above zero day and some dry pavement is all I need

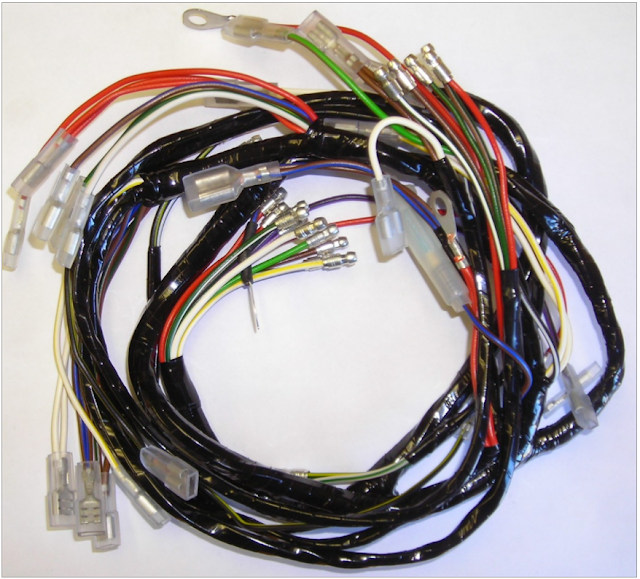
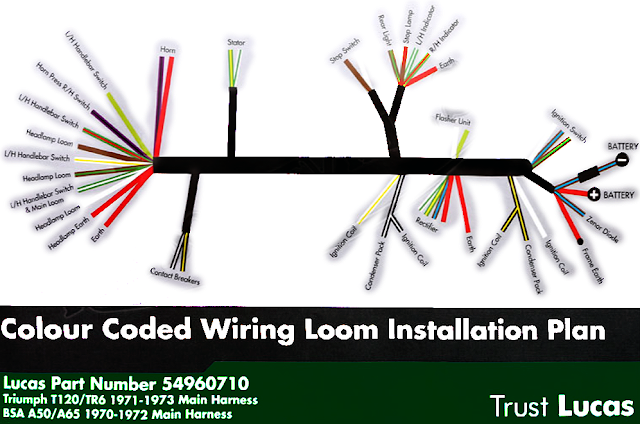
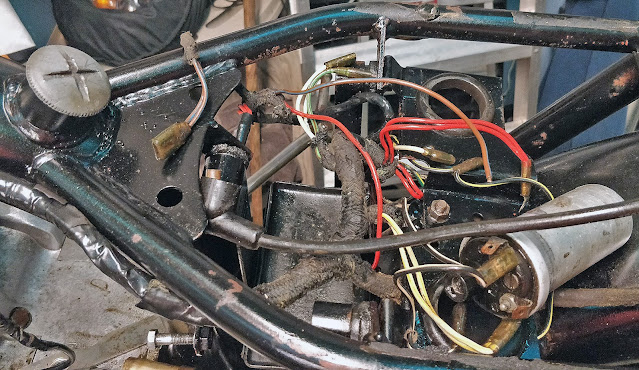
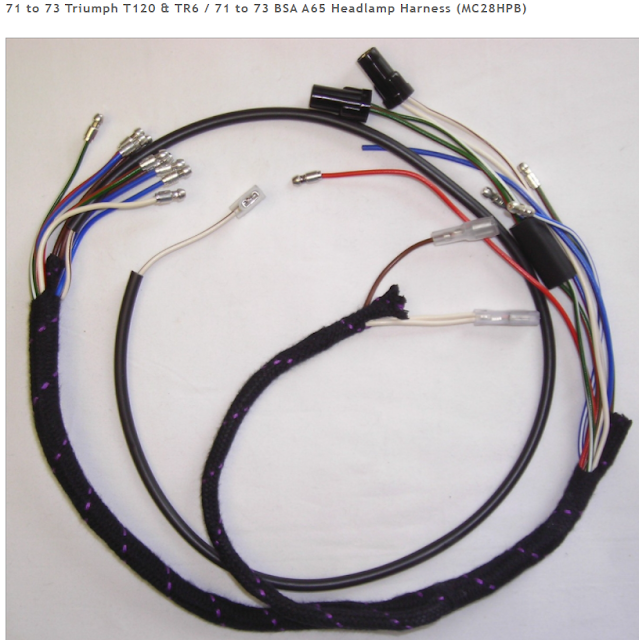
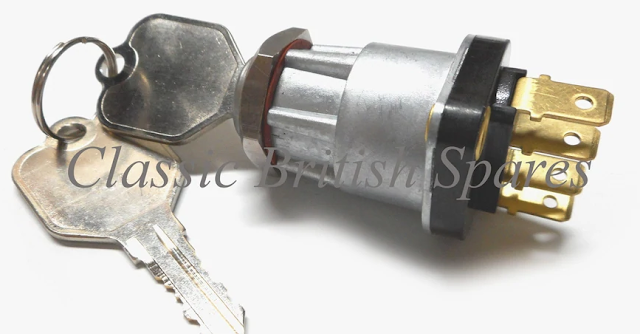
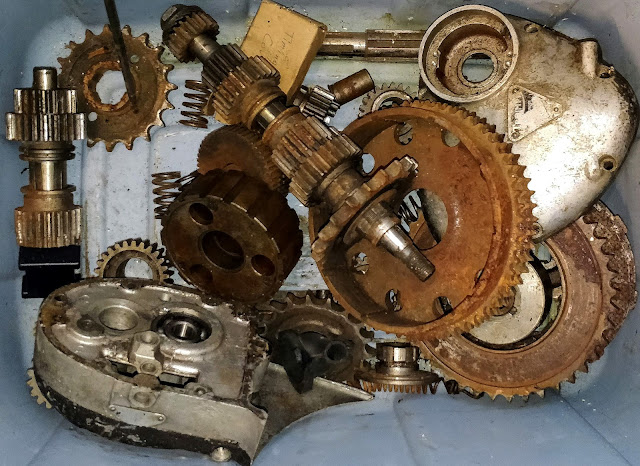
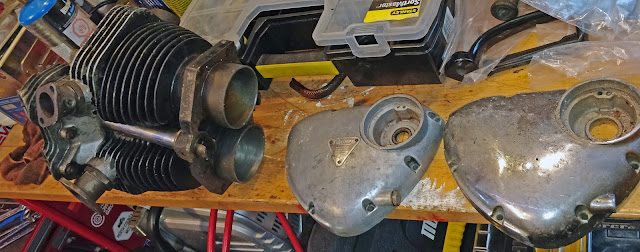
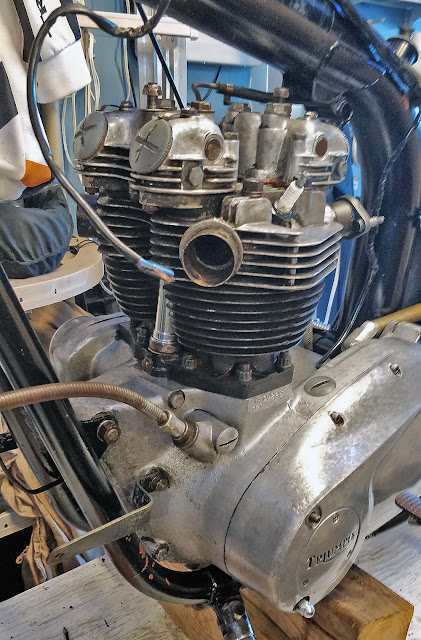
Now that the regular movers (I was going to call them new but the Tiger is almost 20 years old and the Connie turned ten last year) are sorted out maintenance wise, it's back to the old Bonneville project.  Next up I'm rebuilding the two Amal carbs, then it's rebuilding the ignition system and then (hopefully) hearing the old thing bark for the first time in decades.


Sometimes the Bonneville can feel like it's too big to manage, it needs so much, but with two other working machines I'm never going to be angry with it not being ready, though I would love to have it running in time for The Distinguished Gentleman's Ride on May 22nd.  A '71 Bonneville with some early 70s retro style would be a blast.


Monday 3 January 2022

Love It When They Do This


This popped up on my Facebook feed.  I actually contacted the local dealer about this one last year and asked if he'd consider $6500 - he couldn't be bothered to email me back even to barter; love that arrogance.

This is a first gen Concours C14 with almost 60,000 kms on it.  I ended up picking up a second gen C14 that was two years newer with half the kilometers on it for $5500.  I had to put a bit of time in on it sorting out the electric windscreen, a clutch gasket and picking it up and safetying it.  $5500 for the bike, $120 for the rental van to get it, $20 in parts (from Two Wheel!) and $90 to get it safetied with a $715 tax bill still had it all costing me less than $6500 on the road.  Thanks to that price they'll be looking at over $300 more just in taxes for the lucky new owner.

Even with my fancy German windshield and American saddle I'm still coming out ahead.  Prefer the colour on mine too.


Sunday 2 January 2022

Changing Motorcycle Chain And Sprockets


I've done chains before but not sprockets.  It's a fairly straightforward bit of work you can do yourself in your shed/garage.  In this case I'm doing both sprockets and chain on my 2003 Triumph Tiger 955i which has over 80k on it.


With the bike on its centre stand I removed the rear tire.


I picked up a chain breaking and installation tool a couple of years ago and it has more than paid for itself.  It has pin sets that push chain pins out to break the chain (it keeps all the hardware in the handle so for the two+ years I don't use it I'm not losing parts).

It also has drop in pads that let me press new rivet chain connectors together.


The new vs. the old front sprocket.  The new one is 19 teeth, the old one 18.


The new front sprocket on the motor.  These are the parts I used:

RK 530 MAX-O O-Ring Chain Natural 114            $101.99
JT Steel Rear Sprocket 46T (530) JTR2010.46    $74.99
JT Steel Front Sprocket 19T (530) - JTF11           $80.19 (all prices CAD)

The '03 Tiger takes a 114 link chain, a 46 tooth rear sprocket and an 18 tooth front sprocket stock.  I saw a suggestion online that going to a 19 tooth front sprocket calms down the bike a touch (it can be jumpy off the line) while also revving a touch slower while cruising which should improve mileage a bit.


Not bad for the original stock rear wheel with over 80k on it, eh?  If you think modern Triumphs aren't well put together, this one was, and with quality parts.
I've had these on the bike since I got it over 30k ago.  Still not in terrible shape.  I've seen sprockets torn to shreds - some people must be very heavy handed on the controls to strip a socket like that.  I've had the Tiger pulling the front wheel off the ground under acceleration so it's not like I'm soft with it (it's getting this drive train maintenance because the old chain had stretched in places).  I'm curious to see and hear how the new parts work.


The new chain and sprockets on.


The connecting link (see it?) is pressed into place with the DRC chain tool which also pushes links together as well as pulling them apart..


The many directions and warnings on the back of the chain box.
The Tiger had a deep maintenance last year, so this year it only needed the chain & sprockets.  It's back under the blanket waiting for a break in the snow for a cheeky early-spring ride.  Next up is doing the brakes on the Kawasaki, then I'm into rebuilding the Amal carbs on the 50 year old Bonneville winter project.

If you're looking for torque settings and parts details for a 2003 Triumph Tiger 955i while doing a sprocket and chain, here they are:

  1. chain sag:  35-40mm
  2. drive chain adjuster (the clamp on the adjustable rings in the swingarm):  35Nm
  3. rear sprocket nuts:  85Nm
  4. front sprocket nut:  132Nm
  5. rear wheel axle bolt:  85Nm
  6. 530 chain with 114 links (if that seems confusing, check THIS out)
  7. 18 tooth front sprocket (though 19 is recommended)
  8. 46 tooth rear sprocket


Thursday 30 December 2021

Motorcycle Electrical System Rebuild From Scratch

Researched links on re-wiring the 1971 Triumph Bonneville... 

The old Bonnie has an intact loom and many of the original electrical components, but many of these pieces won't have weathered the decades well and I'd be crazy to try and rebuild a hacked on electrical system in a fifty year old bike, so it's all coming out.  I'm going to take a page from the custom scene and build a loom from scratch and design and build a complete electrical system from scratch.

This ain't no modern digital machine so the electrical system in it is prehistorically simple.  Building a dependable replacement with quality modern upgrades (proper copper wiring, modern connectors, new electronic ignition and coils, etc).  The result should be a 1971 Bonneville that is more spritely and dependable than anything that rolled off the line in Meriden in 1971.


Tutorials on creating a motorcycle wiring harness/loom:

BikeExif Tutorial: https://www.bikeexif.com/motorcycle-wiring

Rewiring tutorial:  https://www.liveabout.com/making-a-motorcycle-wiring-harness-743591

Tutorial:  https://purposebuiltmoto.com/motorcycle-electrics-101-re-wiring-your-cafe-racer/

Tutorial: https://www.hagerty.com/media/maintenance-and-tech/building-wiring-harness-from-schematic-to-bundle/

Resource (costs 20 pounds): https://rupesrewires.com/build-your-own-wiring-loom-pdf-book/

Another good resource ($40): https://www.amazon.ca/gp/product/0760345368/ref=ppx_yo_dt_b_asin_title_o06_s00?ie=UTF8&psc=1

I've purchased and read that last one - it's a gentle introduction to electrical work but I found it a bit simple and wished it had picked up speed as it went.  If you've never done any electrical work then it's a good place to start, but that's what I do all day so I was hoping for something with a bit more depth.

Replacement harness:

http://www.britishwiring.com/MC-28-PP-p/mc28pp.htm

Prebuilt '71 Bonneville wiring harness: https://www.thebonnevilleshop.com/product/lucas-71-72-triumph-bsa-650-twins-main-cloth-wiring-harness-pn-54959629-g-99-1222-g/


Original loom wiring colours:
  • RED (seems to be earth but then battery + so this is a positive earthed bike?)
  • WHITE (headlamp loom)
  • GREEN/WHITE STRIPE (LH handlebar switch & main loom)
  • BROWN/GREEN STRIPE (headlamp loom)
  • BROWN/GREEN STRIPE (headlamp loom)
  • WHITE/YELLOW STRIPE (L/H handlebar switch) + ignition coil
  • BROWN (headlamp switch)
  • GREEN/RED STRIPE (L/H handlebar switch)
  • PURPLE (horn press R/H switch)
  • LIGHT GREEN (L/H handlebar switch)
  • PURPLE/RED (earth?) horn
  • BLACK/WHITE STRIPE / BLACK/YELLOW STRIPE (contact breakers)
  • BLACK/WHITE STRIPE (condesner pack/ignition coil split)
  • RECTIFIER:  WHITE/GREEN STRIPE + GREEN/YELLOW STRIPE+BROWN/BLUE STRIPE+RED (earth)
  • IGNITION COIL: BLACK/YELLOW STRIPE to coil & condenser pack + WHITE to coil
  • RED (earth frame)
  • BROWN/BLUE: Zenor diode
  • RED to battery positive (that doesn't make much sense)
  • BROWN/BLUE: battery negative
  • IGNITION SWITCH:  WHITE+BROWN/BLUE+BROWN/GREEN
  • FLASHER UNIT:  WHITE+LIGHT GREEN
  • REAR LIGHTS:  BROWN/GREEN STRIPE (rear lamp)+BROWN (stop lamp)+GREEN/WHITE STRIPE (L/H indicator)+GREEN/RED STRIPE (R/H Indicator)+RED (earth)
  • STOP SWITCH:  BROWN+WHITE
  • STATOR (GREEN/YELLOW STRIPE+WHITE/GREEN STRIPE)
https://monomotorcycles.co.uk/ were advertised in the UK's BIKE Magazine...


The Motogadget is an all-in-one electrical block for all electrical items on a bike - it also provides you with a bluetooth connection so you could start and stop it by your smartphone:
https://www.motogadget.com/shop/en/electrics.html

Not really what I'm looking for for the Bonnie project, though I'll keep it in mind for a future ground up custom build.

A new ignition barrel with keys looks to be about $80.  I'll see if Britcycle has them.

The existing wiring looks like it was taken apart and left that way - I'm tempted to take it all out and just rewire it rather than trust the old mess.

Electrical Systems Parts List:

  • Ignition barrel & key set
  • wiring to rebuild loom step by step - I'd need correct gauge wiring & connectors
  • fuse box
  • fuses
  • reg/rectifier
  • upgraded/modernized stator


Motorcycle wiring how to: https://docs.google.com/document/d/1zm67VyrQTS1_H7WRunfkhOZ1H6wivD6RuK6194P3lvs/edit?usp=sharing  A commonly found writeup someone has done to walk any interested DIYer in how to rewire your bike.

1971 Triumph Bonneville Project: Photos from the current project and long term design ideas

 Some photos from the ongoing 1971 Triumph Bonneville winter project:


One of the boxes of spares.

Spare cylinder head and engine covers.

Looking into the top of the valves...


Yep, that's a 1984 plate sticker on it!

Front wheels cleaned up nicely.

Motor cleaned up well too!

Got it out into the minus ten sun to give it another clean up now that it's stripped.

Strance is back to stock now that the massive chopper front shocks are gone.


The goal is to get it mechanically sorted and ride it rat-bike style next summer to iron out an kinks.  Next winter it'll all come apart again and this time the frame will get painted and so will the body panels.  I've found some year correct Triumph badges but I'm thinking something a bit non-stock for the paint job, like perhaps a Gulf racing livery colour scheme:


https://www.autoevolution.com/news/gulf-racings-iconic-livery-looks-at-home-on-this-modified-yamaha-sr400-149258.html#agal_6


I'm also thinking about seats.  A plain stock seat costs the better part of $500US.  For only $100 more I could get a custom coloured Corbin seat!

https://www.corbin.com/triumph/vintlist.shtml


More research needed, but that looks sharp!  You can customize Corbin vintage seats like their modern bike seats, so I could match it to the Gulf racing colour scheme too.


Sunday 19 December 2021

Happiness is: Mastery!

 Sometimes the on-bike cameras in MotoGP capture a magic moment.  In this case it's Sam Lowes knocking out a fastest lap in free practice before qualifying at the Doha GP in the spring of 2021.

Sam Lowes putting in a fastest lap at the Doha GP in the spring of 2021

Doing something difficult that you love well is one of the foundational ideas behind my own motorcycling.  The glint in Sam's eye there as he blasts down the straight approaching 300kms/hr is magical.  You don't get that kind of intensity when you're being leisurely, it only happens when you're using all of yourself to do something difficult well.

Wayne Gretzky's dad replied to a reporter who described Wayne as a natural by saying that
he wasn't a natural at all - what Wayne Gretzky did was be out every day, stick in hand,
playing hockey more than anyone else: his mastery was hard earned but based on his
love of the game.  You can see that love in the glint in Sam's eye!


Sunday 12 December 2021

WOMBO.ART: How AI generated art offers insight into motorcycle marketing

Wombo's a rocket ship!
I teach computer technology in my day job and I've watched the coming of artificial intelligence over the past decade with interest.  AI and machine learning is getting better at managing real world data like visual information.  Recently, a Canadian company named Wombo have created an abstract art creation tool that builds original images from some key words and a selected art style.  This AI art generator offers some interesting insights, especially in a world where branding is everything (such as in motorcycling).

Wombo (https://www.wombo.art/) is easy to play with - just throw some key words in and pick a style and you get an original piece of abstract art.  If you run the same information it comes out different each time too.

So, what to throw in first?  Valentino Rossi, of course - he's front and centre in many motorcyclist's minds this fall.  


The machine intelligence putting this together has scanned every image it could find of The Doctor.  It creates its own contextual understanding from that massive dataset.  It doesn't understand who Valentino is (though it might have scanned articles about him for keywords and have used that too).  These randomized but thematic pieces makes some interesting inferences.  Firstly, Valentino means high-vis yellow... and Yamaha blue.  This begs the question: "what were Yamaha thinking sending Valentino off to retire in teal and black?

Perhaps my favourite part of this piece is the obvious Doctor's Dangle happening.  The dangle was started by Valentino around 2005.  It's still a bit of a mystery how it makes you go faster, but I suspect it offers a bit of fine tuning on your balance under heavy breaking while also offering a bit more wind resistance to slow you down.  Wombo's algorithm won't know any of that, but it knows to associate the dangle with the man who invented it.  At least it did this time, every other time I tried a Rossi image it wasn't there.

The Rossi implications got me thinking about how a machine intelligence sees a brand... and what interesting conclusions you might draw from it.  Ducati got the first swing at it since they're such an iconic brand:


The colours certainly shout Ducati, and while the motorcycle isn't obvious, there is something about the lean that suggests two wheels.  If someone who'd never heard of Ducati were shown this, I suspect they'd consider it a sporting brand rather than something else like a heritage focused company.  I think they'd be happy with that.

I then threw Triumph into the mix:


Not sure what to make of that one!  Triumph's long history before its resurrection must make for interesting texture in the data.  This looks very art deco and feels like 50s and 60s advertising might have inspired it.  Once again, the idea that Triumph is tied to motorcycles is evident in the edges, especially the one middle right.

Just now I did two more "Triumph Motorcycle" renditions:


I still see bikes (but then I tend to see bikes).  There is a sense of speed in how the designs depict the abstract objects.  I can't help but wonder if the colour choices aren't from actual bikes.

Here's one for MotoGP:


I can almost see Marc Marquez and Valentino Rossi in that.  It certainly contains a feeling of competition and speed.  Does the machine intelligence know who Marc and Valentino are?  Is this an echo from Sepang in 2015?  I wonder if that'd make anyone wince in MotoGP's marketing office.

Wombo's AI art generator is easy to get lost in.  The images seem to speak in surprising ways.  If you've got a minute, go play with it.