Showing posts sorted by date for query c14. Sort by relevance Show all posts

Wednesday 15 February 2023

Plastic Welding

 I thought I'd give this a go when I discovered that one of the plastic dash bits (used) for the 2010 C14/GTR1400 Concours was upwards of $150US +shipping. One of the benefits of reading Practical Sportsbikes Magazine is that they're always dropping technical hints and ideas. They mentioned plastic welding in one of their project bike articles, so I looked it up.

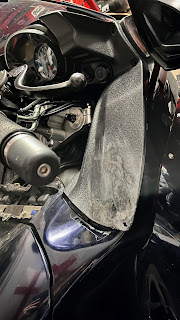
The repair kit cost less than $40CAD and includes a heating 'iron' with multiple ends and piles of plastic strips you can melt into a repair. Starting with a simple crack would have been easier, but I had to rebuild the broken end of a complicated plastic form, including a missing bolt hole.


Here's the broken plastic dash panel:

I found a piece of plastic from a hex key tool with a matching sized hole, cut the end off the plastic bit  and grafted it on.

While that was cooling I melted some of the filler on the back and healed the crack up the middle.


I was liberal with the filler because I figured it would sand back. The only problem with this piece is that it's patterned on the surface and I'm not sure how I'm going to replicate that. The fix might be to take both pieces of and just paint them to a matching finish.


When I tried it for size, the panel lined up with the holes perfectly and is much more sturdy than it used to be. I'm going to finish sanding it and see if the raw finish bothers me while riding. If it does I'll take both dash panels off and paint both sides so they match. If I use a vinyl paint, I should get a matching finish that also acts like the original and would Armor-All up nicely.

So, what's plastic welding like? Pretty straightforward, and like most things if you practice you'll get better at it. The filler sticks provided in the kit melt easily under the iron and fill cracks and holes well. If you don't like the first go you can reapply heat and get it to set differently. If you're looking at absurd replacement costs for old plastic on a well used bike, a plastic welding kit is a good purchase.


Wednesday 24 August 2022

Getting a Flat Tire on your Motorcycle

I've been riding for over a decade now on a lot of different bikes and I've never had a flat tire.  A work colleague got one once and it made her quit riding, so the terror of riding a motorcycle with a flat has always had an inflated (ha!) place in my mind.

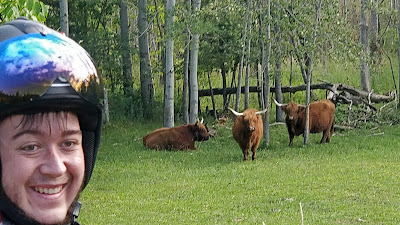
Last week my son and I went to look for hairy cows (highland cattle up by Creemore) on two wheels.  The mission was a success and after a quick lunch in Creemore we headed home.  A stop for a stretch in Grand Valley must have picked up a nail as once we were back in motion the tire sensor started flashing on the dash.  It should have been more obvious that a catastrophic tire failure was under way except the Kawasaki was also in a panic about being low on fuel.  Whoever did the dash layout for the C14 didn't have a good grip on digital ergonomics (a rapid tire decompression shouldn't be vying with early low-fuel warnings on the screen).

I started to feel the back end get squishy so I slowed down and pulled over once I'd sussed out what the panicky dash was trying to tell me.  With a 200lb+ passenger on the back this was the worst possible getting-a-flat scenario, yet I found it very manageable.  I like to think all that time at SMART Adventures getting used to a bike moving around on loose material helped.  We pulled over, the tire was very flat, so we unloaded and then I pushed the bike off the side of the road and into the grass.  We were on a country road so there wasn't much of a shoulder and everyone was steaming by at 100kms/hr.  I then got on the phone trying to find anyone local who could give us a hand.

Nice spot for a breakdown, as long as you can manhandle the bike away from the verge. No one stopped to check on us or even slowed down or moved out of the lane to avoid us. Country living ain't what it used to be.

No point in being all long faced about it :)
My wife was heading out to ballet but a friend in town, Scott, was around and offered to come out with some spray filler to get us home.

It was a nice day for a flat in a lovely part of the world.  Potatoes were growing behind us and cows grazed across the road as the sun streamed down.

Scott was there in a flash.  I removed the topbox and Max and it went with Scott in the car (no point in putting more weight on a bad tire than necessary).  The spray filler went in and bubbled out of the hole and the bike's pressure sensor said I had 5psi.  Perhaps the foam expands as the tire spins and heats up?  Scott and Max followed me as I took it slowly down the road toward the village of Belwood, but the fill-in-foam did bugger all.

I was only a few minutes in motion but the tire pressure fell off to zero again and the tire was starting to come off the bead, so I pulled over on the edge of the road in Belwood.  Scott and Max went back to Elora to see if he could borrow his neighbour's trailer to get the bike home, but I was in my hood now.  Belwood is the edge of the catchment area where I teach and teaching generations of people here means I'm connected, even when I don't know it.

The guy mowing his lawn across the street came over and said he had a portable air compressor and some tire plugs and would I want to give it a try?  He came back a minute latter with a rusty old plug kit and the air pump and as he plugged the hole we discovered that he was the uncle of one of my top students (the kid's going to German to do IT this fall!).  He waved me off when I offered to pay, but a bottle of Glenfiddich is coming his way next time I'm passing through there.  Scotch is cheaper than a tow and I'd like to cultivate what little small town spirit is left in our rapidly urbanizing county.

Plug kits are the way!

The Concours uses tubeless tires on alloy rims, similar to a car, so the plug did the trick and the portable air compressor he had put 20psi into the tire which held all the way home.  I stopped half way and texted Scott that I was in motion and they met me at the house.  I took it slow and steady but the bike felt fine even at half pressure.  If you're frantically worried about getting a flat on a motorcycle get some off road training, it'll make you comfortable with the squirming.


Lessons learned?
This wasn't my first time seeing
biker 'brotherhood' fall on its face
.
It's all a load of nonsense, isn't it?
I stop, but it has nothing to do with
this fictional B,S, designed to make
the loud  pipe crowd feel good
about themselves.

  1. Flats feel like riding on gravel.  If that freaks you out, so will getting a flat.
  2. Pressure filler goop doesn't work, it's a waste of money.  This was only a nail puncture and it did nothing to solve it.
  3. Plugs are the way!  There are moto-friendly options that aren't big (or expensive compared to getting towed) and can get you back in motion.
  4. Don't expect Kawasaki's tire air pressure system to prioritize the danger in any kind of way that makes sense.
  5. Don't expect the biker brotherhood (or anyone else) to pull over and see if you need a hand, they all just potatoed by while we were on the side of the road.  In fact, no one stopped to check on us.  How's that for country hospitality?
  6. Because of 5, be self sufficient in sorting your own flat.


Jeff the motorcycle Jedi suggested getting an all-in-one micro-sized puncture repair kit and suggested the Stop And Go kit which includes all you need for plugging including a mini pump that you can clip onto your battery for under $100.  Packs up nice and small too so throwing it in a pannier is no problem.
I got mine from Fortnine, but Amazon has 'em too.

As for tires, I ended up going with Revco and getting a single new rear tire rather than doing both.  When I got the C14 it had a relatively new (2019) front tire and much older rear on it.  The front was still nicely rounded (no flat spots), so it stayed on.  I didn't want to mismatch tires so I stayed with Michelin Pilot Road 4s.  If you want a COVID inflationary kick in the head, the rear tire cost $235 when I looked it up last summer.  Your latest inflationary price (Aug, 2022)?  $274.  That's a 16.6% price jump, aren't economics fun?  I can't imagine what the dealership is asking these days, probably five hundred a tire installed.

All that shitty milk in the bottom of the tire? That's courtesy of the utterly useless 'tire repair' foam filler - don't bother with it!

Revco did its usual excellent job getting the tire out (it was here less than 48hrs after ordering).  Installation was straightforward and gave me a chance to clean up the rear end and shaft drive which I hadn't been into yet.

Here's where things get even craftier (or Norfolk stingier if you like).  I like mechanics, but like my dad before me, they also scratch a why-spend-money-when-you-don't-have-to itch.  The tire pressure warning system has been flashing low power warnings at me since I got the bike.  I looked up replacements and they are an eye-watering three hundred bucks or more a piece, then I did some research and found this handy video where the guy dismantles the sensors and solders a new lithium battery in.  Recommended?  Not unless you're really handy soldering (lithium batteries don't like a lot of heat).  Fortunately, I'm handy with soldering.

The TPMS (tire pressure measurement system) is a wireless sensor screwed into the valve stem and held in place with a big hex bolt.  It sends a wireless signal to the dash once the bike is in motion which gives you your tire pressure in real time.  Removing the sensor is easy enough and taking it apart equally so (there is a torx head bolt under the sticker).


Disassembly is straightforward.  There are plastic clips on the sides that can't have much to do in a thing spinning round and round inside a hot, pressurized tire.  The hidden fastener is a tiny torx head bolt under the sticker.

I removed the old battery and picked up a pack of 4 of the Energizer C2032 batteries (we use them all the time in motherboards at school) for under $10.

I soldered wires onto the extensions from the PCB and then soldered them onto the battery.  Solid connections all around and it all went back together nicely.  For a hack around a non-repairable high-expense replacement, this went well!

The new tire went on without any headaches.  Compared to the winter install of the tubed tires on the Tiger, it was a much easier summer job.  No inner tubes to wrangle and (after leaving the tire in the sun for 10 minutes), everything was pliable and easy to stretch over the rim using tire spoons.

I was worried about the tire not inflating if I didn't have a tire installer with rapid inflation on it, but I needn't have worried.  Perhaps the Armour All helped (I used it on the rim edge as a lubricant), but the tire started to take in air with a bit of jiggling and once it started filling, at about 20psi the edges popped out onto the bead and were airtight.

I set the tire pressure to 42psi and went for a ride around the block and then up and down the river (about 20kms).  Everything it tight and working well, including the tire pressure sensor - no more low power warnings!  I'll do the front one when I eventually replace the front tire the same way.  A new tire always feels fantastic (like a newly sharpened pencil if you're older enough to know what that feels like) with the bike feeling friskier and more willing to drop into corners.  The new tire is a 190/55 rather than the stock 190/50 and it subtly shifts weight forward by lifting the back end up a touch - it felt good, and is a bit less crashy on bumps too (a bit more sidewall means a bit more flex).

Thanks to Steve A on YouTube for some genuinely useful help researching the tire pressure management system and how to hack a fix.


Tuesday 26 July 2022

Exploring The North on Unridden Roads


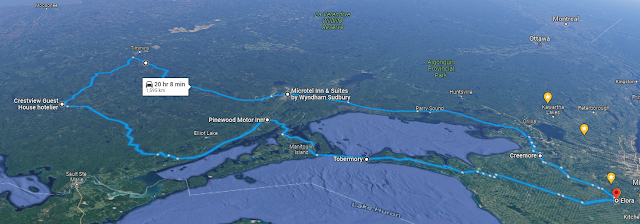
Finding some roads I haven't ridden before:  this ride involves circumnavigating Georgian Bay (which I did in 2015 on the old Concours C10), but then going north onto roads I haven't ridden before.  This time around I'd do it on the C14 if Alanna wanted to come along or on the TIger if I were solo.

Three nights four days on the road breaks it up into manageable chunks that would allow for frequent stops and off piste explorations.  If I did it in August the temperatures shouldn't be too mad.


ONTARIO MOTORCYCLE TOURING RESOURCES

Ride The North: https://www.northeasternontario.com/ride-the-north/

Northern Ontario Travel Motorcycle Routes: https://www.northernontario.travel/motorcycle-touring/top-10-motorcycle-routes-for-2020

Ontario Motorcycle Tour Routes:  https://www.destinationontario.com/en-ca/motorcycle-tour-routes-ontario

Haliburton Highlands:  https://www.ridethehighlands.ca/

Destination Northern Ontario: https://destinationnorthernontario.ca/

Northern Ontario Road Trip: https://ivebeenbit.ca/northern-ontario-road-trip/

What to see and do in Northern Ontario: https://us-keepexploring.canada.travel/things-to-do/what-see-and-do-northern-ontario


Monday 7 March 2022

First Ride of the 2022 Season: Scratching That Itch

Imagine having an itch you can't scratch for 112 days.  Riding a motorcycle in Canada is an ongoing act of stoicism.

It was a long one this Canadian winter.  I'm usually able to get out for a cheeky February ride, but not this year in Ontario. Winter started later but when it came it clamped down on us like an angry professional wrestler and didn't offer any breaks from Polar Vortexes and snow.  My last ride was mid-November, it's now March.

T'was -22°C on Friday and tonight we've got freezing rain and snow into tomorrow, but it was a balmy 6 today so off I went.

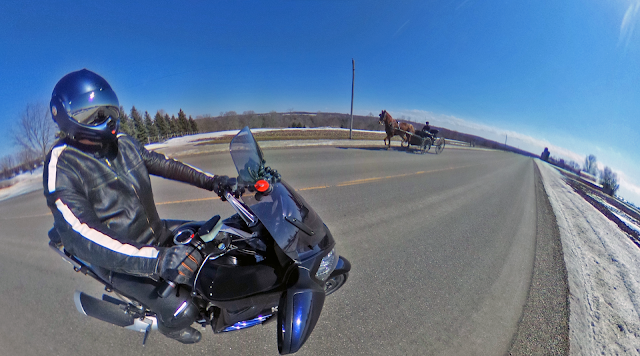
The C14 started on the first touch and was bullet proof on a 30km ride up and down the Grand River:


The bisons were out at Black Powder.

It was mennonite o'clock as I shook the cobwebs out of the Connie.


The Tiger took a bit more convincing but that wasn't its fault, I'd had the whole fuel injection system out for a cleaning and it needed to get represussurized.  Once it had fuel it took off like a rocket!


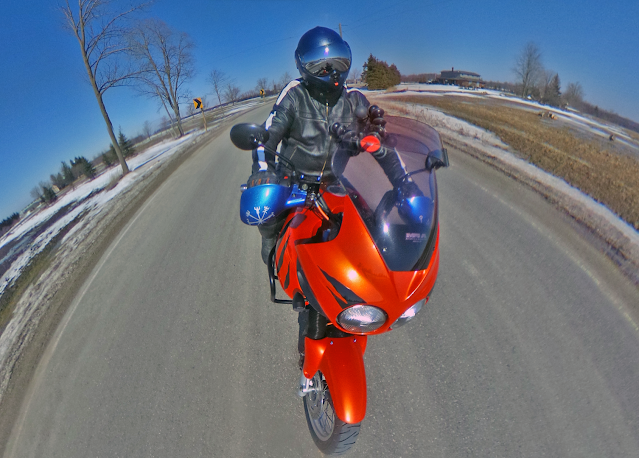
Leaning into a corner, finally!

The zipper replacement on the jacket is working like a charm!

The roads were thick with sand and salt so after a cleanup everyone is back under a blanket waiting for the next break.  I'd be a year rounder if I still lived in Norfolk (UK).


On the upside, the 750cc cylinder head for the 71 Bonnie project came in so I've got other things to do!

On bike photos were taken with a Ricoh Theta camera attached to the windshield and auto-shooting every 8 seconds.  If you're curious, here's a bit on how to make awesome on-bike 360 photos.  Here's another published on Adventure Bike Rider Magazine in the UK:  How to capture 360-degree photos while riding your motorbike.

Looking forward to leaning into more corners in less than another 112 days!

Tuesday 1 March 2022

My First Distinguished Gentleman's Ride

I'm going to get past my age related hipster-imposter-syndrome and commit to taking part in the The Distinguished Gentleman's Ride this year, complete with ascot and tweed.  I bet I have a pillion willing to dress up and join me.  I'm hoping I can channel my granddad's riding style when I do it.

From my DGR Suggestion from the summer of 2020.

My '03 Triumph Tiger also struggles with the idea of being a faux-classic hipster style icon (DGR likes classics or faux classics to fit the image - I'd argue the Tiger is a kind of, um, scrambler?).  Tigger's too genuine for that kind of style police nonsense, but it's an old warhorse with over 80k on it from another era so we're both going to commit.  I wouldn't take the C14, that's missing the point, but the Tiger deserves the work.

The Concours is a fine thing and my wife and I are enjoying the rides together, but the old Tiger is still my two-wheeled spirit animal.

The question now is do we fight our way into the misery that is the GTA for an event in the Six with hundreds of riders or enjoy a similarly (time wise) ride through the country to London for a smaller event with far fewer riders but without the traffic?

There are many Canadian DGR events forming this spring to ride on Sunday, May 22nd:  Get out to one if you can, and don't be anxious about not meeting the hipster bike style code (though do dress nicely).


This is last year's poster - I'm sure they'll come up with a 2022 one shortly (it's on Sunday, May 22nd.)


Sunday 9 January 2022

Brake System Maintenance on a C14 Kawasaki Concours

 I'm busy in the garage these days with the on-going 50 year old Triumph Bonneville restoration project.  It's a big project that will take some time to sort out, but it's -20°C outside with snow squall warnings of 20cm of snow coming, which means it's also regular maintenance time on the two running bikes in the stable.

Tiger's back in hibernation after last week's sprockets & chain maintenance, waiting for a break in another never-ending winter of COVID for a chance to ride.

Last week the Tiger got new chain and sprockets.  I hadn't done the sprockets on it since getting it over 5 years and 40k ago, so I figured it was time when I noticed the latest chain had stretch in it that made it impossible to set the sag properly.  This week it's all about the Concours.

I got the Connie last spring in the middle of the second lockdown.  My son and I rented a van and drove down to The Beaches in Toronto and picked it up from its second owner who hadn't been riding it for several years.  It's a very low mileage bike (under 30k when I picked it up), but I like to cover all the basic maintenance so I can set a 'zero point' for future work.

As you would expect from Kawasaki Heavy Industries, the brakes on the GTR1400/C14 Concours are superbly engineered Nissin calipers.  I'd picked up the pads last summer but they hung on the wall until now because I was putting miles on the thing.  I did find the brakes were squeaking a bit, suggesting the calipers weren't releasing properly - something that can happen in a bike that sits for several seasons.  Like I said before, I don't like riding a bike where I'm not sure of the maintenance, especially on brakes, so it was due.

Doing the pads on the Concours is remarkably easy.  You don't need to remove any body panels and everything is very accessible.  Undo the pin that holds the pads and spring that holds them in and then everything comes apart in your hands.  The pins were rough and there was some odd gunk stuck in the front right caliper.  I cleaned everything up and lubed it and then slotted the new pads into place with the now lubed pins (I think it's a #5 hex head that does the trick).  All very logical.

If you're looking for torque settings for the
brakes on a Kawasaki GTR1400/Concours
C14, here they are.
The rears are just as easy and a similar design with the same pin and caliper bolt sizes (everything is hex metric).  The back was as mucky as the front and I went to lengths to clean up the pressurized caliper slider and lube the pins and areas where the pads move.  The action immediately felt better afterwards.

Last spring when I got the bike I had to sort out a leak in the hydraulic clutch which resulted in entirely new DOT 4 brake fluid (what the Connie uses in both clutch and brakes).  Changing up your brake fluid removes impurities and moisture that can eventually cause real corrosion headaches in your brake system, so after doing the pads I changed up the brakes fluid on both front and rear systems.  The only fluid change left now on the Concours is the antifreeze.  I'll do that at the end of next season.  When I tested it the fluid it was still bright green, looked new and showed good temperature range.

Getting all the air out of the hydraulic clutch so that it felt tight and had positive action was a real pain in the ass last spring.  The good new is that this air-line powered vacuum system did the trick then (it's not crazy expensive) and takes the headache out of bleeding anything with steady, controllable suction.

In the case of the brake system, I set up the vacuum bleeder and then kept adding fluid in the reservoir at the top until it came out clear (the used stuff was darker and cloudier - it looked almost like water once the new stuff made an appearance.

Just a note:  don't keep brake fluid laying around open.  It collects moisture and goes off pretty quickly.  As with all brake fluid changes, I opened the bottle and then immediately used it this time.

The front brakes took less than 10 minutes to completely bleed of old fluid and the rears even less.  If you're doing your own brake/hydraulic fluid maintenance with any kind of regularity, let that hand-pump go and get one of these things (assuming you have an air compressor of course).

With the brakes sorted on the Concours and the sprockets and chain on the Tiger, both are waiting for a break in the weather for a cheeky winter ride to kick off the 2022 season.  As long as I'm not trying to navigate ice on the road, I'm good to go.  An above zero day and some dry pavement is all I need

Now that the regular movers (I was going to call them new but the Tiger is almost 20 years old and the Connie turned ten last year) are sorted out maintenance wise, it's back to the old Bonneville project.  Next up I'm rebuilding the two Amal carbs, then it's rebuilding the ignition system and then (hopefully) hearing the old thing bark for the first time in decades.


Sometimes the Bonneville can feel like it's too big to manage, it needs so much, but with two other working machines I'm never going to be angry with it not being ready, though I would love to have it running in time for The Distinguished Gentleman's Ride on May 22nd.  A '71 Bonneville with some early 70s retro style would be a blast.