Showing posts sorted by relevance for query Bonneville. Sort by date Show all posts

Sunday 10 April 2022

1971 Triumph Bonneville T120 Sensible Bodywork Bolt Replacements

I'm in the process or stripping the last bits of hardware from the frame and bodywork in order to clean up and paint the frame and bodywork on the 51 year old Bonneville project bike.  The bolts holding the licence plate holder onto the rear fender were 4 different sizes with the longest ones protruding so far toward the wheel that they'd be a safety hazzard on a big bump (the tire would make contact with them on full suspension compression, especially with me on it).

I was talking to a friend online who made a career out of flying helicopters for the military and he said he's found wrong sized hardware in controls that have actually jeopardized flight safety.  One of the rhings I enjoy about motorcycle mechanics is that it feels closer to aviation than four wheel appliance repair where an error like this might cause you inconvenience as you roll to a stop on the side of the road.  If you're up in the air or out on a bike and you have a catasrophic mechanical failure, it's a very different consequence.

Another pilot friend (the perils of being an air cadet), when we were going up for a flight in a Cessna, brought it back around and landed when the engine didn't feel right.  Everyone was impatient at the delay, but he said something that is simply true that many people don't consider when their flight is delayed:  "it's better to be down here wishing you were up there, than being up there wishing you were down here."  It's a shame more people who work on bikes don't think the same way.  I've seen even professional work that was half assed to save time/money.  Incompetence like that puts a rider's life at risk needlessly.  It can end up costing you far more than you saved.

Pretty sure that last one isn't a stock Triumph bolt.  These'll all get replaced with metric bolts because they're easier to find, but they'll be the right length, matching and be staineless steel.

The 14-0101 bolts used to fasten the fenders on the '71 Bonneville are 1/4" X 1/2" X 28 UNF, which are a bugger to try and find a match for.  The longest bolt on the bike was an inch and a half - way too long for where it was.  Working with SAE/imperial sizes on this bike makes it a real pain to match hardware out of what I have on hand, but stuffing a bolt that long onto a bike where it can interfere with the wheel isn't sensible.
SAE Wrench SizeBolt Size (SI)Metric Wrench Size
5/16″1/8″8 mm
3/8″3/16″10 mm
7/16″1/4″11 mm
1/2″5/16″13 mm
9/16″3/8″14 mm
5/8″7/16″16 mm
3/4″1/2″19 mm
13/16″9/16″21 mm
7/8″9/16″22 mm
15/16″5/8″24 mm

1/4" bolts can be replaced with an 11mm metric option and finding stainless steel versions of these are easy.  I can also get four matching that are the correct length for the job at hand rather than bunging whatever I have in the toolbox onto the bike.  Compared to other costs in this restoration, hardware costs are trivial (for under $40CAD I can get a 900+ piece kit).  When I'm dropping $600+ on a new head, spending a bit on properly sized bolts seems like a no-brainer.

Of course, body panel fasteners are a different proposition to what you put into a motor or transimssion - in those cases I'd always use stock pieces to manage the heat and pressures involved as decided by the engineers to designed the thing, but for bodywork there is a bit more latitude, you just don't want to be a pratt about it.

While sorting the
frame I've cleaned
up the oil in frame
drain system.
The Amazon bolt set arrived in less than 24 hours.  It is (of course) snowing today in mid-April in Canada, so moving the other bikes out of the garage to paint things isn't likely, and I can't paint outside if it's snowing.  You need 10°-30°C temperatures, no direcf sunlight and good ventilation.  If I can get the other bikes out of the garage, open the door a foot and run the fan, I might be able to retain enough heat to do it, but Canada's 'spring time' isn't helping things along.

If had a wee outdoor shed I'd use it as a paint booth, heating it to the required temperature and then having a fan to move the overspray out.  This DIY paintbooth would be a thing if I had a larger workshop, but a shed outside is a real possibility.  It could provide storage, freeing up space in the garage, but with some crafty ventilation it'd also be a paintbooth.  If I don't get to painting today, I can at least finish prepping the frame and body panels and hope for warmer temperatures later in the week.

New tires and innertubes are on hand.  The frame is being prepped.
I've still got some other body panels to clean and prep for painting.


Tuesday 8 March 2022

1971 Triumph Bonneville Restoration: Gudgeons, Johnson Rods & Cylinders out! (oh my)

I've got a degree in English, but working on the old Bonneville is stressing out even my vocabulary:

That'd be your gudgeon pin right there.

Gudgeon: one who will bite at any bait or swallow anything, credulous or gullible person Mer. V. I. i. 102.  (that might apply to this project)

Definition of gudgeon
1: PIVOT sense 1, JOURNAL  (we're getting closer)
2: a socket for a rudder pintle (a rudder pintle?)

Definition of gudgeon pin: WRIST PIN

Definition of wrist pin: a stud or pin that forms a journal (as in a crosshead) for a connecting rod (that's it!)

They can make up anything! Nobody knows!  Well, you need a new Johnson Rod in here!
A few people know, George.  Consumer ignorance is expensive, but who has time
to understand the machines they depend on?


Gudgeon pins?  After the massive fight that was removing the seized cylinder head, I was bracing for misery, but I was able to pop the circlips (!) out and tap the gudgeon pins (!) through with no sweating and swearing.  Pink Floyd was playing on the computer and I think music from its era calms the old Bonneville down when I'm working on it.

The circlips popped out easily and a 3/8 inch socket extension was the perfect size to tap out the 'wrist' pins.  I thought the one on the seized side might cause more problems because it had been stuck in place with moisture but it didn't and both came out easily leaving a motor bereft of its pistons.


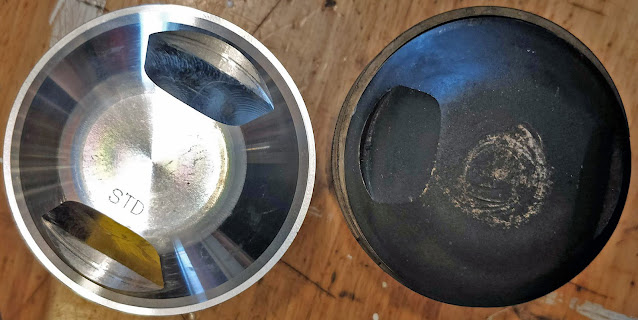
British Cycle Supply Co. delivered my 750cc kit quickly and without any headaches (and also for about $200 less than comparable kits out of the USA), so I got the shiny new bits out and had a look:


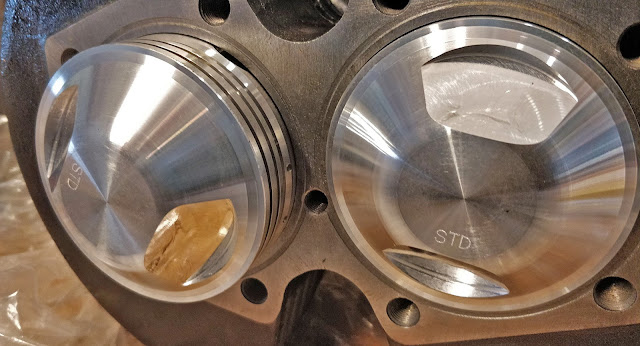
You'd think a 750cc head would look significantly different to the stock 650cc unit, but you have to look closely to see a difference in size.

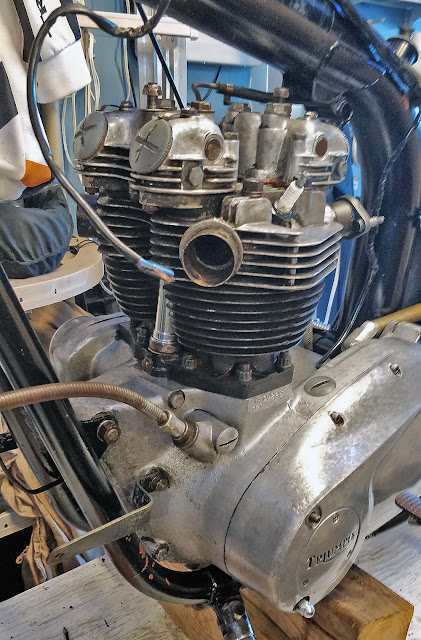
I had a close look at the connecting rods and they appear to be in good shape and the bottom end of the motor moves freely.  I think next steps are to remove the rest of the engine from the frame, give the oil-in-frame a deep clean and then recoat it with some quality paint.  With the frame cleaned up and sorted I'll strip the rest of the motor and clean everything out to ensure nothing's whacky before I begin the great rebuild.

I could just chuck it all back together now and hope for the best, but if it ends up having other niggles rushing things at this point is just false economy.  I'm not worried about making the bike look mint, but I do want it to be dependable and that wouldn't be the case if I haven't checked it over completely after such a long (30 year?) layoff.  An engine out deep restoration was always the intention here and I'm not in any kind of rush since the other two bikes are both five by five and felt fantastic on their first rides of the year this past weekend.

The gudgeon pin itself looks to be in good shape, which is good because the head kit didn't come with new ones.  The circlips came out nicely too but the kit did come with those.  It amazes me that even specialized material like that in these cylinders can withstand the extreme forces they operate in.  This Bonnie had done at least twenty thousand miles on these cylinders and they're still in remarkable shape considering they were face to face with more than 17 controlled explosions every second (a spark plug typically fires about 17 times per second at 2000rpm!).  You'd think all that heat and violence would cause more wear than I'm seeing in the beating heart of this motor.


This is the 3/8 inch socket extension I used to tap the gudgeon pins out.  Nothing grabbed or slowed the process down and I barely had to apply any pressure.  I might have even been able to push them out had I been so inclined.  
I caught the pin as it came loose and the cylinder lifted off the connecting rods easily.  Again, considering the extreme conditions the heart of every engine operates under, I'm impressed by the engineering and metallurgy that makes all this possible.


The new cylinders don't have the carbon build up from all those combustion cycles and look pretty spectacular in their pristine newness:


Here's the whole kit from British Cycle Supply.  It includes the cylinder head, cylinders, piston rings, circlips for the gudgeon pins and a head gasket.  I swiped the last one they had in stock for $688.75CAD ($535USD - told you I got a good deal).  Unfortunately I might be the last person on the planet to get a 750cc kit that cheap.  Prices will be going up on the new stock and probably even higher than that as we're in an inflationary spiral thanks to Putin overreaching and years of pandemic fueled broken supply chains; we live in interesting times.

Another tool came in that's interesting.  I was reading Practical Sportsbikes last week (highly recommended if you love bikes and getting your hands dirty on them), and editor Chris mentioned an endoscope smartphone camera he was using on a project bike to inspect the internal parts of an engine.  I found one on Amazon for under $40CAD and it came in on the weekend.  It lets you see parts of the engine that haven't seen light before.  It's an exciting thing that offers you a look into the secret life of engines.  I'm looking forward to using it as i continue to work on the Bonnie.

Through an inspection hole inside the engine - it's disco in there!

That look on my face after the first ride in a long, long time.

The 12 year old Kawasaki (left) and the 19 year old (!) Tiger (right) were keen to turn a wheel after a long hibernation.

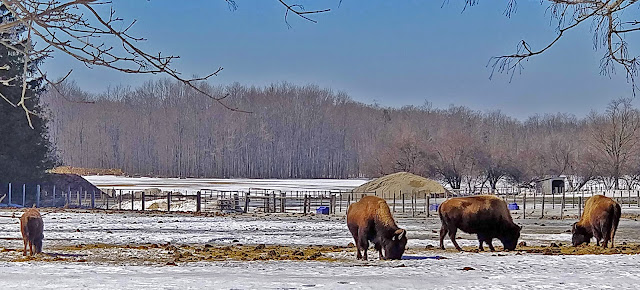
Bison were out bisoning at Black Power Bison Co. when I was out for a ride in balmy 6°C March Sunday.


Sunday 27 March 2022

1971 Triumph Bonneville Restoration Project: Frame Breakdown & Rear Brakes

I'd initially planned to do a rolling restoration of the 1971 Triumph Bonneville project, but the state of the engine and my desire to get it back to a place where I can enjoy an updated, dependable but mechanically sympathetic restoration (I want the bike to retain its patina, but I also want it to be dependable) made a rolling restoration impractical.  The engine is lined up for a new 750cc head and electronic ignition system, but before all of that I have to get the frame and wheels sorted out so that I can put the upgraded engine back into a sorted rolling chassis.

To that end, it was finally time to take it to pieces, which also gave me a lot of space back in the one car garage once the bike stand was stacked to the side:

The frame out means I don't need to fill half the garage with the bike stand.

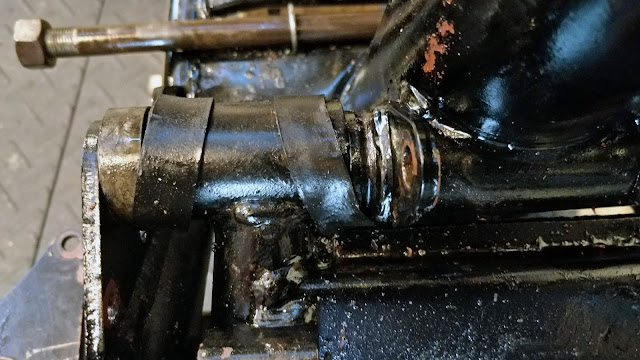
Black rubber bands cover the frame to swingarm joints (to prevent water getting in?).

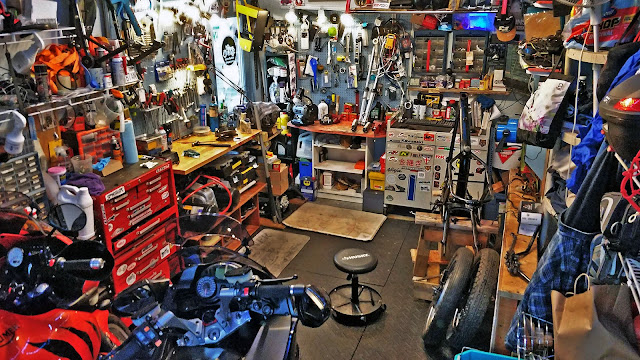
Way more space in the garage with the Bonnie in pieces.

With the bike in pieces, I'm restoring all parts that I can reuse.  This usually involves some WD40, a toothbrush or wire brush depending on how filthy it is, and then a dip in a hot ultrasonic bath for small pieces to get them back to fresh.

The front wheel Smiths speedometer.

Into the rear brakes. Like everything else on this old bike they are much simpler than modern hydraulic brakes.

Bringing old parts back from the brink is very satisfying.

The entire rear brake system - the brake lever is so long because it is the only mechanical advantage you have when applying the rear brakes.  Instead of using hydraulics to amplify your push on the pedal, the old Bonnie is a simple mechanical system.  You press the brake lever which pulls that long metal bar which rotates the top of the drums, pressing them into outside of the drum.  No hydraulics, and I bet you have to press that lever like you mean it to lock the rear wheel.

Thursday 30 December 2021

1971 Triumph Bonneville Project: Photos from the current project and long term design ideas

 Some photos from the ongoing 1971 Triumph Bonneville winter project:


One of the boxes of spares.

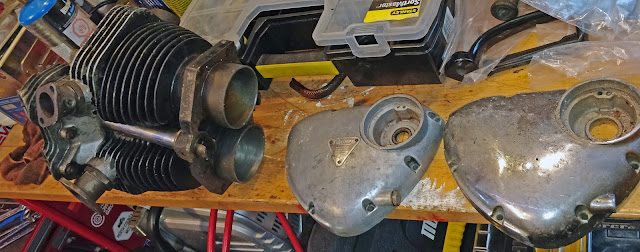
Spare cylinder head and engine covers.

Looking into the top of the valves...


Yep, that's a 1984 plate sticker on it!

Front wheels cleaned up nicely.

Motor cleaned up well too!

Got it out into the minus ten sun to give it another clean up now that it's stripped.

Strance is back to stock now that the massive chopper front shocks are gone.


The goal is to get it mechanically sorted and ride it rat-bike style next summer to iron out an kinks.  Next winter it'll all come apart again and this time the frame will get painted and so will the body panels.  I've found some year correct Triumph badges but I'm thinking something a bit non-stock for the paint job, like perhaps a Gulf racing livery colour scheme:


https://www.autoevolution.com/news/gulf-racings-iconic-livery-looks-at-home-on-this-modified-yamaha-sr400-149258.html#agal_6


I'm also thinking about seats.  A plain stock seat costs the better part of $500US.  For only $100 more I could get a custom coloured Corbin seat!

https://www.corbin.com/triumph/vintlist.shtml


More research needed, but that looks sharp!  You can customize Corbin vintage seats like their modern bike seats, so I could match it to the Gulf racing colour scheme too.


Sunday 5 March 2023

Rings and Carburetors: Swimming Upstream on this Vintage Motorcycle Restoration Project

The never ending winter drones on up here, so I'm putting my back into getting the '71 Triumph Bonneville project closer to a state of mobility.

I have a new 750cc head and pistons on hand, so I gave the piston rings a go. Installing them is pretty straightforward and the first set went in no problem, but as I was compressing the second set into the cylinder sleeve it didn't feel right, so I backed everything out and the bottom ring came out in pieces. I can only think it was already compromised in the package.

I sent Britcycle an email and they looked through the warehouse to see if they had any extras laying around, but I was out of luck, so it's a $100 failure (new rings, taxes, shipping). Ouch. This got me looking at costs for this vintage project. The last one I did was the Fireblade. Those are my favourite kinds of restorations. Parts are easy to find and relatively inexpensive, the bike is rideable fairly quickly and, after riding it for a season, I can turn it over for at least what I put into it (or with a small profit as was the case with the Fireblade).

New cylinder heads and cylinders... and broken ring.


I think I'm still right way up on the Bonneville simply because these older bikes seem to work under their own economy. I was looking up prices of what I've got on eBay this evening and the frickin owners manual that Bryan threw in at the last minute is $50US! A used top end is $500US (and Bryan gave me 2 of the things!). I imagine I could double my money just parting it all out, though dealing with people doing that would be a giant pain in the ass - at least it has been with the newer bike crowd, maybe the vintage types are less adversarial.

I had a couple of choices when I was considering going old school, and I think I picked the hardest possible one to bring back to life. The technical side of it doesn't bother me, but with costs increasing all around I'm bothered more about the high prices and difficulty finding and shipping parts than I am with what I've got to do to bring it back. That old BSA would have probably been a better choice for my first vintage resto, but it (and alas, Bryan) are long gone.

I've got what I've got, and I've got a lot of it, and I'm crafty. I'll see what I can do about replacing fasteners and the other bits and pieces I'm missing without it breaking the bank, those these strange old British pre-metric fasteners are a story unto themselves. The goal right now is to rebuild the bike to an operational state and then maybe ride it for a bit before putting it up for sale. I still need a seat and exhausts and I'll need other odds and ends like control cables. If I can get it back to a state of play, I think I can cover costs and move it along, then I'm thinking I'll go back to my favourite hunting grounds: forgotten bikes from the 80s, 90s and 00s that I can turn over for next to nothing while giving me a chance to ride something different for a little while.


When the ring crumbled on me I changed gears and rebuilt the Amal carbs. That went well, but I'm missing two of the bolts to put the second carb back together - they weren't on it when I wiped the mud and rust away. It's these little setbacks that stall things, and it's not like I can grab a couple of replacements out of my big tray of bolts (most of which are metric).


How simple can you make a carburettor? These old Amals are pretty close to first principles. The combination of archaeology and simple mechanics is very appealing when everything else I ride carries a computer and my day job is all about them - it's nice to be fully analog!

I'd broken down the carbs in the fall and left them packaged in a segmented toolbox. Putting them back together was problem free and the kits I got from Britcycle replaced all the gaskets and rubber grommets in them. The old rubber bits were really showing their age.


Guess which one is the 50 year old ring (I;m assuming they're original)?


Just need some bolts (at $3.50US a pop)

If money and time were no object I'd dig deeper into this vintage resto thing - I dig the mechanical simplicity and I enjoy seeing how mechanical evolution happens over time. As a hobby in retirement, it has great appeal, but I'm some years away from that much free time on my hands.

I'll see this one through and then refocus on the SPQR-WRO (small profit, quick return - with riding opportunities) side of it where the costs and time commitments aren't quite so demanding.