Showing posts with label chain maintenance. Show all posts

Sunday, 2 January 2022

Changing Motorcycle Chain And Sprockets


I've done chains before but not sprockets.  It's a fairly straightforward bit of work you can do yourself in your shed/garage.  In this case I'm doing both sprockets and chain on my 2003 Triumph Tiger 955i which has over 80k on it.


With the bike on its centre stand I removed the rear tire.


I picked up a chain breaking and installation tool a couple of years ago and it has more than paid for itself.  It has pin sets that push chain pins out to break the chain (it keeps all the hardware in the handle so for the two+ years I don't use it I'm not losing parts).

It also has drop in pads that let me press new rivet chain connectors together.


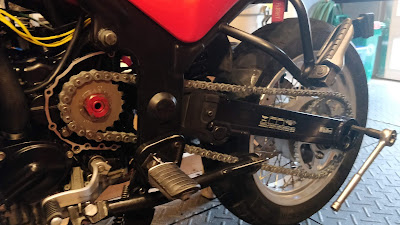
The new vs. the old front sprocket.  The new one is 19 teeth, the old one 18.


The new front sprocket on the motor.  These are the parts I used:

RK 530 MAX-O O-Ring Chain Natural 114            $101.99
JT Steel Rear Sprocket 46T (530) JTR2010.46    $74.99
JT Steel Front Sprocket 19T (530) - JTF11           $80.19 (all prices CAD)

The '03 Tiger takes a 114 link chain, a 46 tooth rear sprocket and an 18 tooth front sprocket stock.  I saw a suggestion online that going to a 19 tooth front sprocket calms down the bike a touch (it can be jumpy off the line) while also revving a touch slower while cruising which should improve mileage a bit.


Not bad for the original stock rear wheel with over 80k on it, eh?  If you think modern Triumphs aren't well put together, this one was, and with quality parts.
I've had these on the bike since I got it over 30k ago.  Still not in terrible shape.  I've seen sprockets torn to shreds - some people must be very heavy handed on the controls to strip a socket like that.  I've had the Tiger pulling the front wheel off the ground under acceleration so it's not like I'm soft with it (it's getting this drive train maintenance because the old chain had stretched in places).  I'm curious to see and hear how the new parts work.


The new chain and sprockets on.


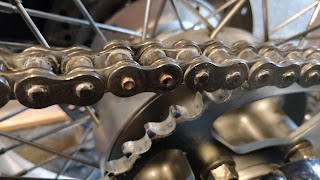
The connecting link (see it?) is pressed into place with the DRC chain tool which also pushes links together as well as pulling them apart..


The many directions and warnings on the back of the chain box.
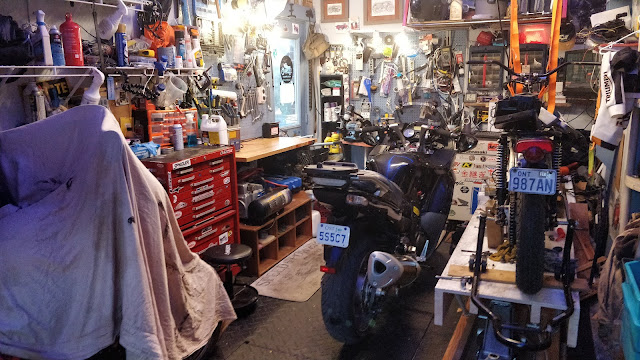
The Tiger had a deep maintenance last year, so this year it only needed the chain & sprockets.  It's back under the blanket waiting for a break in the snow for a cheeky early-spring ride.  Next up is doing the brakes on the Kawasaki, then I'm into rebuilding the Amal carbs on the 50 year old Bonneville winter project.

If you're looking for torque settings and parts details for a 2003 Triumph Tiger 955i while doing a sprocket and chain, here they are:

  1. chain sag:  35-40mm
  2. drive chain adjuster (the clamp on the adjustable rings in the swingarm):  35Nm
  3. rear sprocket nuts:  85Nm
  4. front sprocket nut:  132Nm
  5. rear wheel axle bolt:  85Nm
  6. 530 chain with 114 links (if that seems confusing, check THIS out)
  7. 18 tooth front sprocket (though 19 is recommended)
  8. 46 tooth rear sprocket


Wednesday, 16 July 2014

Chain and no Agony

Follow up to Chain & Agony and How to Size and Replace a Motorcycle Chain...


The whole process of breaking the chain and installing it took about half an hour this time around.  The o-ring chain I got was easy to break using the tool I picked up, and installing the new master link on the chain took only moments.  The three in one DRC Chain Tool I got (chain breaker, outer plate presser, rivet presser) was easy to use and looks good doing it.  It might be my favourite tool at the moment.


The chain-breaking tool comes with two sizes of /privet pushing bit.  The blue bit was for 500 sized chains (the Ninja's is
a 520).  You back off the big bolt and install the push pin, then use the smaller outer bolt to push the pin into the rivet on the chain. The tool automatically centres the rivet, so you're true all the way through.
The new chain was a 120 link chain, the Ninja takes 114 links, so that's 6 links off the end.  The hole in the
top is where the chain pin falls out once you've pushed it through.
Close-up of the blue chain bit .  There is a pin inside it that the outer bolt pushes through, pushing the rivet
right out of the chain.  Once the pin falls out the chain falls apart.  You end up with a clean break and two
inner chain links ready to be re-attached on the bike with a master link.
Six links of the 120 link chain removed.  One pin is pushed right out, the other was pushed
out far enough to dismantle the chain.
I installed the master link on the sprocket - it keeps everything lined up and made installation easy.  After
pressing on the side plate (gently, checking that it's in line with the other links and the chain has play in it),
the only tricky bit was installing the retaining clip, it took a few tries.  When you get it though you know for
sure because it makes a very satisfying click.
With the chain back on and lubricated, everything is tight.  The change to how the bike feels is subtle
but very satisfying.  The engine feels much more firmly connected to the back wheel now.  No sags and tight
spots like on the old chain.

I got this mighty DRC Pro chain
tool
at Royal Distributing in
Guelph
.


Now that I've got a handle on this and the right tools for the job, chains don't worry me any more.  This process also emphasized how surgical bike mechanics are.  I started off doing heavy equipment repair as a millwright and then did a couple of years in automotive.  Compared to that kind of work, motorcycle mechanics feel more like surgery than butchery.  Patience and a careful hand are more important than brute force.

Now more than ever I'm looking for an old bike to dismantle and rebuild to get an inside feel for how motorbikes go together.