Showing posts with label motorcycle sprockets. Show all posts

Sunday 2 January 2022

Changing Motorcycle Chain And Sprockets


I've done chains before but not sprockets.  It's a fairly straightforward bit of work you can do yourself in your shed/garage.  In this case I'm doing both sprockets and chain on my 2003 Triumph Tiger 955i which has over 80k on it.


With the bike on its centre stand I removed the rear tire.


I picked up a chain breaking and installation tool a couple of years ago and it has more than paid for itself.  It has pin sets that push chain pins out to break the chain (it keeps all the hardware in the handle so for the two+ years I don't use it I'm not losing parts).

It also has drop in pads that let me press new rivet chain connectors together.


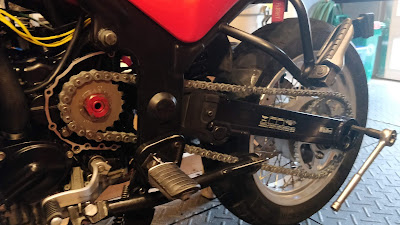
The new vs. the old front sprocket.  The new one is 19 teeth, the old one 18.


The new front sprocket on the motor.  These are the parts I used:

RK 530 MAX-O O-Ring Chain Natural 114            $101.99
JT Steel Rear Sprocket 46T (530) JTR2010.46    $74.99
JT Steel Front Sprocket 19T (530) - JTF11           $80.19 (all prices CAD)

The '03 Tiger takes a 114 link chain, a 46 tooth rear sprocket and an 18 tooth front sprocket stock.  I saw a suggestion online that going to a 19 tooth front sprocket calms down the bike a touch (it can be jumpy off the line) while also revving a touch slower while cruising which should improve mileage a bit.


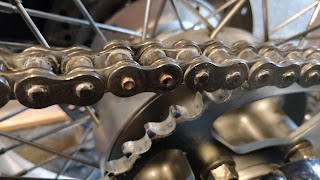
Not bad for the original stock rear wheel with over 80k on it, eh?  If you think modern Triumphs aren't well put together, this one was, and with quality parts.
I've had these on the bike since I got it over 30k ago.  Still not in terrible shape.  I've seen sprockets torn to shreds - some people must be very heavy handed on the controls to strip a socket like that.  I've had the Tiger pulling the front wheel off the ground under acceleration so it's not like I'm soft with it (it's getting this drive train maintenance because the old chain had stretched in places).  I'm curious to see and hear how the new parts work.


The new chain and sprockets on.


The connecting link (see it?) is pressed into place with the DRC chain tool which also pushes links together as well as pulling them apart..


The many directions and warnings on the back of the chain box.
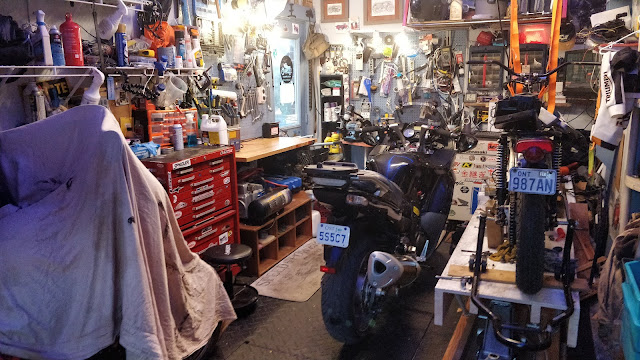
The Tiger had a deep maintenance last year, so this year it only needed the chain & sprockets.  It's back under the blanket waiting for a break in the snow for a cheeky early-spring ride.  Next up is doing the brakes on the Kawasaki, then I'm into rebuilding the Amal carbs on the 50 year old Bonneville winter project.

If you're looking for torque settings and parts details for a 2003 Triumph Tiger 955i while doing a sprocket and chain, here they are:

  1. chain sag:  35-40mm
  2. drive chain adjuster (the clamp on the adjustable rings in the swingarm):  35Nm
  3. rear sprocket nuts:  85Nm
  4. front sprocket nut:  132Nm
  5. rear wheel axle bolt:  85Nm
  6. 530 chain with 114 links (if that seems confusing, check THIS out)
  7. 18 tooth front sprocket (though 19 is recommended)
  8. 46 tooth rear sprocket


Friday 11 July 2014

How to Break/Resize/Install a Master Link on a Motorcycle Chain

A 2007 Ninja 650R with its pants down (chain and front
sprocket cover removed)
If you've never done chains and sprockets on a motorcycle before, they are complicated.  Being an open part of the drive system, they offer a relatively easy way to modify your bike's performance.  With smaller (faster) sprockets you can produce a revvier, shorter geared engine.  With a shorter chain you can close up your wheel-base creating a bike more willing to change direction.  Chains and sprockets are a bike fettler's delight.

On top of sprockets, you also have a pile of chain choices.  O-ring chains are the cheaper, lower efficiency alternative, while X-ring chains offer more efficiency and less maintenance at a higher cost.  They also come in a rainbow of colours and a variety of sizes from little dirt bikes all the way up to thousand plus cc super-bikes.  


Chain sizes and dimensions
From little dirt bikes to bike motors.
Chain sizing is based on the width of the chain and the length between the pins in the chain.  You've got match all these up with the right sprockets or it won't all fit together.  With so many factors in play, it pays to get a handle on chain mechanics before you take a run at changing the chain on your motorbike.

Here's a primer on how to break a chain.  Some people say cutting a chain but you aren't cutting it, you're breaking it by popping the rivet out and dismantling the chain links.

How to Break a Chain:

  • If you're removing your old bike chain, find the master link (it should be the one that's different from all the rest)
  • Put a chain breaking tool on the chain and push the rivets out - do a bit on each side at a time until the chain 'breaks' open.  I did this with a bicycle chain breaker (see bottom) and it worked fine.
  • Once you've 'broken' apart the master link the chain will come apart and you can pull it through and free of the bike.

To reduce chain size on a motorcycle:
  • if you have a 520 or smaller chain and a good motorcycle specific chain link breaking tool you can simply push the rivet through (see the video at the bottom)
  • if you don't have specific tools, grind or file down the rivet and then tap it out with a hammer and punch pin.  If you grind down the rivet you can also use a bicycle weight chain breaker (see a pic at the bottom) to push out the worn down rivet.
  • triple check which link you want to pull and use something like Gearing Commander to make sure you've got the right number of links in your chain.  (This is what I'm kicking myself for not doing).
  • Using the bicycle chain puller on filed down pins, I pushed on side and then the other and then repeated the process and the rivet popped loose along with the outer chain links.  Since you're only filing down the outer link (which you'll chuck after) it doesn't matter if you file into it a bit.
  • With the chain dismantled you should now have two inner links ready for a new master link.
Installing a New Master Link:
  • Install the little rubber washers on the master link rivets and slide it onto the chain - do this on the sprockets as it's easier to do with some tension on the chain.
  • put the last two rubber washers on and the end plate and then use the chain tool or some other kind of clamp to press the side plate on.
  • if you've got a rivet type master link you need a light hand and some patience to press in the rivet ends.  If you're too heavy handed you'll bind the chain and swear a lot.
  • The more traditional type of master link is the kind I was familiar with from bicycles.  It comes with a slid on clip.
Don't freak out if you've got the rivet type master link, just make sure you have the right tool handy.  The rivet type link is very strong and performs pretty much like all the other links if installed properly, which is why you'll find it exclusively on high performance chains.  Check out the youtube video at the bottom for a good primer on how to do this.

If you take your time and work through it slowly, you'll have a new chain on in no time.  If you want to get into sprockets the rears are remarkably easy to do.  When you remove the rear wheel bolt the wheel drops down and the floating rear caliper on the Ninja 650r simply disengaged and I hung it on the frame.  You can then remove the wheel.  The rear sprocket is held on with your typical nuts and was easy to swap out.

This front sprocket is a f&#*er.
The front sprocket was in good shape, so I gave up on it.  Others online have said that they are pretty straightforward if you have an air gun, but even with a breaker bar I couldn't budge the damn thing and I can pick up a car by the fender.  You remove the front sprocket by bending back the holding washer, putting the bike in gear, stepping on the rear break to hold everything still and removing the nut (it's a good fit on a big 27mm bit).  If there's a trick to this (other than getting a compressor, air tank and air tools), I'd love to hear it.

Follow up with Chain And No Agony for how easily the new chain went on with the right tools.


SOME CHAIN & SPROCKET LINKS THAT MIGHT BE HANDY:

If you've only got a bicycle chain
breaker, file or grind down the rivets
first before you push them out.
If you've broken bicycle chains before you know the basics.  Motorcycle chains are much heavier duty so the process requires stronger tools capable of dealing with stronger rivets.  If you have a bicycle chain breaker you just have to take your time and file down the rivet you're going to push through first.  It took me a couple of minutes of filing to do this.  Lazy people on the internet say buy a Dremel.  If you're lazy, that's what you should do.

VIDEOS

A video on how to break a motorcycle chain (skip to 35sec when the mechanic comes in) in order to re-size it using a motorbike specific tool

A good primer on how to install a master link (and how the pressed, rivet type master links work)

How to measure a motorcycle chain

Hillbilly mechanics: how to do a master link without special tools.

LINKS

Gearing Commander - a handy webpage that lets you compare different sprocket and chain combinations
http://www.gearingcommander.com/

DID company chain guide:

http://www.didchain.com/chainSpecs.html

Motorcycle Chain primer on about.com

http://motorcycles.about.com/od/motorcyclemaintenanc1/ss/Chain_Maint.htm

Wikipedia's history and technically detailed chain description
http://en.wikipedia.org/wiki/Roller_chain

Layout of a roller chain: 1. Outer plate,
2. Inner plate, 3. Pin, 4. Bushing, 5. Roller
An exhaustive history of chains!
ttp://chain-guide.com/applications/1-5-2-motorcycle-chain.html

How Motorcycles Work's awesome chain diagram: