Thursday 31 July 2014

Track Day Planning

I'm pretty keen to go do a track day, and I have a buddy who is the same.  The Grand Bend Motorplex does motorcycle open lapping on its track.   I found GBM through motorcycletrackdays.ca.  The upcoming SOAR racing event at Grand Bend offers open motorcycle lapping prior to their weekend events.  That might be a good time for two nØØbs to go as there will be experienced track day people on hand to help us fumble through the technical inspection.

I figured it would be a show up on what you rode here on and go on the track, as you would with a car, but bikes seem a bit more involved.  Here is the list of motorcycle specific technical requirements:
  • Is your kickstand secured? Your spring return isn’t enough on a racetrack. Use a plastic strap tie or duct tape to secure your kickstand in the up and locked position before you come to tech. 
  • Tape over your speedometer. It’s the rule.
  • Make sure your throttle returns quickly and positively. We want to see it snap back when you release the grip. 
  • Change your antifreeze for straight water. If your bike puts antifreeze on the surface, it shuts the entire track down and may result in suspension. Antifreeze is 100 times worse than water on asphalt (It’s like wet ice). Swap it out for water before you proceed to tech. 
  • Tape over or remove lights, signal and mirrors. They all shatter and they all puncture tires. 
  • Brakes: Make sure they’re properly functioning, front and back, with no leaks, because we’ll check. 
  • Chain: Check your drivechain adjustment. Too tight or too loose means breakage. Refer to manufacturer’s specification. Also, check your master link. A rivet style link is preferred, but a standard ‘slip on’ while suffice if you put a dab of silicone on the key to secure it. 
  • Now that you’ve ensured your brake lines don’t leak, check the rest of the bike. Your engine and suspension components must also be leak free. 
  • Overall track worthiness: These are the small things that can lead to disaster. Loose lines can snag. If it can flop around, it can be snagged and lead to a crash. 
  • Body: All body parts must be secured or removed. 
  • Mechanical: Check your fasteners and ensure they’re secured at recommended torque. 
  • Tires: Properly inflated, with structural integrity intact (sidewall, tread, steel-belts, bulges).
Most of that is common sense/maintenance, but there are a couple of bits that will require some thought.  Tying up the kickstand is all well and good, but that means you're bringing a rear stand to keep the bike upright.  Swapping out the antifreeze also means you need to bring some distilled water.  Some tools, disposable gloves and fluids would probably be a good idea too.  Suddenly the back of the bike I want to ride to the track day is looking like a hardware store.  You wouldn't want to ride an hour and a half to a track to find out you don't have what you need to go around it.  Short of asking for a pit crew to accompany you in a four wheeler, riding solo to a track day seems difficult if not impossible.

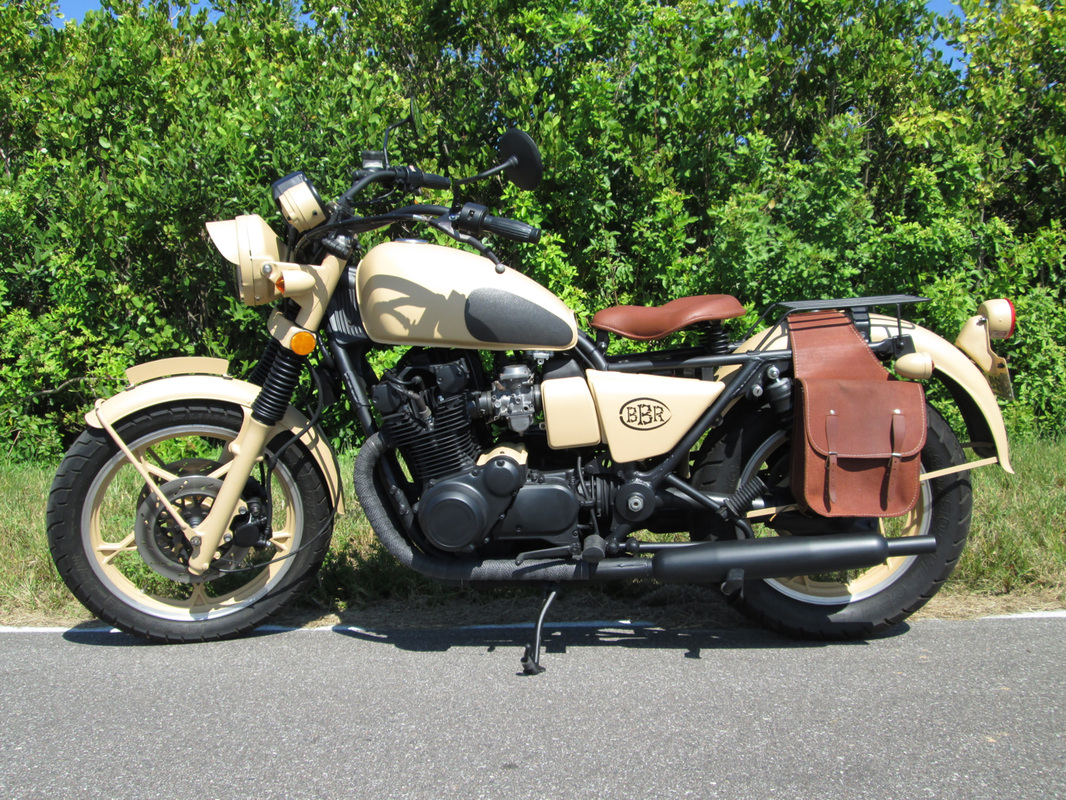
Of course, this leads you down the road to a trailer, which then begs the question, why use your road bike for track days when you can pick up an older sport bike for not much, not have to pay for road insurance on it and spec it out specifically for track days.  Stripped of lights and needless accessories like rear foot pegs and indicators, you'd be ready to ride as soon as you roll it off the trailer, and the machine would be tailored for the track.

I've been to several racing schools, but the one time I really got into it was while living in Akita, Japan.  Kyowa Race track was a small carting track deep in the mountains south east of the city.  Kazutoyo, a student of mine, was an avid racer (he came to Canada for a summer to participate in a Mosport racing mechanics program).  We'd go up there half a dozen times in the summer and spend the day hauling the carts around that bendy circuit as quickly as we could.

The vehicle of choice for the carts and the paraphernalia that went with them was a cargo van.  We'd be able to fit three people, the tools, the disassembled cart and spare tires and other odds and ends all in the van and head to the track.  Riding around at break neck speeds was awesome, but I have fond memories of all the fettling that when on in the pits too; it's all part of the race experience.

Ford Canada's handy Transit Van Builder got me all
set with a customized utility van that could carry two
bikes and gear with ease... things I'd do if I were rich!
Now that I'm thinking about doing a track day on two wheels I'm tempted to imitate those Japanese carting guys and get what I need to make a track day possible.  I've been wishing for a trailer several times this summer to haul lumber.  Having one on hand and a vehicle to haul it would be handy for more than just track days.  

Or just win the lottery and get the full on racing support van.

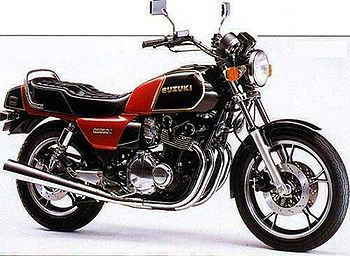
If Mechanical Sympathy were to go full on into racing, I'd grab that 1000cc VFR from Angus (in my Transit race van) and prep it for racing.  Stripping off all the lights and extras and minimizing it down to a race bike.  I'd be a dangerous man if I had more money.

In the meantime I'm still trying to look for ways to ride my Ninja to the track and do some laps without dragging along someone in a cage to support the activity.

Links:
Motorcycle track day primer: a good explanation of track days.
Beginner's Guide to Track Days in Ontario: a great checklist on how to approach track days - renting a bike is what I'm now looking into...

Friday 25 July 2014

KLR Curiosities

A super high mileage KLR, but it's pretty new (mid-00s).  Unclear on its mechanical details, other than it's very tired and the plastics and tank don't match.  

$1300 seems like a lot to pay for a bike in such condition with unoriginal parts (probably because it's been dropped hard).

If I got it I'd shelf it for a year while I broke it to pieces and rebuilt it.  I might go as high as $800, but I'll be spending a lot to give this tired old bike a second life.  I've asked the owner for info...

Followup:  I got a fantastic response from the owner.  The bike has been fettled to within an inch of its life.  The first owner took it from Alaska to Tierra del Fuego, and did the Demptster Highway.  The second and current owner has taken it to James Bay and various off-road adventures in the past couple of years.  It hasn't been dropped recently, but it's an off-road capable bike, so it's been down, once in Chile where they rider had to order in a new instrument cluster, the mileage is uncertain with the replacement instruments.  This bike has had a life, and now it's for sale in Southern Ontario.  

I suggested he sell it back to Kawasaki, this KLR shows what KLRs are capable of.

The mods list is extensive:
EM Doohickey
Upgraded headlight wiring harness with relay
Headlight cut out switch
Glass fuses replaced with blade fuses
Oversized side stand pad
Subframe bolt upgrade
Scott chain oiler
Progressive 420 Series rear shock
Instrument and idiot lights converted to LED
Choke relocation mod
Stainless front brake line
Headlight modulator (not hooked up but still in the fairing)
UNI air filter
LED plate light
Perelli M21 tires with lots of meat on them
Shell Rotella every 2500km or so

Wednesday 23 July 2014

Intercepting Possibilities

I just came across some dream project bikes.  There are a pile of '80s Honda Interceptors online this week, and an interesting little VT500.


Low mileage but not in working condition, just what I need to break down and rebuild!


Asking only $400, but it's a hike out the other side of Toronto.


For $700 there is a higher mileage but better cared for Interceptor just up in Angus that comes with all the shop manuals.


Or I can drop $700 on bits and pieces in Kitchener and put an Interceptor back together again, because dude took it apart and now has a garage full of unspecified parts.  Brilliant.  Seven hundred bucks might be a bit much to clean out his garage, though it's close by and it'd be easy to go pick up.  Might be a good choice further down the road, but not for a first project bike.


Another possibility is the Honda VT500.  This air cooled beauty is in great shape and would be a fantastic starting point for a cafe racer build.  It's been well taken care of and I could probably ride it home from out Brockville way.


Lots of possibilities on Kijiji this month...

Wednesday 16 July 2014

Project Bikes

I got a couple of nibbles on Kijiji from my 'got an old bike in your shed you want to get rid of?" ad...

1979 Suzuki GS850, not running, asking $500


A review on this specific bike from the UK shows a lot of love for it.

Here is a history of the GS850 series of bikes from Suzuki.  It's a touring bike and weighs in at around 600lbs.  With a shaft drive and that weight it isn't exactly ideal as a cafe racer rebuild.  It is however air cooled and those pipes are lovely. Something other than a cafe racer could be

the goal.  This military style build is interesting.

As a bobber style bike with a saddle, the GS850 has some potential!


1986 Honda Shadow 1100cc, no info given, asking $500


Another big cruiser (many people seem to have these old lumps lying around).  Shaft drive, massive motor, covered in things.  Everything I don't like in a motorcycle.


If these get customized, it seems to be along chopper lines.  I think I'm holding out for something a bit less, um, big.

Chain and no Agony

Follow up to Chain & Agony and How to Size and Replace a Motorcycle Chain...


The whole process of breaking the chain and installing it took about half an hour this time around.  The o-ring chain I got was easy to break using the tool I picked up, and installing the new master link on the chain took only moments.  The three in one DRC Chain Tool I got (chain breaker, outer plate presser, rivet presser) was easy to use and looks good doing it.  It might be my favourite tool at the moment.


The chain-breaking tool comes with two sizes of /privet pushing bit.  The blue bit was for 500 sized chains (the Ninja's is
a 520).  You back off the big bolt and install the push pin, then use the smaller outer bolt to push the pin into the rivet on the chain. The tool automatically centres the rivet, so you're true all the way through.
The new chain was a 120 link chain, the Ninja takes 114 links, so that's 6 links off the end.  The hole in the
top is where the chain pin falls out once you've pushed it through.
Close-up of the blue chain bit .  There is a pin inside it that the outer bolt pushes through, pushing the rivet
right out of the chain.  Once the pin falls out the chain falls apart.  You end up with a clean break and two
inner chain links ready to be re-attached on the bike with a master link.
Six links of the 120 link chain removed.  One pin is pushed right out, the other was pushed
out far enough to dismantle the chain.
I installed the master link on the sprocket - it keeps everything lined up and made installation easy.  After
pressing on the side plate (gently, checking that it's in line with the other links and the chain has play in it),
the only tricky bit was installing the retaining clip, it took a few tries.  When you get it though you know for
sure because it makes a very satisfying click.
With the chain back on and lubricated, everything is tight.  The change to how the bike feels is subtle
but very satisfying.  The engine feels much more firmly connected to the back wheel now.  No sags and tight
spots like on the old chain.

I got this mighty DRC Pro chain
tool
at Royal Distributing in
Guelph
.


Now that I've got a handle on this and the right tools for the job, chains don't worry me any more.  This process also emphasized how surgical bike mechanics are.  I started off doing heavy equipment repair as a millwright and then did a couple of years in automotive.  Compared to that kind of work, motorcycle mechanics feel more like surgery than butchery.  Patience and a careful hand are more important than brute force.

Now more than ever I'm looking for an old bike to dismantle and rebuild to get an inside feel for how motorbikes go together.

Friday 11 July 2014

How to Break/Resize/Install a Master Link on a Motorcycle Chain

A 2007 Ninja 650R with its pants down (chain and front
sprocket cover removed)
If you've never done chains and sprockets on a motorcycle before, they are complicated.  Being an open part of the drive system, they offer a relatively easy way to modify your bike's performance.  With smaller (faster) sprockets you can produce a revvier, shorter geared engine.  With a shorter chain you can close up your wheel-base creating a bike more willing to change direction.  Chains and sprockets are a bike fettler's delight.

On top of sprockets, you also have a pile of chain choices.  O-ring chains are the cheaper, lower efficiency alternative, while X-ring chains offer more efficiency and less maintenance at a higher cost.  They also come in a rainbow of colours and a variety of sizes from little dirt bikes all the way up to thousand plus cc super-bikes.  


Chain sizes and dimensions
From little dirt bikes to bike motors.
Chain sizing is based on the width of the chain and the length between the pins in the chain.  You've got match all these up with the right sprockets or it won't all fit together.  With so many factors in play, it pays to get a handle on chain mechanics before you take a run at changing the chain on your motorbike.

Here's a primer on how to break a chain.  Some people say cutting a chain but you aren't cutting it, you're breaking it by popping the rivet out and dismantling the chain links.

How to Break a Chain:

  • If you're removing your old bike chain, find the master link (it should be the one that's different from all the rest)
  • Put a chain breaking tool on the chain and push the rivets out - do a bit on each side at a time until the chain 'breaks' open.  I did this with a bicycle chain breaker (see bottom) and it worked fine.
  • Once you've 'broken' apart the master link the chain will come apart and you can pull it through and free of the bike.

To reduce chain size on a motorcycle:
  • if you have a 520 or smaller chain and a good motorcycle specific chain link breaking tool you can simply push the rivet through (see the video at the bottom)
  • if you don't have specific tools, grind or file down the rivet and then tap it out with a hammer and punch pin.  If you grind down the rivet you can also use a bicycle weight chain breaker (see a pic at the bottom) to push out the worn down rivet.
  • triple check which link you want to pull and use something like Gearing Commander to make sure you've got the right number of links in your chain.  (This is what I'm kicking myself for not doing).
  • Using the bicycle chain puller on filed down pins, I pushed on side and then the other and then repeated the process and the rivet popped loose along with the outer chain links.  Since you're only filing down the outer link (which you'll chuck after) it doesn't matter if you file into it a bit.
  • With the chain dismantled you should now have two inner links ready for a new master link.
Installing a New Master Link:
  • Install the little rubber washers on the master link rivets and slide it onto the chain - do this on the sprockets as it's easier to do with some tension on the chain.
  • put the last two rubber washers on and the end plate and then use the chain tool or some other kind of clamp to press the side plate on.
  • if you've got a rivet type master link you need a light hand and some patience to press in the rivet ends.  If you're too heavy handed you'll bind the chain and swear a lot.
  • The more traditional type of master link is the kind I was familiar with from bicycles.  It comes with a slid on clip.
Don't freak out if you've got the rivet type master link, just make sure you have the right tool handy.  The rivet type link is very strong and performs pretty much like all the other links if installed properly, which is why you'll find it exclusively on high performance chains.  Check out the youtube video at the bottom for a good primer on how to do this.

If you take your time and work through it slowly, you'll have a new chain on in no time.  If you want to get into sprockets the rears are remarkably easy to do.  When you remove the rear wheel bolt the wheel drops down and the floating rear caliper on the Ninja 650r simply disengaged and I hung it on the frame.  You can then remove the wheel.  The rear sprocket is held on with your typical nuts and was easy to swap out.

This front sprocket is a f&#*er.
The front sprocket was in good shape, so I gave up on it.  Others online have said that they are pretty straightforward if you have an air gun, but even with a breaker bar I couldn't budge the damn thing and I can pick up a car by the fender.  You remove the front sprocket by bending back the holding washer, putting the bike in gear, stepping on the rear break to hold everything still and removing the nut (it's a good fit on a big 27mm bit).  If there's a trick to this (other than getting a compressor, air tank and air tools), I'd love to hear it.

Follow up with Chain And No Agony for how easily the new chain went on with the right tools.


SOME CHAIN & SPROCKET LINKS THAT MIGHT BE HANDY:

If you've only got a bicycle chain
breaker, file or grind down the rivets
first before you push them out.
If you've broken bicycle chains before you know the basics.  Motorcycle chains are much heavier duty so the process requires stronger tools capable of dealing with stronger rivets.  If you have a bicycle chain breaker you just have to take your time and file down the rivet you're going to push through first.  It took me a couple of minutes of filing to do this.  Lazy people on the internet say buy a Dremel.  If you're lazy, that's what you should do.

VIDEOS

A video on how to break a motorcycle chain (skip to 35sec when the mechanic comes in) in order to re-size it using a motorbike specific tool

A good primer on how to install a master link (and how the pressed, rivet type master links work)

How to measure a motorcycle chain

Hillbilly mechanics: how to do a master link without special tools.

LINKS

Gearing Commander - a handy webpage that lets you compare different sprocket and chain combinations
http://www.gearingcommander.com/

DID company chain guide:

http://www.didchain.com/chainSpecs.html

Motorcycle Chain primer on about.com

http://motorcycles.about.com/od/motorcyclemaintenanc1/ss/Chain_Maint.htm

Wikipedia's history and technically detailed chain description
http://en.wikipedia.org/wiki/Roller_chain

Layout of a roller chain: 1. Outer plate,
2. Inner plate, 3. Pin, 4. Bushing, 5. Roller
An exhaustive history of chains!
ttp://chain-guide.com/applications/1-5-2-motorcycle-chain.html

How Motorcycles Work's awesome chain diagram:


Chain and Agony, or, the End of Local Parts Suppliers

I've got to admit I'm a bit pissed off.  After trying to wrap my head around chains and sprockets online I decided to buy locally and have a chat with the parts desk at my regional dealer.  Since it was my first time doing a chain/sprocket replacement I figured I'd pay the extra cost and get some face to face advice.

Trying to get details out of the parts-desk guy was like pulling teeth.  He seemed frustrated with my questions and didn't offer up much.  I guess the logic there was, 'just bring it in to service.'  I left paying over $300 taxes in for what would have cost me $240 online, but was none the wiser.  I was at least assured that these were the specific parts I needed.

After a series of confusing and frustrating situations, here is the advice I wish the parts guy at the dealer had given me:

The Ninja 650r uses a 114 link chain, he gave me a 120 link chain but told me this was the stock chain especially for my bike.  He's not wrong, but he didn't tell me I'd have to 'break' the chain.  Here is how I wish it'd gone down:


You're going to need one of
these to break and master
link up a motorcycle chain.
It isn't expensive (about
sixty bucks)
Parts guy: "I'm ordering you the chain size for your bike, but it comes with six extra links.  When it comes in I'll get one of the guys to break the chain so it fits your bike specifically.  If you want I'll even ask him to do it when you come to pick it up so you can see how he does it."

He could have sold me a $60 tool (probably for more) and I would have left knowing what I was getting into, instead all I got was the exasperated face.  

When I hung the chain on the bike it was way too long (it was a 120 link chain going on a 114 link bike, but I didn't know that at the time).  I had to go digging to find out why the chain 'specific to my bike' obviously didn't fit.

This experience asks a larger question about brick and mortar stores versus shopping online: why would I spend the gas and time driving there and then pay the extra 20% for the experience if I can pay less online?  If there is nothing value added in me bothering to buy at full retail locally, then why would I do it?

Second up, I wish he'd have offered me some pragmatic advice for doing my own chain work:

Parts guy: "Is this your first motorcycle chain?  It's pretty easy to mess it up.  I'd suggest going for a basic O-ring chain for your first go.  If you botch the job you're only out fifty bucks and you've learned something."

I ended up buying the bells and whistles X-ring chain on his advice, and then breaking it a link too short (after looking up how to do that on that paragon of customer support, the internet).  It's an expensive learning experience breaking a chain so that it doesn't fit my bike.  At least it's still over 110 links and a 520 sized chain, meaning it'll work on a lot of other bikes.  Now I've not got to decide whether to seal it up and wait for an ideal use or try and resell it (at a loss).

One way or another, I don't think I'll be driving down to the local dealer again for parts, I get my questions answered with more patience on the internet, which beggars belief.

Note:  a couple of days later I went online and picked up a basic O-link chain from the same Japanese chain manufacturer from
Canada's Motorcycle (35% cheaper than the equivalent chain from the dealer).  In a matter of moments the chain was on its way (free delivery).  It got here in the same amount of time it took the dealer to order it in (but I didn't have to drive down to the city twice).  I'm all for buying locally and helping out the area economy, but if local business don't realize how they can add value to a local buying experience they're going to kill it stone dead.

Note²:  maybe it's only a motorcycle dealership thing.  I went to RONA to make an order for deck parts and they couldn't have been more fantastic, same with Universal Rentals in Fergus, equally awesome customer service.  Are motorbike shops just too cool to care?

Note³: See the followup post on how to break/shorten/master link a new bike chain for how-tos. 

Tuesday 8 July 2014

Naked Versys Ninja: Riding Many Demo-Bikes

At Kawasaki's Demo-Day last weekend I threw a leg over as many different bikes as I could.  I'm looking for my second bike and I have an opportunity to make a much more educated decision this time, however my expectations didn't always match my riding experience, although with my current crush they exceeded them:

Kawasaki Z1000


As pretty in person and a treat to ride.
I started on a bike I like so much I've got a poster of it up in the garage: the Kawasaki Z1000.  Riding a 1000cc bike spoiled me for the rest of the day.  You can be inattentive with gear changes and the big four just pulls away with turbine like insistence.  The wide bars made handling light and responsive and I didn't find the gearing as twitchy as I've read it is.


The saddle most wanted.

It's not often that someone you're smitten with is as impressive in person, but the Z1000 rides as special as it looks.  It pulls hard, feels wonderfully poised and seems to enjoy moving as much as the rider, it has the same kind of cheerful internal combustion that my Ninja has.


Our 20-30 minute round trip down country roads and through villages put this naked beauty in its glory.  It's a bike for riding not a bike for covering miles at speed, but if you're looking for an interactive riding experience this is it.  As a solo riding machine that puts the focus on the experience, you can't get much better.  It's an emotional as well as a mechanically satisfying ride.  When I've been riding long enough that I can afford to insure one, it'll be on my short list.


Kawasaki Versys


The big Versys with a wonderfully smooth four
cylinder and a very neutral riding position.
I've been curious about the Versus for a while now, it's Kawasaki's all-rounder.  Before taking any out I was talking to the Kawi-rep and he said they get photos of people riding Versys to the ends of the earth, it's a very capable all-round machine.

I'd initially only signed up for a 650cc test ride, but the rep was able to get me onto a VIP ride with the 1000cc, and I'm glad he did.  The big Versys is a tall bike with great wind protection, tall handlebars and comfortable seating position.  Like the Z1000, that big four is turbine smooth and pulls hard at any RPM.  It's an easy bike to ride and doesn't show its weight other than the somewhat awkward ride height.


My 32" inseam just touched the ground but I couldn't flatfoot.  On a bike this tall I'd expect more relaxed geometry in my legs when I'm on the pegs, but they were bent about as much as they are on my Ninja.  Short of getting on a cruiser I'm going to have to assume I'll be folding myself onto most bikes.  If the foot pegs are high enough to allow the bike to lean into corners meaningfully then leg geometry is going to be bent.


The little Versys, a close cousin to my Ninja with
the same engine and many shared parts.
Overall I found the big Versys a nice surprise.  It's only 33 kilos heavier than the 650cc bike and has much more presence, comfort and wind protection.  This would be a bike that could cover long miles with ease, yet is higher off the ground and able to traverse even rough terrain.

I was talking to a rep from Rally Connex Adventure Tours about the Versys and he suggested it wouldn't take much to create a Versys Scrambler.  His main concern was the soft underbelly full of exhaust pipes - with a modified exhaust that runs up the side high on the bike, the Versys might become a real RTW contender.

The little Versys was the one I was keen to try.  It has the same engine as my Ninja, which I think sounds great, is super efficient and offers great power to weight.  I expected a light, quick bike with a more neutral riding position suitable for longer rides.


I was surprised at how rough the little Versys was.  Perhaps I was spoiled by riding the bigger bike first, but on the ride home back on my own Ninja it had none of the buzziness of the 650cc Versys.  The seat was hard and high and the riding position is less leaned over than on the Ninja, but not by much.  When revved it I found a lot of vibration coming back through the handlebars and seat, to the point where I didn't want to rev it and actually stalled it at a traffic light (my only stall of the day).  Perhaps it's a new engine and it hasn't been worked in yet, but the bike I was most curious about was the one I had the least interest in after the ride.  It was uncomfortable, felt under-powered and didn't offer the more relaxed rider geometry that I was hoping for, a real disappointment.


Kawasaki Ninja 300


I would have signed up for a ride on the Ninja 1000 or the ZX-14r, the former because it has gotten good reviews as an athletic all-rounder, the later because it's bonkers and I've got a crush on it, but instead I thought I'd try the Ninja 300 to see what such a wee bike is capable of.  It turns out, quite a lot!  Trying to keep up with everyone else on two to three (to five!) times the displacement was tricky until I figured the bike out.

The little Ninja is unbelievably light and feels a weak until you get half way up the rev range, then that little motor comes to life.  Five minutes in I wasn't letting it drop below seven thousand RPM, and I hit the rev limiter at a stratospheric 13,000 RPM a couple of times before I figured out how to keep it close by the sound of the engine (which is surprisingly smooth and eager).

The wee Ninja is a limited machine, no doubt, but when you wring its neck its also a very entertaining one.  It was nice to end my day of rides with such a pleasant surprise.


There was such a mix of bikes at this demo ride that I'm disappointed that I couldn't try them all.  From the ZX-14r super-bike to something as relaxed as the Vulcan cruiser, I'm more curious than ever as to how all these bikes do the same job differently.  Even up the sports/adventure end of things where I did my riding, the differences in the bikes were astonishing.

As I mentioned before, if you have a chance to do a demo-day, I highly recommend it.  The experiences gained there make finding a bike that suits you a matter of fact and hands-on preference rather than faith and opinion.

Monday 7 July 2014

Demo Daze

Kawasaki Canada's Demo-Day, if there is one in
your neighborhood, I highly recommend heading
out for a day of diverse riding experience.
There aren't many opportunities to ride motorcycles when you first start out.  If you're a new rider buying even a second hand bike generally happens without a test ride.  Based on very loose ideas of what fits and the advice of others, you wind up on a machine with little or no idea of how it might work with you.  I purchased my Ninja 650 without test riding it and I often wonder if I would have had I a chance to ride other bikes.

This past Saturday I spent most of the day at Two Wheel Motorsport in Guelph riding a variety of bikes from Kawasaki Canada.  Kawasaki's demo-days lets you sign up to ride your choice of pretty much their full range of bikes, and it only costs you a donation to the Canadian Cancer Society.


The demo-day setup is a well oiled machine with a Kawasaki trailer set up along with tents to cover the bikes.  After a briefing on what to do if separated and the expected 'don't ride like a fool' safety talk, you're ready to go.  The ride is 20-30 minutes and took us through country roads, small towns and offered some twisty bits as well as opportunities to open up the bikes.  One of the safety tips before we began was to not grab a handful of brakes if you're coming off an older bike.  The more athletic machines have such good brakes that you might launch yourself if you grab them too hard.


After the ride you get a debrief and chat with the Kawasaki people there who are very responsive to rider feedback, often taking notes on what people are saying.  Apart from the opportunity to ride all of these new machines, it's also nice to see a company so interested in getting ground-level rider feedback.

The people at the demo-rides ranged from early twenties to seniors and on some of the rides there were as many female riders as male.  Some people went out on the same kind of bike that they rode in on, others were obviously looking to try something specific, and then there were the few ding-dongs like me who just wanted to try as many different bikes as they could.

I ended up riding everything from a Z1000 naked sport bike to the all rounder Versys and even a little Ninja 300.  I'll go into details on subsequent posts, but I'll end this one saying, if there is a demo-day going on in your area, head out for a couple of three hours of riding that will expand your appreciation of just how different motorbikes can be.  If they're all run as well as Kawasaki's was, I'll be heading out to others at earliest opportunity!


A sea of green... a chance to ride everything from a KLR650 to a ZX-14r or a Vulcan!