Showing posts sorted by date for query xs1100. Sort by relevance Show all posts

Wednesday 16 March 2016

An Adventurous, Versatile, Always-on Versys

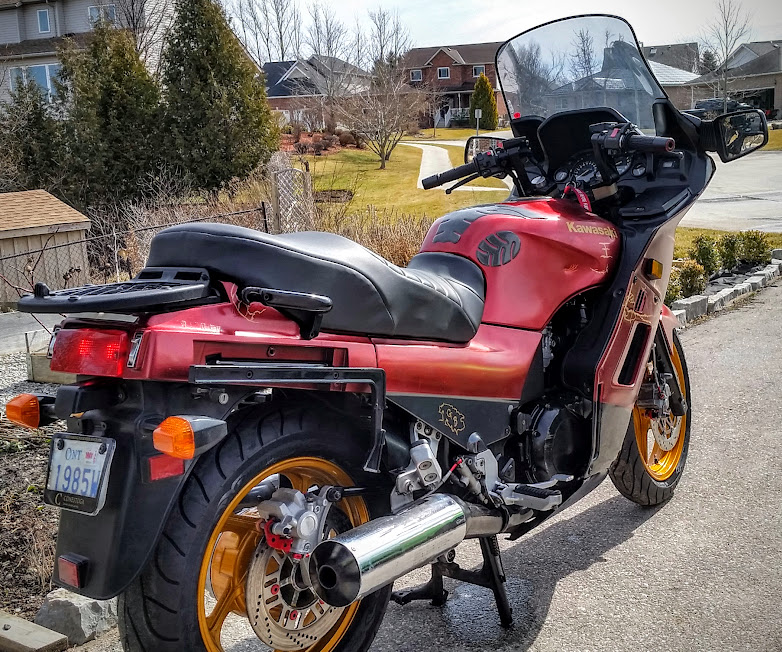
Two bikes not being used...
With the ongoing frustrations with trying to run a 22 year old bike as my daily rider I'm thinking of rearranging things so that I have a more functional motorbike stable.  At the moment I've got a KLX250 that I don't throw a leg over very much and isn't a popular choice with my pillion.  I've also got the big old Yamaha project bike that isn't getting any attention because I'm spending all my garage time working on the Concours.  Rejigging things to have a more functional stable is on my mind.

I miss having I.T. on at least one bike - having an onboard computer means the bike will self regulate and run more consistently.  Being a computer teacher means I'm not really scared of digital tech either, so I'd welcome it back.

The process might look like this:  sell the KLX, get the XS1100 operational and sell it too, and sell  the little Yamaha my son has never ridden.  In a perfect world I'd bring in about $4000 with those bikes.

What I'd be looking for is a second bike that could do basic commuting duties including two-up, would run all the time, and could ride a wider range of roads than the Concours is comfortable on.  As a road tool the Concours takes some beating (when it works).  It'll tour two up comfortably with lots of room for luggage, cover highway miles with ease and makes for a surprisingly agile back road weapon when riding alone.  What it needs is a break from the demands of being an always on motorcycle (it's twenty-two years old!).

That always on motorcycle should be light with a fuel injected/modern engine.  Of course the Ninja was those things, though it was a very road focused machine as well.  Kawasaki makes the Versys, based on the same ER6 chassis as the Ninja but with an enduro riding position.  With a few tweaks that bike could become the light-weight all-rounder I'm looking for.  At only 180kg, the Versys 650 is a mighty light, very dependable bike.

Where would I find a Versys?  They're about.  There is a well cared for '07, albeit with pretty high kilometres, for under three thousand over in Kitchener.Starting there I could build out an adventure Versys.  There are a lot of people doing something similar...


A great thread to follow on an adventurous Versys

high/scrambler pipe inspiration


LINKS

http://www.topspeed.com/motorcycles/motorcycle-news/studio-motor-gives-us-the-kawasaki-versys-650-scrambler-ar169995/picture634237.html

http://bikebrewers.com/kawasaki-versys-650-scrambler-studio-motor/

http://advrider.com/index.php?threads/one-more-versys-adventure.1078100/#post-27148119


Sunday 13 March 2016

There is always one more thing...

The open road awaits, and it's still waiting...
Recent frustrations with the twenty two year old Concours had me saying yesterday, "I like doing mechanical work, but sometimes I just want to go ride a fucking motorcycle."  It was a day in the mid teens Celsius (almost 60 Fahrenheit), and the sound of motorcycle engines could be heard on distant roads.  After spending the winter redoing the brakes, wheels and bearings, I got the Concours back on its feet only to find the carburetor has gone off.  The bike is running lean, not fueling nicely and back-fires when coming off throttle.  Instead of going out for a ride on one of the first nice days of the year, I was popping and swearing my way up and down the road by my house trying to get the carb to play nice.

Some vacuum diagrams on there, but not where they go.  Another
suggestion for lean burning/back firing conditions (which I have) are
the air cut valve (highlighted).
Some research into Concours carbs produced a baffling array of opinion and vitriol.  It appears that no one who works at a dealership has the experience or time to do carbs properly any more, and the carbs on the Concours are fantastically complicated.

I've done carbs before on cars, and labyrinthine vacuum tubes aren't a problem when you have a diagram to follow, but Clymers doesn't include one in their manual (unless it's for California bikes), and the Kawasaki diagrams show bits of vacuum diagram spread across the valve head blowup, the carb blow up, the fuel tank blowup, air box blow up and others.  Needless to say, trying to chase vacuum connections across half a dozen diagrams isn't easy.

Today I'm taking the fairing I just put on back off, removing the gas tank (again) and trying to make sense of the vacuum tubes.  If nothing obvious presents itself it'll be time to remove the carbs and go deeper.  I just did something similar on the XS1100 in the fall.  I haven't had time to work on it since because I'm spending all my garage time on the Concours.

I'm starting to think one project bike is enough.  The other one needs to be modern, dependable and there when I need it so I can, sometimes, you know, just go ride a damned bike.

Sources for Concours carburetor and vacuum information:

As usual, CoG is the place to go first:
http://forum.cog-online.org/index.php?topic=27077.0
http://forum.cog-online.org/index.php?topic=38095.0
http://forum.cog-online.org/index.php/topic,11914.0.html

CoG wisdom on Concours carbs:
Normally it is caused by dirty carbs and and not being sync'd properly. The dirty part can be from just a few days of sitting due to the ethanol evaporating....

it's very likely during the "cleaning" they did not dissassemble the air-cut valves from the 2 carb bodies prior to spraying with volatile carb cleaner. internal to each of those housings is a very delicate diphragm, not unlike the ones that lift the slides....during this process they damaged them, and at the least, never cleaned the rod attached to those diphragms that during decell, when the diphragm moves, opens a port to add fuel to the intake tract to preclude/prevent a "lean burn popping" upon decell. That is the sole purpose of those 2 valves, when they don't function, you get this result.

Check the vacumn stuff like you already mentioned. I had a back fire for a while, peeked under the tank, found the rubber cap on the #3 carb was split. Just for the fun of it, replaced all the hoses while there, good to go now.

You Cannot do away with the reed valves entirely unless you tap the ports in the actual valve cover and thread in some set screws. The easier way here is to leave the reed valves and metal covers on the valve cover, and remove all the vacuum hosing associated with the pair valve. Go to your local auto parts store, and pick up three 5/8" "heater core block off caps". They look like big vacuum caps, and also some 3/16" regular vacuum caps. Using the 5/8" Cap off the 2 ports left on the valve cover, and insert one backwards into the airbox hole. Use the 3/16" to block the intake ports.

Tuesday 23 February 2016

Lessons Learned From Rims, Tires & DIY

So, the rims are back from Fireball Coatings.  They look fantastic, but I'm a bit baffled by the process.  Mark, the owner, suggested getting candy coated gold, though I'd initially said I'd just go for the plain gold.  After being convinced of the upgrade the process took longer than expected (about 20 days instead of a week) because he was out of the product needed to do it.  Communication wasn't a strong point during this wait.

I was worried about tolerances changing on the inside of the rims, but I was assured that they  would be masked off.  The end result has a fair bit of over-spray, which isn't easy to clean up (which I guess bodes well for the rims themselves in regular wear and tear use).  With a Dremel I've been able to clean up the over-spray and I've begun to rebuild the rims for re-installation.

The final bafflement came when Mark said that black bits dropped into the process and there are minor imperfections as a result.  They are barely visible, but his explanation was that no one does gold candy coat on rims.  This begs the question, why up-sell me on them then?  All the strangeness aside, they do look fantastic, and I'm looking forward to seeing them back on the bike again.  The final cost to coat two rims was just over $300 Canadian taxes in (or about a dollar fifty US).


I'm not sure what I'd do differently next time as I don't have much experience with industrial coatings.  I think I'll give Fireball another go in the future though, just not if I'm on a tight timeline.  I imagine less finicky (ie: rims without a shaft drive hub on them) parts would be less of a headache.  They had a coated motorcycle frame on the floor at the shop that looked spectacular.  Mark figures he can coat all the basic parts of a bike (frame, swing arm, exposed bits and pieces) for about $1000.


Buy 'em online and you're looking at a lot of money for tires
unseen and possible long on the rack.
The tire portion of the process was handled by Two Wheel Motorsport just north of Guelph on Highway 6.  It's my first time doing motorcycle tires (everything previous was well rubbered when I got it and sold safetied as is).  What I've learned is that motorcycle tires are expensive!  And evidently wear out much sooner than car tires (odd considering how they are supporting much less weight on lower mileage).

The tires from the dealer were about forty bucks more per tire than online, but you're buying them on the internet sight unseen, and they might be cheap because they're stale.

I got the benefit of very experienced Concours owners in the parts department helping with tire choices rather than depending on the generic tire size finder online.  No one seems to support the OEM Dunlops that originally came with the bike twenty two years ago, so selecting ZG1000 tires is about preferences rather than manufacturer's recommendations.


The tire pricelist from the Toronto
Motorcycle Show - 2 Wheel was
cheaper, and could get the weird
size for my Concourse.
I was going to go with Bridgestones, but when a guy with over a million miles ridden (!) suggests the Michelins if you want good handling and amazing mileage, I didn't ignore him. 

All was well until I got the $600 bill... for two tires!  I think my last car change was 4 Yokohamas for the Mazda2, and it cost $650 and included balancing and installation.  Like I said, bike tires are expensive!  It was $35 to install each tire - ninety nine and change for the work.  I think I got charged for tire disposal even though the rims were bare, and even though I asked for a 90° valve stem on the back I didn't get one (though I don't think I was charged for it).

I thought maybe buying tires at the Bike Show would save money, but the prices listed weren't as good as the sale prices offered over the desk at Two Wheel, and they didn't have the weird sizes I need for the Concours anyway, so that isn't a way out.

I used to be a tire guy at Canadian Tire when I'd just gotten out of high school.  I know my way around the tools involved.  In the future I think I'm going to try and get tires and bits and pieces online and then do the install myself.  I'm going to install balancing beads on my current tires.  If they work as well as advertised, balancing (the only part that requires expensive machinery) won't be necessary.  When I do the tires on the XS1100 I'll do them in-house and see how it goes.

Speaking of in-house, the last frustration was removing the bearings.  I took them in to school figuring that the autoshop had a press and could take them out easily.  They sat there for a week before I finally took them home and knocked out the bearings in ten minutes.  While there for the week they managed to lose my bearing retaining clips and the front bearing spacer as well, so I'm having to spend another $20 at the dealer replacing parts they lost.  The moral of this story?  Do the work yourself.  You learn more by doing it, and you're less likely to lose parts you need to put the thing back together again.

The missing bits and pieces should be in this week, I should have the bike back on its feet by this weekend.  I'm looking forward to seeing how it looks with its new kicks on.


Parts Costing

                      TIRES                            Online      Dealership   Difference
Michelin Commander II 150/80/16       $174.45        $213.79        $39.34
Michelin Commander II 130/70/18       $208.00        $244.54        $36.54
                                                                                                 --------
                                                      money saved buying online   $75.88
                                                      + gas & time going to and from the dealer (online delivery is free)

Dealer parts total:  $458.33+$4 (shop supplies) = $462.33 (don't see any charge for the valves)
Online order total: $442.61 (including a 90° rear valve & a front valve)

Labour Costing

Dealership installation of two tires (with new valve stems, no balancing, no disposal - though they charged me for that anyway):  $99

How to change your own tires.

Saturday 12 December 2015

The Always On Motorcycle, or: to scramble or not to scramble, that is the question!

Time to put the bike away, right?  Not so much... 
it's 10°C and sunny out today!
I was all proud of myself for pushing into late November on two wheels this year.  When they finally laid down salt and sand after the first real snowfall I put the Concours away and stripped it down for winter maintenance.  I like having a twenty year old motorbike, but it isn't a hop on and go kind of machine, it needs TLC.

A bigger mistake was putting away the KLX even before that.  A newer machine with no need for heavy maintenance, it would have made sense to keep it handy just in case.  The past week I could have ridden in to work several times, but I'm finding myself bike-blocked by too early hibernation habits and a single purpose motorbike.


Riding into the frost line is a good time!
Next year I'm going to keep an iron horse
saddled just in case.
I coulda been riding in this!
I wouldn't be going on any long rides, just commuting, but that means 2-up with my son to drop him off at school.  I got the Concours because it does this job well while still letting me fly when I want to.  The KLX just manages the job of carrying me (it struggles to run at speed on the road with my 250lbs), but with storage and a second passenger?  I think it would be fairly miserable.  Perhaps that's what's stopping me from hauling it out of the shed again.


It's away too soon!  Too soon!
The Concours isn't going anywhere, but the KLX, while a good introduction to off road riding isn't the Swiss Army knife of a bike I was looking for.  Come spring I'm going to liquidate some biking assets and go looking for a more multi-functional alternative.

I think I'll clear $1000 on the XS1100 I'm currently fixing up, and I think I'll be able to get what I bought the KLX for ($2000).  Getting the $600 back I spent on the little Yamaha should also be possible.  With $3600 on hand I have some interesting choices when it comes to a Swiss-Army knife bike I can keep handy for multi-surface riding while also being able to ride 2 up while commuting.  The 650cc dual sport class of bikes has three contenders worth considering...


$1700  sitting in Kingston.  an '01 with 55K, well maintained,
KLRs are cheap and plentiful.  It'd also be more generally
usable than the KLX.


I'm thinking once again about a Kawasaki KLR650.  A tank of a bike.  Not fast, but fast enough, able to carry two up, and rugged.  If looked after it'd hammer along for a long time.  The KLR is the darling of the cheap adventure rider and has an awful lot of after market accessory clobber as a result.


$3400 over in Waterloo.  Top of the price range, but it's an  '05
in immaculate condition with 24k on it.  Nice photography too!


Honda makes an equivalent bike, the XR650.  It looks more off road focused, and it'd be my first Honda.  Other XR650s hover around $3000 with low kilometres.  They seem a bit more expensive than either the KLR or the Suzuki, but Hondas are famous for holding value like that.


An '05 with 33k out in Brockville going for $3200...


I looked at a DR600 last year, but shied away from such an old bike (this was an '89 in poor condition).  The DR600 evolved into the DR650 which is still in production today.


All three of these 650cc dualsports have enjoyed strangely long production runs with minimal changes.  That gives them a deep and well supported parts availability though.


I could creep into the adventure bike genre proper for about twice what I've got.  At under ten grand I'd consider the current crop of mid-sized adventure touring bikes, especially the ones with some off-road capability.  The Honda NC750x rolls out for just under $10k.  Suzuki's V-Strom 650 is five hundred bucks cheaper, and the Kawasaki Versys 650 is a grand under that, though it isn't much of an off-road machine.  The Honda CB500x rolls out for seven grand, making it an even cheaper option.  These bikes tend to put on the airs of an adventure bike without delivering any real off-road abilities.  Being new they'd all handle the job of an always-on/Swiss army knife bike better than the venerable Connie though.


Triumph's new Bonneville
Scrambler is a pretty thing.
Yep, we look good on that!
At just over ten grand I'm into Triumph Scrambler territory.  This would scratch both the classic itch as well as the multi-surface riding itch.  I'm not interested in MX riding.  My off roading would be dirt roads and light trail riding.  Staying away from the brightly coloured, long shocked dirt bikes would be OK with me, especially if I were on a classic looking Scrambler.


My kind of off-roading... very civilized!
The Scrambler genre has picked up as of late, with Ducati and BMW both entering the fray.  Yamaha is also doing it (though overseas), and Scramblers have long been a favourite of the custom crowd.  But unless I can make more space, a home made custom isn't the dependable always on machine I'm looking for... though that hasn't stopped me before.

Rather than just jumping into another dual sport that puts function before everything, maybe I should just start working toward the Scrambler I'd rather have.

However, the adventure bike rabbit hole goes all the way to the 1%er land.  On the way to Silly-Rich World you've got some multi-faceted mid-level adventure machines that are both stylish and capable.

With much disposable income I could go with the new Triumph Tiger 800cc XCx (about $16k).  With more cash on hand I'd be onto the new Triumph Tiger Explorer (north of $20k) or perhaps Honda's newly re-released Africa Twin (maybe $17k?).  In this territory you can get a stylish, long-distance able, off road capable machine.

Once you get into the high end adventure market things get silly quickly.  Suddenly you're thinking about Ducati Multistradas and superbike fast KTM Super Adventures.  Bikes with more computers than a moonshot.  Every time I read an article about these bikes they are described as fantastic, followed by a long list of all the things that broke on them but were covered under warranty.  I guess that's an adventure of a sort.

These kinds of bikes wander into more than just disposable income.  If I'm buying a bike like that I'd better be at my leisure.  Dropping upwards of $30k on a motorcycle that can handle dirt roads (but needs expensive TLC every time you do) should mean you've also got a stable of a dozen other bikes and lots of time to ride them.

Back in the real world I'm motivated to expand my riding season and have a machine on hand that can do more than one thing if the Connie is feeling her age.  Come spring I'll be considering options to scramble or dual sport, but it'll be scrambling unless I can afford an actual adventure bike.  If I'm going to look for a multi-purpose always on bike, I'd also like to get one that tickles an aesthetic itch.

Saturday 28 November 2015

IIHTM: The Digital Workshop

If I had the money, what would the dream workshop look like?

I'm a computer tech teacher by day, and the 3d printer revolution is astonishing to behold.  The dream workshop would have the usual suspects (awesome tools etc), but it would also have some truly alien looking tech.

Ever seen a resin based 3d printer?  It's like something out of Terminator:


3d printing is about to get even wilder, with larger scale prints becoming an option.  Imagine a 3d printer that could handle motorcycle fairings... except you could do anything you want.  Want a fairing made out of dragon scales?  No problem!  Want customized etching across the entire fairing?  No problem!  Want to design a radical fairing using the stock mounting points?

Some time in Blender and you'll be ready to print radically customized fairings and other parts.


The BigRep1 goes for almost $40,000, but imagine what you could print in over a cubic meter of build space - motorcycle fairings would be not problem.  I think I'd rent one first to see what I could get away with before buying.

Using resin based printing instead of additive 3d printing means you can produce parts that have the same structural nature as cast pieces (they aren't made of bonded parts).  These pieces would be incredibly strong - they could also be made much more quickly.  Instead of hours long build times, we'd be looking at minutes...


If you're looking for futuristic workshop inspiration the Big Hero 6 garage would be a good place to start - in there he's 3d printing carbon fibre!  The holographic display is pretty dope too...


Iron Man is another film that gives you a good idea of what a 21st Century garage might look like.  Tony Stark's workshop is a holographic wonderland with built-in fabrication capabilities.


It was once thought that with fuel injection, onboard computers and digitization we would be losing the ability to modify and customize our motorbikes.  It turns out that digitization is actually handing the ability to manufacture back to individuals from the factories that took it from them.  Industrialization meant standardization and centralization in the 19th and 20th Centuries.  In the 21st Century manufacturing will return to the craftsmen it started with; localized micro-manufacturing is going to be the way of things to come.

If you're making shop space for yourself, having a computer in it gives you access to a world of information (I frequently use my to watch how-to videos and view schematics), but that workshop based computer is soon going to be providing a lot more than just information.  Do yourself a favour, get a handle on 3d modelling, it'll come in handy in the near future.

Ways to get started:
  • Get handy with Blender - it's free, and it's powerful!  There are also a lot of tutorials available for it online
  • Structure Sensor: a 3d scanner that snaps onto your ipad.  It makes making 3d copies a breeze!
  • Basic 3d printers start at about $1000.
  • If you want to give printing a try, many people in the maker movement offer 3d print services. It's a nice way to see what a 3d printer can do for you without the overhead... 3D Hubs is one such option, and they'll introduce you to makerspaces in your area.
  • Sketchfab is handy for sharing and doing light editing on 3d models.


Update:  Just saw this.  It'll print 18 x 18 x 24 inch pieces and is made by a Canadian company!  That'd do the business...


Sunday 8 November 2015

Sense of Satisfaction!

After all the Maker talk this week at a conference I attended, I was keen to spend some quality time in the garage working on the 35 year old XS1100 basket case.  It's easier to walk the walk than talk the talk when it comes to Making.  Unlike the education approach infused with collaboration for your own good, I did it the way I always do: alone in a garage.  It's wonderfully cathartic to get something broken working again, and meditative when I don't have to explain everything I'm doing.

How do you get a 35 year old motorcycle left outside for several years unattended working again?  Very carefully!

The front brakes were seized, the throttle body was seized, the rear brake is still seized, as are other things I haven't found yet.  Motorcycles aren't like cars, when they're left in the world they don't have a shell protecting the mechanicals from the weather.  Restoring a car tends to be more mechanically salvageable as a result.


I ended up having to take the end carburetor off the rack of four Mikunis that line the back of the Yamaha engine.  It was the most carboned up and filthy one, and the grit had seized the throttle body rod.  A complete dismantle, cleaning and reinstall has the carb working again (before this you couldn't move the throttle body without great effort and a nasty creaking sound...


It took a couple of hours to break it down, find the problem and rebuild it.


It was pretty before, but the Mikunis are even prettier now that they work!

Sunday 25 October 2015

Rainy Day Carburators

A cold, rainy Saturday had me break down the carburetor on the Yamaha XS1100.  A Triumph Spitfire and Mercury LN7 owned as a teen made me pretty handy with carburetors.  In addition to multiple rebuilds I also got handy at jury rigging manual chokes thanks to the utterly crap Ford Escort carb set up.

The beautiful Mikuni unit on the Yamaha looks like a piece of industrial art in comparison to the pedestrian Triumph and Ford carbs, unfortunately it's seized.  After breaking down the top end I soaked it and freed up the seized throttle body.

The next to-do with the Yamaha is to clean up the gas tank and then reassemble the fuel system.  The engine isn't seized and spins easily, so I think I'll have an easy time firing it up for the first time in years (knock on wood).

Here are some pics of Mikuni's Yamaha masterpiece:


The throttle cable wasn't playing nice even after taking apart the handle bar - so into the carb I go...

The Yamaha XS1100 engine block with the carbs off - it got the Warhol treatment....


Like everything else so far, the internals look to be in good shape on the old (35 year old!) Yamaha

Cleaning up the fasteners using the caps from each carb to keep things organized.


XS1100 is in for surgery

Not many riding days left as the weather turns up here in Canada

Saturday 17 October 2015

XS1100: Steps Toward Resuscitation

Snow last night, the XS got some mechanical
attention today as a result.
After looking over some internet advice (sic) on how to start a long dormant motorcycle engine (and ignoring never ending discussions on it), I got the XS1100 to the point where it would crank over (with spark plugs removed).  The plugs look brand new, but sooty.  Cleaning them up and regapping should be all that's needed.  It's nice to know it isn't seized, the electrics aren't pooched and the starter motor sounded solid.

I also have the airbox off and the carbs cleaned (though they look pretty clean before I did them).

The gas tank is a rusty mess, it was left outside and empty for a length of time.  I'm thinking about doing some instructables chemistry on it, just to try it.  Failing that, I think I'm going to try Evapo-Rust.

Here's what it looked like today:


Makes you wonder how many motorcycle tires don't get worn out before they need a change.

With the airbox removed, the wall-o-carbs is easy to get at.

Carb internals look to be in good shape.  Only the throttle cable is suspect.


The air box has cleaned up nicely