Monday 2 May 2022

My First Motorcycling Accident: ATGATT Saves The Day!

 ... and it wasn't so bad thanks to all the (quality) gear, all the time.  This weekend we had family friends coming over so I took their son and mine up to S.M.A.R.T. Adventures for an afternoon dirt biking.  My boy did a day on bikes last year so he was stepping up to intermediate level, the other boy had never ridden before.

It was a glorious day.  We had snow last week but it was 15°C and sunny on Saturday, and we weren't gettting on a bike until it had already reached that lofty high.

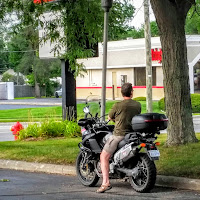
They kit you up good at SMART!

We got kitted up and out to the bikes.  Ethan went with another new rider and did the how-bike-controls-work introductory lesson.  Max hadn't been on a bike in 10 months and had only had a day when he last did, but he remembered all the basics so off we went.


We had Joe instructing us who I've had a couple of times before.  He has psychic trail reading skills and is a joy to follow in the woods.  He's also big on the basics (elbows up, sit at the front of the saddle right above the pegs and most of all, clutch control!).  Max had the basics down, but his work on the clutch dramatically improved his ability to ride off road this time around, it was time well spent!


We did the ride-over-a-log thing and after a tentative start Max got a handle on that too!  All in all it was a very satisfying afternoon of riding.

To end the day we joined the new riders and did some of the easier trails.  Earlier we'd been talking to the instructor who had been looking after the new riders and he said you can never underestimate how tired the newbies are.  The physical and mental demands on learning to ride from scratch are heavy.  We all lined up as a group and headed out into the woods for one last ride together.

We were coming down a washout with rocks and loose dirt when the instructor eased up at the bottom, perhaps deciding which way to turn.  I was up on the pegs behind him and was able to stop, but Max was behind me and couldn't.  Ethan was behind him and said Max hit the back brake hard enough to lock up, but with the loose surface and incline he slid right into me, trapping my ankle between his front fork and my bike.  When he came off, his bike surged forward as it stalled, driving into my ankle even more.

It was trapped so tight I was thinking it was already broken, but SMART doesn't mess around with the kit.  Those SIDI off road boots are the balls.  Having been caught between the two bikes (which were now locked together), there was an incredible amount of pressure on my ankle, but the boots were taking the brunt.  I couldn't move and was frustrated that I hadn't avoided the situation entirely, but it was a series of events I couldn't see behind me and the accident was no one's fault.  Max was feeling terrible about it, but once the tail end instructor had run down the hill and seperated the bikes, I got up and tested the ankle and was stunned to find I could stand on it without any real pain.  Even now, a day later, it's only mildly bruised and I'm able to walk on it without any pain.  If I hadn't been in good off road boots I'd have dust for an ankle.

We got the bikes sorted out (one of the plastic panels had popped out on my Honda 250cc, but was popped back in - it wasn't even cracked!) and continued the ride.  At the end of the day we got back to the SMART office and all was good.


As I told Max, "this was about as ideal an accident as you could have!"  He learned about
leaving space, keeping his eyes up and experienced target fixation for the first time (which might one day save his life if he's learned to look where he wants to go).  It also underlined my belief in ATGATT.  I tell you what, thanks to SMART I'm going to be looking for some SIDI dirt boots when I finally get my own kit.  They aren't cheap, but then neither is a broken ankle.  Wear the right kit and even if you have an accident, you walk away!

I'm still hoping to get Max and I sorted out with a couple of tidy 250cc bikes to go trail riding together.  It's great exercise, a wonderful way to get deep into the woods and sure, it could be dangerous, but with the right kit and a sensible approach to riding it's a manageable risk that can also have minimum environmental impact.  A knowledgeable trail rider leaves no trace while exploring wilderness in a way that few other activities allow, often enjoying over 70mpg.

I know a lot of people think of motorcycling as a pointless risk that is destined for injury, but that isn't the point at all.  When done well, as we did it yesterday, riding is the best kind of exercise for your mind and body, and something I'm always willing to mitigate risk on in order to enjoy.  I've heard of many people who have an accident and never ride again, but that isn't my way.

We're aiming to do a full day SMART later this year.  Funds permitting, we'll get ourselves independently riding off road eventually, but in the meantime, SMART provides the kit and the bikes along with some vital mentorship.  We'll both be better riders by the time we're soloing on the trails in our own gear on our own bikes.


Sunday 1 May 2022

Making Miles on the Concours

We had a break in the Canadian winter (in April) and I finally got a chance to exercise the Concours.  This jaunt took me over 250kms from where I live in the tedious industrial farming desert of South Western Ontario, an hour up to the road to the edge of the Niagara Escarpment where I have a small chance of finding a corner to ride around.  It usually gets colder by the lake, but contrary to physics, it went from 12°C when I left up to 27° by the lake.  It only dropped down into the low 20s again once I found some altitude on Blue Mountain (a hill anywhere but in Ontario).  Even on the straightness I got into moto-zen riding mode.

https://goo.gl/maps/6DWBjfGv1WgbX6Ws5

It's been a long, cold COVID winter #2 and the opportunities to make miles on two wheels have been thin this spring.  A warm Sunday to get up to the big water and stare at the blue horizon was much needed.

It is actually nuclear powered!  I feel like I really bonded with the Connie on this ride - we sailed for miles and we had many more in us when we stopped for the day.  If you're light on the throttle it gets reasonable mileage, but it's a wonderful thing when you wake up that motor.  Kawasaki has a special touch with engines.

I had the 360 camera along for the ride and put together a montage using an incredibly complicated process that involves batch processing the 360 panaramas into 'tiny planet' images and then clipping them all together in video editing.  It isn't for the faint of heart, but it sure looks unique.  This is the how-to if you're feeling brave.


Sunday 10 April 2022

1971 Triumph Bonneville T120 Sensible Bodywork Bolt Replacements

I'm in the process or stripping the last bits of hardware from the frame and bodywork in order to clean up and paint the frame and bodywork on the 51 year old Bonneville project bike.  The bolts holding the licence plate holder onto the rear fender were 4 different sizes with the longest ones protruding so far toward the wheel that they'd be a safety hazzard on a big bump (the tire would make contact with them on full suspension compression, especially with me on it).

I was talking to a friend online who made a career out of flying helicopters for the military and he said he's found wrong sized hardware in controls that have actually jeopardized flight safety.  One of the rhings I enjoy about motorcycle mechanics is that it feels closer to aviation than four wheel appliance repair where an error like this might cause you inconvenience as you roll to a stop on the side of the road.  If you're up in the air or out on a bike and you have a catasrophic mechanical failure, it's a very different consequence.

Another pilot friend (the perils of being an air cadet), when we were going up for a flight in a Cessna, brought it back around and landed when the engine didn't feel right.  Everyone was impatient at the delay, but he said something that is simply true that many people don't consider when their flight is delayed:  "it's better to be down here wishing you were up there, than being up there wishing you were down here."  It's a shame more people who work on bikes don't think the same way.  I've seen even professional work that was half assed to save time/money.  Incompetence like that puts a rider's life at risk needlessly.  It can end up costing you far more than you saved.

Pretty sure that last one isn't a stock Triumph bolt.  These'll all get replaced with metric bolts because they're easier to find, but they'll be the right length, matching and be staineless steel.

The 14-0101 bolts used to fasten the fenders on the '71 Bonneville are 1/4" X 1/2" X 28 UNF, which are a bugger to try and find a match for.  The longest bolt on the bike was an inch and a half - way too long for where it was.  Working with SAE/imperial sizes on this bike makes it a real pain to match hardware out of what I have on hand, but stuffing a bolt that long onto a bike where it can interfere with the wheel isn't sensible.
SAE Wrench SizeBolt Size (SI)Metric Wrench Size
5/16″1/8″8 mm
3/8″3/16″10 mm
7/16″1/4″11 mm
1/2″5/16″13 mm
9/16″3/8″14 mm
5/8″7/16″16 mm
3/4″1/2″19 mm
13/16″9/16″21 mm
7/8″9/16″22 mm
15/16″5/8″24 mm

1/4" bolts can be replaced with an 11mm metric option and finding stainless steel versions of these are easy.  I can also get four matching that are the correct length for the job at hand rather than bunging whatever I have in the toolbox onto the bike.  Compared to other costs in this restoration, hardware costs are trivial (for under $40CAD I can get a 900+ piece kit).  When I'm dropping $600+ on a new head, spending a bit on properly sized bolts seems like a no-brainer.

Of course, body panel fasteners are a different proposition to what you put into a motor or transimssion - in those cases I'd always use stock pieces to manage the heat and pressures involved as decided by the engineers to designed the thing, but for bodywork there is a bit more latitude, you just don't want to be a pratt about it.

While sorting the
frame I've cleaned
up the oil in frame
drain system.
The Amazon bolt set arrived in less than 24 hours.  It is (of course) snowing today in mid-April in Canada, so moving the other bikes out of the garage to paint things isn't likely, and I can't paint outside if it's snowing.  You need 10°-30°C temperatures, no direcf sunlight and good ventilation.  If I can get the other bikes out of the garage, open the door a foot and run the fan, I might be able to retain enough heat to do it, but Canada's 'spring time' isn't helping things along.

If had a wee outdoor shed I'd use it as a paint booth, heating it to the required temperature and then having a fan to move the overspray out.  This DIY paintbooth would be a thing if I had a larger workshop, but a shed outside is a real possibility.  It could provide storage, freeing up space in the garage, but with some crafty ventilation it'd also be a paintbooth.  If I don't get to painting today, I can at least finish prepping the frame and body panels and hope for warmer temperatures later in the week.

New tires and innertubes are on hand.  The frame is being prepped.
I've still got some other body panels to clean and prep for painting.


Sunday 3 April 2022

Motorcycle Gear as a Pre-Game Ritual

Long before I got into riding motorcycles I discovered ice hockey as a new immigrant to Canada.  I played whenever I could from backyard rinks to 5am practices to driving miles for games on evenings and weekends.  The smell of a hockey rink is a happy one for me, as is the process of getting ready for a game.  For many years I played net, which involved putting on over 70lbs of gear each time (this was back in the day when it was made with leather and bricks rather than the fancy space-aged stuff they have now).

I enjoyed getting to a game early and made putting on the gear a pre-game ritual.  It gave me meditative time to get into the zone before I had to peak-perform.  Perhaps this is why, when I saw this question on Facebook, it took me by surprise:


My ride starts when I go out into the garage and start putting the kit on.  This isn't tedious, it's a chance to echo all those hours spent in cold arenas getting ready to lay it all out there on the ice; it's an opportunity to put on my game face.  I never end up on the bike out on the road half paying attention or thinking about something else because putting on the kit is a integral part of getting ready to ride for me.

I don't know about a different person, but I am a focused person.  Here's the MotoGP video.

Getting my gear on builds a sense of anticipation, so the idea that this might be tedious feels very foreign.  How can you be bored when you're preparing to do something awesome?  Robert Heinlein gives a good description of the feeling in Starship Troopers:

I always get the shakes before a drop. I’ve had the injections, of course, and hypnotic preparation, and it stands to reason that I can’t really be afraid. The ship’s psychiatrist has checked my brain waves and asked me silly questions while I was asleep and he tells me that it isn’t fear, it isn’t anything important—it’s just like the trembling of an eager race horse in the starting gate.

Perhaps riding a bike for you is a flipflops, t-shirt and loud radio half-paying-attention kinda thing, but I take my riding a bit more seriously.  Every time I'm able to get out onto a bike it's worthy of my full attention, every time.  Making sure I've got the right gear is an integral part of that, but so is the opportunity it provides to cultivate a strong mental riding game.

Back in 2015 we rode down to the Indy MotoGP round.  Helmets are optional down that way and we went out once to pick up dinner just up the road without helmets, and it just felt wrong.  The right kit means you can ride longer without getting wind or sunburned and can even make you more comfortable than free bagging it.  Once you've got that approach, trying it the other way just feels wrong.

The gear makes the rider angle also means you don't buy the cheapest junk you can find to check a box.  I've spent years honing my gear so that when I put it on it fits, feels right and does what I want it to do.  I started off cheap but soon found that if you spend a bit more you get the kind of quality that makes the extra outlay worth it.  You can sometimes save money getting quality things second hand or on sale, but it's false economy to get cheap gear and then expect it to work.  If you get quality ventilated kit for the summer, it can keep you cool while keeping the sun and wind off you.  If you get properly insulated gear for cold weather riding, you can sail for hours in temperatures approaching freezing.  Good gear makes you superhuman.

Helmets are especially important.  I'm partial to Roof Helmets because they're of high quality and are an advanced, modular design that lets you change from a fully safetied full face helmet (lots of flip ups are only safetied as open-face helmets) to an open face 'jet' style helmet with a quick flip.  They're aerodynamic, quiet and ventilate well.  I've tried many different lids, including a dalliance with that beaked adventure nonsense, but (for me) a helmet that lets me feel wind on my face quickly and easily (I can flip it up when passing through a town then be back to full face comfort again in seconds without stopping) was what worked.  Getting into kit that feels this right and is well made is all part of the pre-ride ritual and is no hardship.

I frequently see people out on bikes that are wildly unequipped.  They're usually the cruiser-Captain Jack Sparrow types who are into riding for style rather than, um, riding.  The bikes they tend to ride aren't really into going around corners (or much else) and their riding gear follows suit.  If that's your kind of motorcycling then you're probably not reading this anyway.

If you're curious about sports psychology and how it might serve your bikecraft (assuming you see riding as a sport that demands practice and focus to improve your performance), there are a lot of links below on getting in the zone, peak performance and pre-game rituals.  Pre-ride rituals work the same way, giving you a chance to clear away the clutter and get your head on straight.

If you watch any motor racing you'll be aware of pre-race rituals that many riders adopt.  Valentino Rossi was famous for his pre-race contortions, and those are only the visible ones!  Doing this sort of thing looks eccentric, but you do what works for you in order to get yourself into a peak performance mindset.  The amazing things you see athletes do don't happen without mental preparation.  Riding your bike well won't happen without it either.  Don't get frustrated at putting your gear on, use that time to get yourself into the zone for your ride.


LINKS

Sports Psychology:

https://gladiatorguards.com/the-psychology-of-sports-equipment-how-does-gear-affect-your-team/

https://www.theguardian.com/science/neurophilosophy/2011/oct/24/psychology-neuroscience

https://www.youthsportspsychology.com/youth_sports_psychology_blog/when-sports-kids-feel-equipment-is-safe-their-confidence-increases/

https://www.betterup.com/blog/sports-psychology

https://www.billyhansen.net/pregame-meditation

Getting in the Zone:

https://www.inc.com/jessica-stillman/3-tricks-to-help-you-get-in-the-zone.html

https://www.peaksports.com/sports-psychology-blog/mindsets-to-help-athletes-perform-in-the-zone/

https://drstankovich.com/tips-for-athletes-looking-to-get-in-the-zone/

Peak Performance:

https://theathleteblog.com/peak-performance-mindset/

https://www.apa.org/education-career/guide/subfields/performance

Take advantage of pre-game routines:

Athletes stand a much better chance for getting in the zone when they make it a point to engage in a pre-game routine that allows them to think about the upcoming game, elevate their mood state, and lower their negative anxiety.


Moto Specific:

https://www.motorcyclistonline.com/valentino-rossi-motogp-rituals-from-circuit-of-the-americas-austin/

https://www.motogp.com/en/news/2018/01/18/racing-together-superstition/248214

https://www.pinkbike.com/news/racing-pre-race-rituals-traditions-and-rules-2015.html

https://www.worldsbk.com/en/news/2022/Rider+rituals+how+do+WorldSBK+competitors+get+ready+for+a+race

https://www.asphaltandrubber.com/racing/motorcycle-ritual-motogp/

https://www.motosport.com/blog/motocross-superstitions-rituals-10-best

Monday 28 March 2022

1971 Triumph Bonneville: More Bike Archeology from Tires, Wheel Restoration & Rear Brakes

I got the rear tire off the rim today in the ongoing '71 Bonneville project during a late March snowstorm. It had a Lien Shin tire on it. I'm unfamiliar with that brand and I can't find a heat pressed time stamp on it. Tires produced before the year 2000 use a 3 digit code that makes it difficult to determine which decade they were made in (first two digits are month of manufacture, last digit is the year). Tires after 2000 use a four digit code (week # of manufacture followed by a the last two digits of the year, ie: 0501 would be the fifth week of 2001).  A 511 would be the 51st week (December) of a year ending in 1, ie: 1981, 1991.

While I couldn't find a stamped date on the Lien Shin tire, there is a three digit date stamp on the Inoue front tire: 511.  Based on the bike's last sticker on the SATAN license plate ('84), this probably dates the front tire to the 51st week (December) of 1981.  I was 12 when this tire was manufactured.  I'm still amazed that it works at all and the inner tube holds pressure.

Taking a tire this old and stiff off was tricky, but as with the TIger tire change last year, a judicious application of heat really helps soften the rubber and makes removal easier, especially in the winter.  It was -17°C outside so I put the shop heater next to the tire and let it warm up, then removing it with the irons was pretty easy.


Once I had the old rubber out of the way, I went at the rim with a wire brush and it cleaned off the surface rust well.  Some SOS soap pads and then a bout with the pressure washer out in the snow storm and the rim came up nicely.


Next time I have some time and space I'll get the front tire removed and prep that too, then it'll be time to order some wheel hardware (bearings and brake pads).  With the wheels rebuild, I'll clean up the frame and repaint it and then it's time to start putting the rolling chassis back together.

While I had the wheels off I took the rear brake apart.  I keep being surprised by how simple this bike is.  The rear brake is a mechanical mechanism, no hydraulics in sight.  You press on that big brake lever (it's big because you need the mechanical advantage for it to work) and that pulls the rod connected to a spinner on the top of the rear brake drum.  The drum spins and applies the brake.  When you let go, a spring on the drum spinner disengages the brake.  You must get pretty good feel out of a direct mechanical system like this, and you're not carrying any extra weight from a hydraulic system (fluid container, piston, pipes, caliper cylinders, etc), but I bet you've gotta have big calves to lock it up.


I'm back at work this week so it might be a few days before I take another swing at it, but it's exciting to get to the point where the bike is enough pieces that I can see how it'll go back together again.

300kms in Two Days

It was a long winter this year, made particularly difficult by grinding through a second year of COVID19.  I find a great deal of satisfaction in spannering my own bikes, but that isn't an end in itself for me, riding is.  With a few days off work and the weather finally breaking, I got over 300kms while I could.  Both the nineteen year old Triumph Tiger and the twelve year old Kawasaki GTR1400 worked like a charm.


Guelph Lake is still frozen...


All photos taken with a Ricoh Theta 360 camera mounted on a flexible tripod and set to shoot automatically every 10 seconds.  I select the good'uns and sort them out using the Ricoh 360 camera software and Adobe Photoshop.  If you want a how-to, here's one:  https://www.adventurebikerider.com/how-to-capture-360-photos-while-riding-a-motorbike/  Here're others!

That many-things-my-eyes-have-seen face!

Sunday 27 March 2022

1971 Triumph Bonneville Restoration Project: Frame Breakdown & Rear Brakes

I'd initially planned to do a rolling restoration of the 1971 Triumph Bonneville project, but the state of the engine and my desire to get it back to a place where I can enjoy an updated, dependable but mechanically sympathetic restoration (I want the bike to retain its patina, but I also want it to be dependable) made a rolling restoration impractical.  The engine is lined up for a new 750cc head and electronic ignition system, but before all of that I have to get the frame and wheels sorted out so that I can put the upgraded engine back into a sorted rolling chassis.

To that end, it was finally time to take it to pieces, which also gave me a lot of space back in the one car garage once the bike stand was stacked to the side:

The frame out means I don't need to fill half the garage with the bike stand.

Black rubber bands cover the frame to swingarm joints (to prevent water getting in?).

Way more space in the garage with the Bonnie in pieces.

With the bike in pieces, I'm restoring all parts that I can reuse.  This usually involves some WD40, a toothbrush or wire brush depending on how filthy it is, and then a dip in a hot ultrasonic bath for small pieces to get them back to fresh.

The front wheel Smiths speedometer.

Into the rear brakes. Like everything else on this old bike they are much simpler than modern hydraulic brakes.

Bringing old parts back from the brink is very satisfying.

The entire rear brake system - the brake lever is so long because it is the only mechanical advantage you have when applying the rear brakes.  Instead of using hydraulics to amplify your push on the pedal, the old Bonnie is a simple mechanical system.  You press the brake lever which pulls that long metal bar which rotates the top of the drums, pressing them into outside of the drum.  No hydraulics, and I bet you have to press that lever like you mean it to lock the rear wheel.