Showing posts sorted by relevance for query chain. Sort by date Show all posts

Friday 11 July 2014

How to Break/Resize/Install a Master Link on a Motorcycle Chain

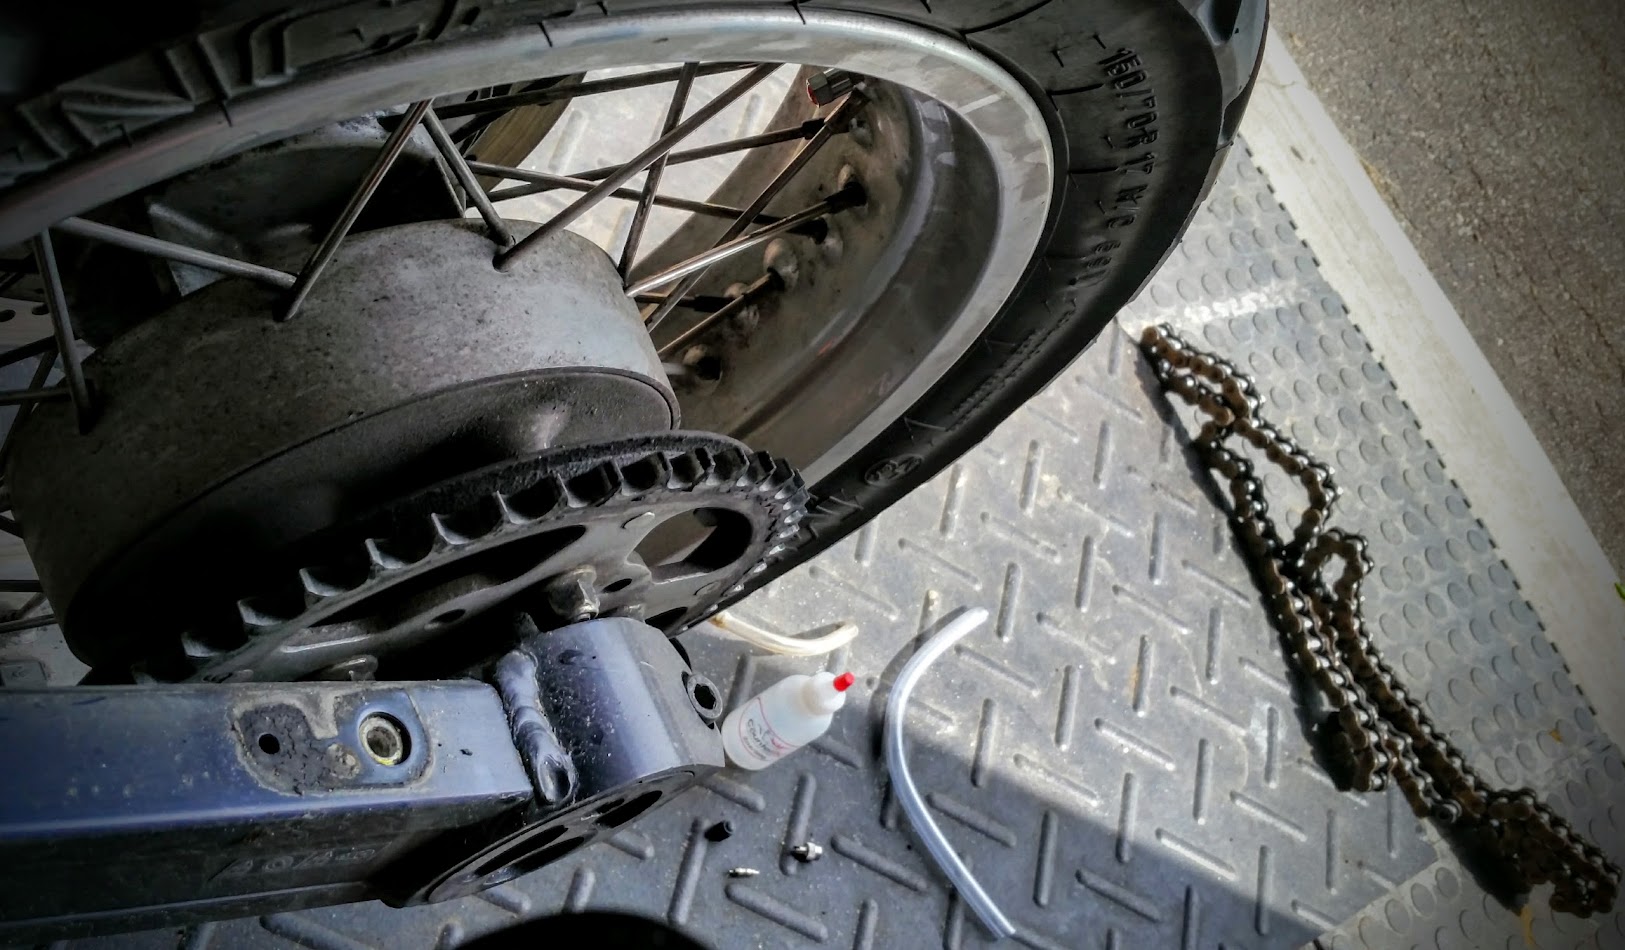
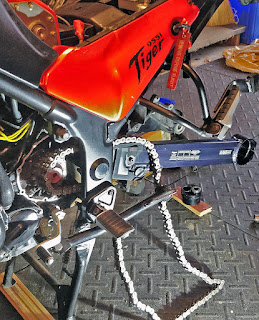
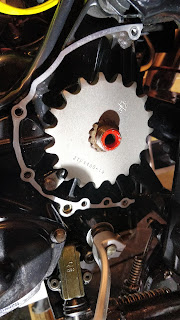
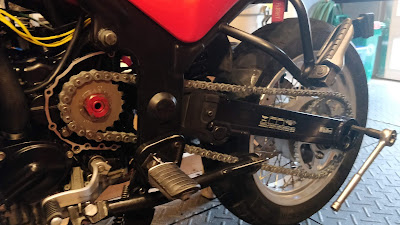
A 2007 Ninja 650R with its pants down (chain and front
sprocket cover removed)
If you've never done chains and sprockets on a motorcycle before, they are complicated.  Being an open part of the drive system, they offer a relatively easy way to modify your bike's performance.  With smaller (faster) sprockets you can produce a revvier, shorter geared engine.  With a shorter chain you can close up your wheel-base creating a bike more willing to change direction.  Chains and sprockets are a bike fettler's delight.

On top of sprockets, you also have a pile of chain choices.  O-ring chains are the cheaper, lower efficiency alternative, while X-ring chains offer more efficiency and less maintenance at a higher cost.  They also come in a rainbow of colours and a variety of sizes from little dirt bikes all the way up to thousand plus cc super-bikes.  


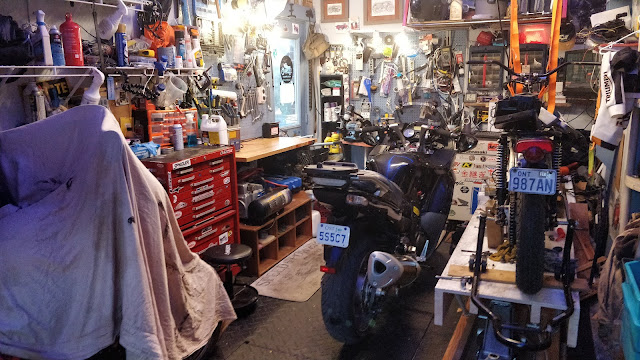
Chain sizes and dimensions
From little dirt bikes to bike motors.
Chain sizing is based on the width of the chain and the length between the pins in the chain.  You've got match all these up with the right sprockets or it won't all fit together.  With so many factors in play, it pays to get a handle on chain mechanics before you take a run at changing the chain on your motorbike.

Here's a primer on how to break a chain.  Some people say cutting a chain but you aren't cutting it, you're breaking it by popping the rivet out and dismantling the chain links.

How to Break a Chain:

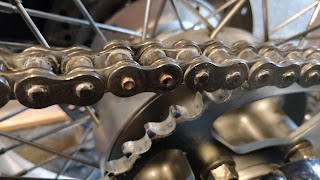
  • If you're removing your old bike chain, find the master link (it should be the one that's different from all the rest)
  • Put a chain breaking tool on the chain and push the rivets out - do a bit on each side at a time until the chain 'breaks' open.  I did this with a bicycle chain breaker (see bottom) and it worked fine.
  • Once you've 'broken' apart the master link the chain will come apart and you can pull it through and free of the bike.

To reduce chain size on a motorcycle:
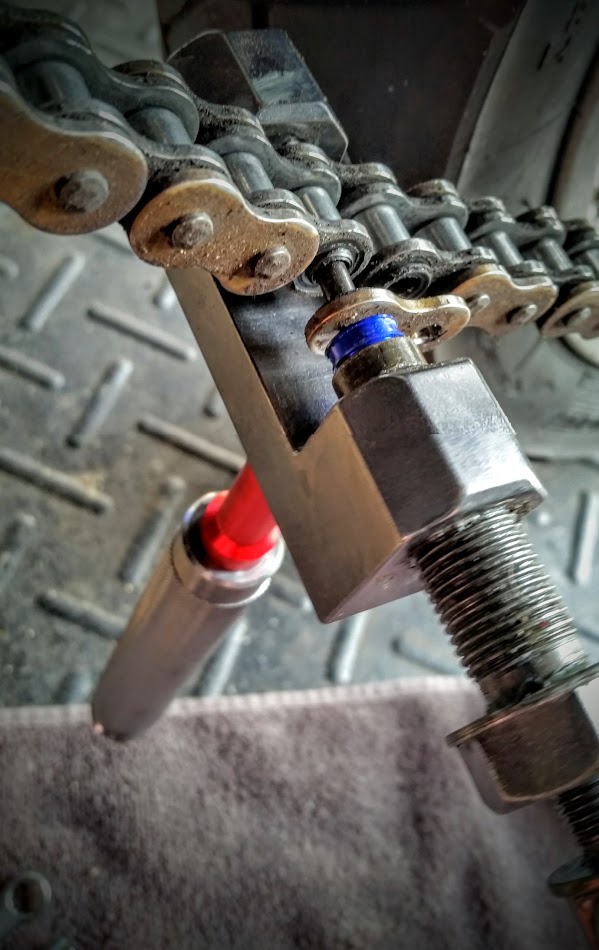
  • if you have a 520 or smaller chain and a good motorcycle specific chain link breaking tool you can simply push the rivet through (see the video at the bottom)
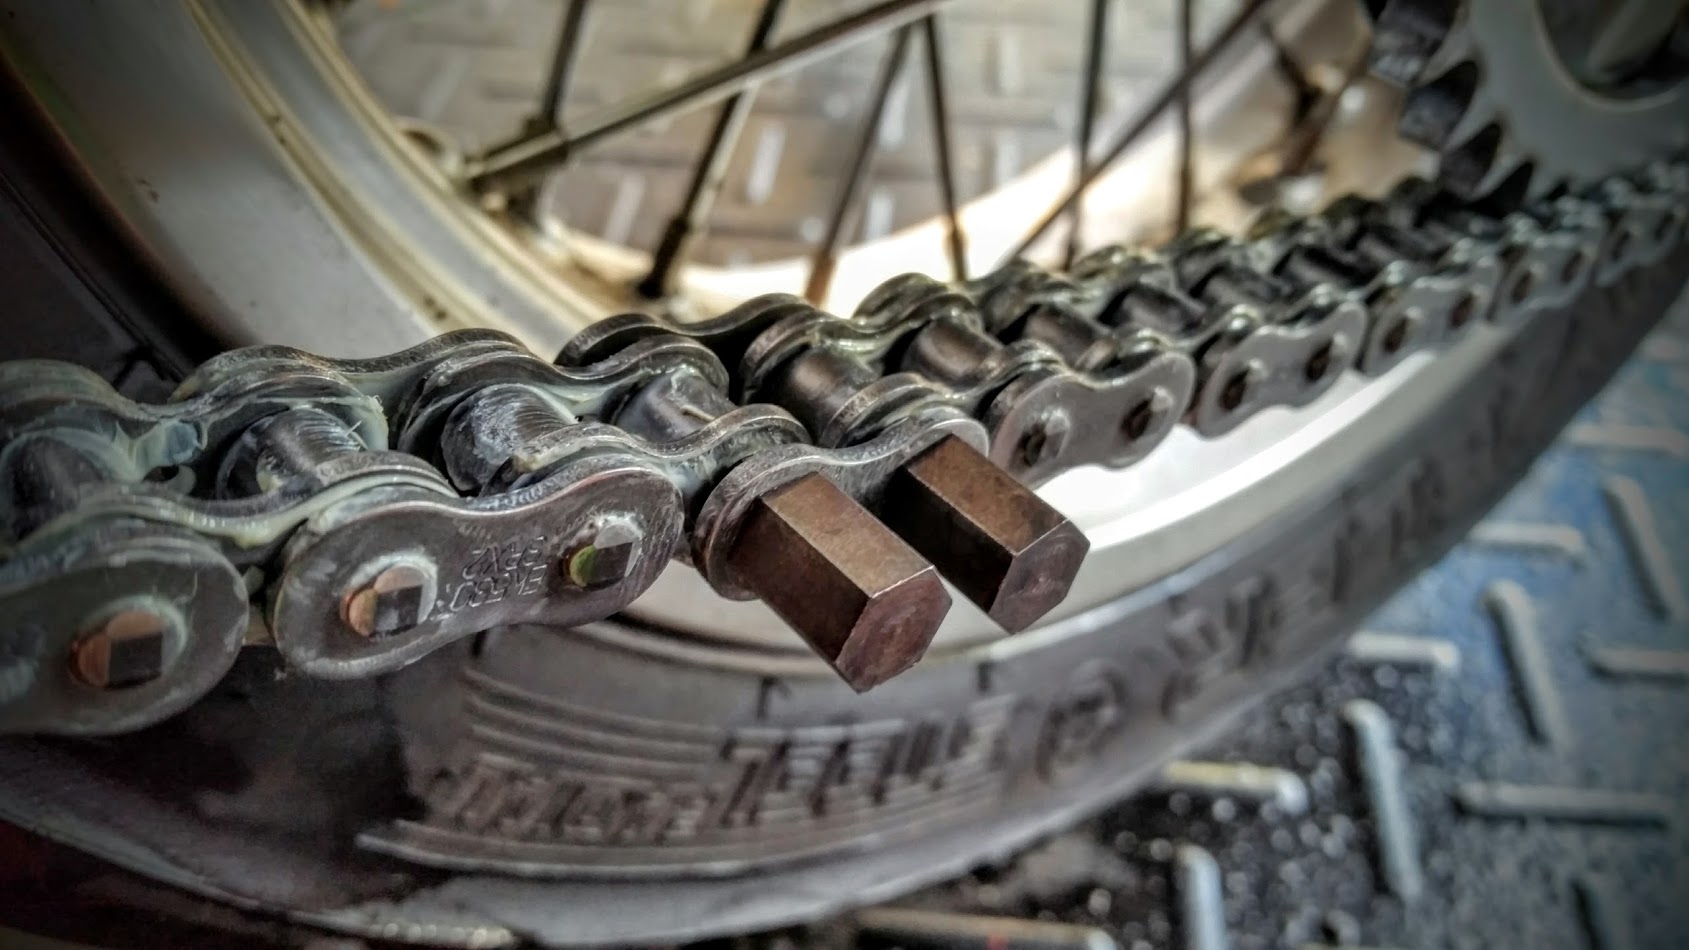
  • if you don't have specific tools, grind or file down the rivet and then tap it out with a hammer and punch pin.  If you grind down the rivet you can also use a bicycle weight chain breaker (see a pic at the bottom) to push out the worn down rivet.
  • triple check which link you want to pull and use something like Gearing Commander to make sure you've got the right number of links in your chain.  (This is what I'm kicking myself for not doing).
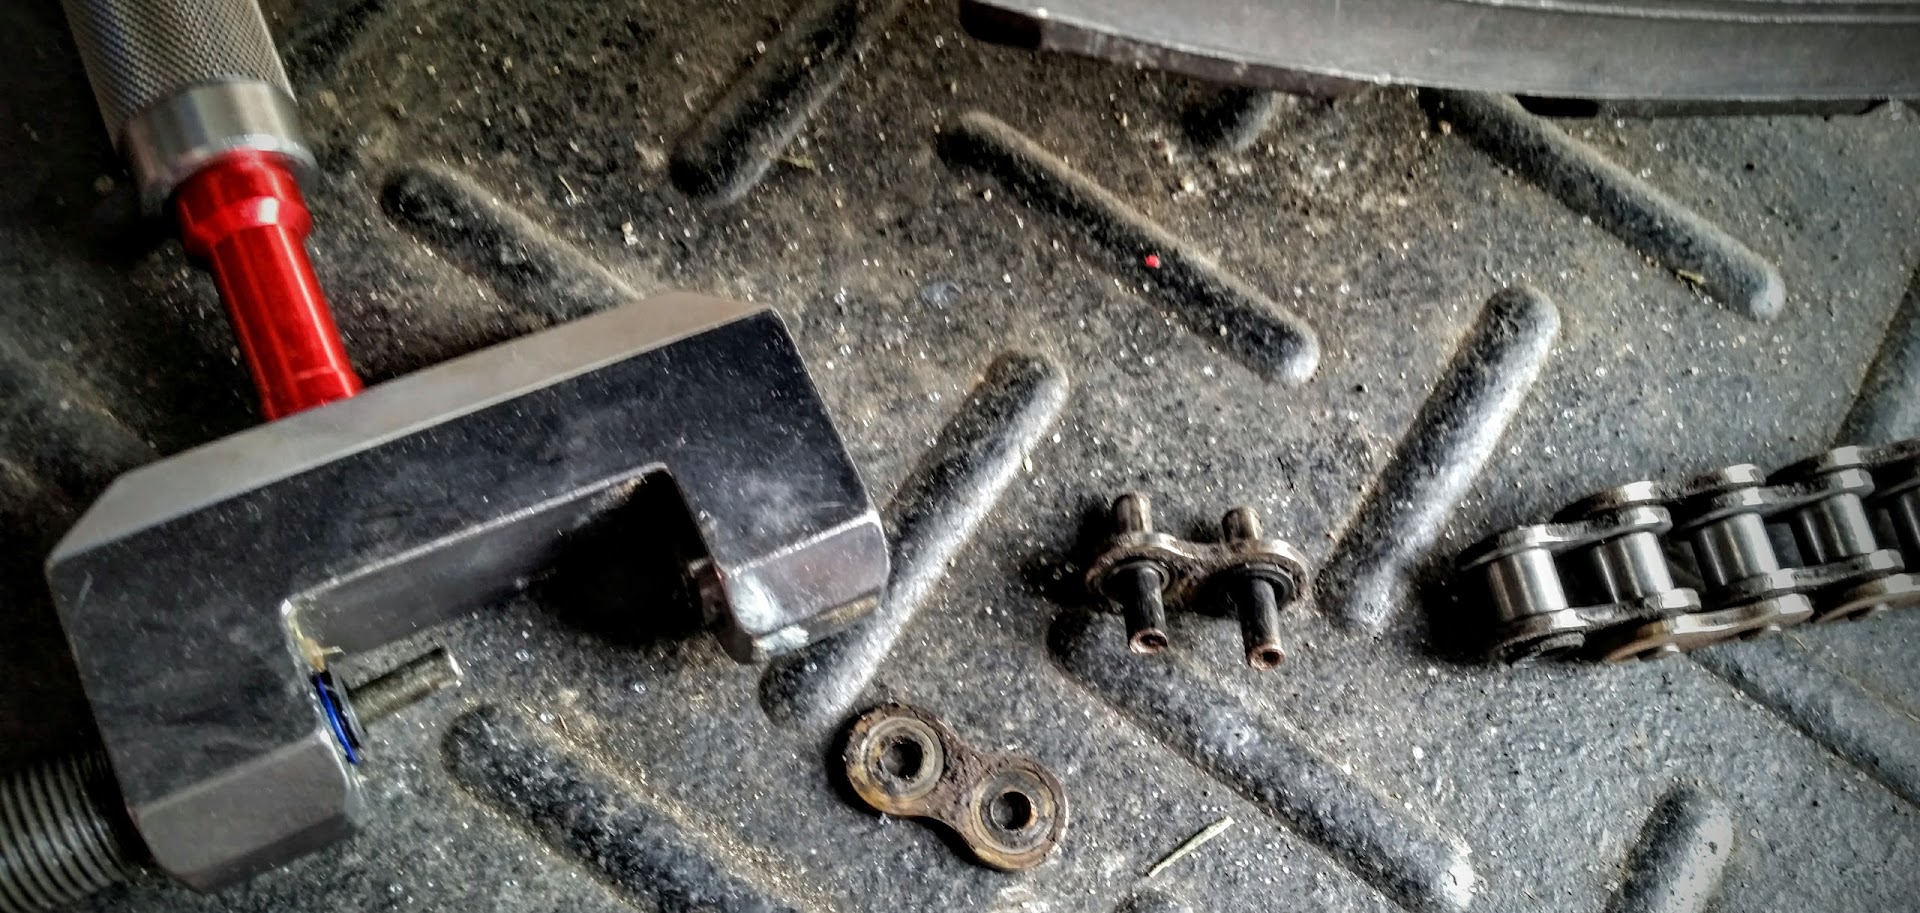
  • Using the bicycle chain puller on filed down pins, I pushed on side and then the other and then repeated the process and the rivet popped loose along with the outer chain links.  Since you're only filing down the outer link (which you'll chuck after) it doesn't matter if you file into it a bit.
  • With the chain dismantled you should now have two inner links ready for a new master link.
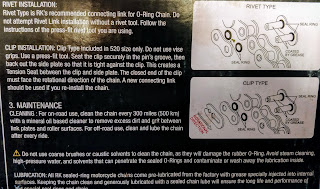
Installing a New Master Link:
  • Install the little rubber washers on the master link rivets and slide it onto the chain - do this on the sprockets as it's easier to do with some tension on the chain.
  • put the last two rubber washers on and the end plate and then use the chain tool or some other kind of clamp to press the side plate on.
  • if you've got a rivet type master link you need a light hand and some patience to press in the rivet ends.  If you're too heavy handed you'll bind the chain and swear a lot.
  • The more traditional type of master link is the kind I was familiar with from bicycles.  It comes with a slid on clip.
Don't freak out if you've got the rivet type master link, just make sure you have the right tool handy.  The rivet type link is very strong and performs pretty much like all the other links if installed properly, which is why you'll find it exclusively on high performance chains.  Check out the youtube video at the bottom for a good primer on how to do this.

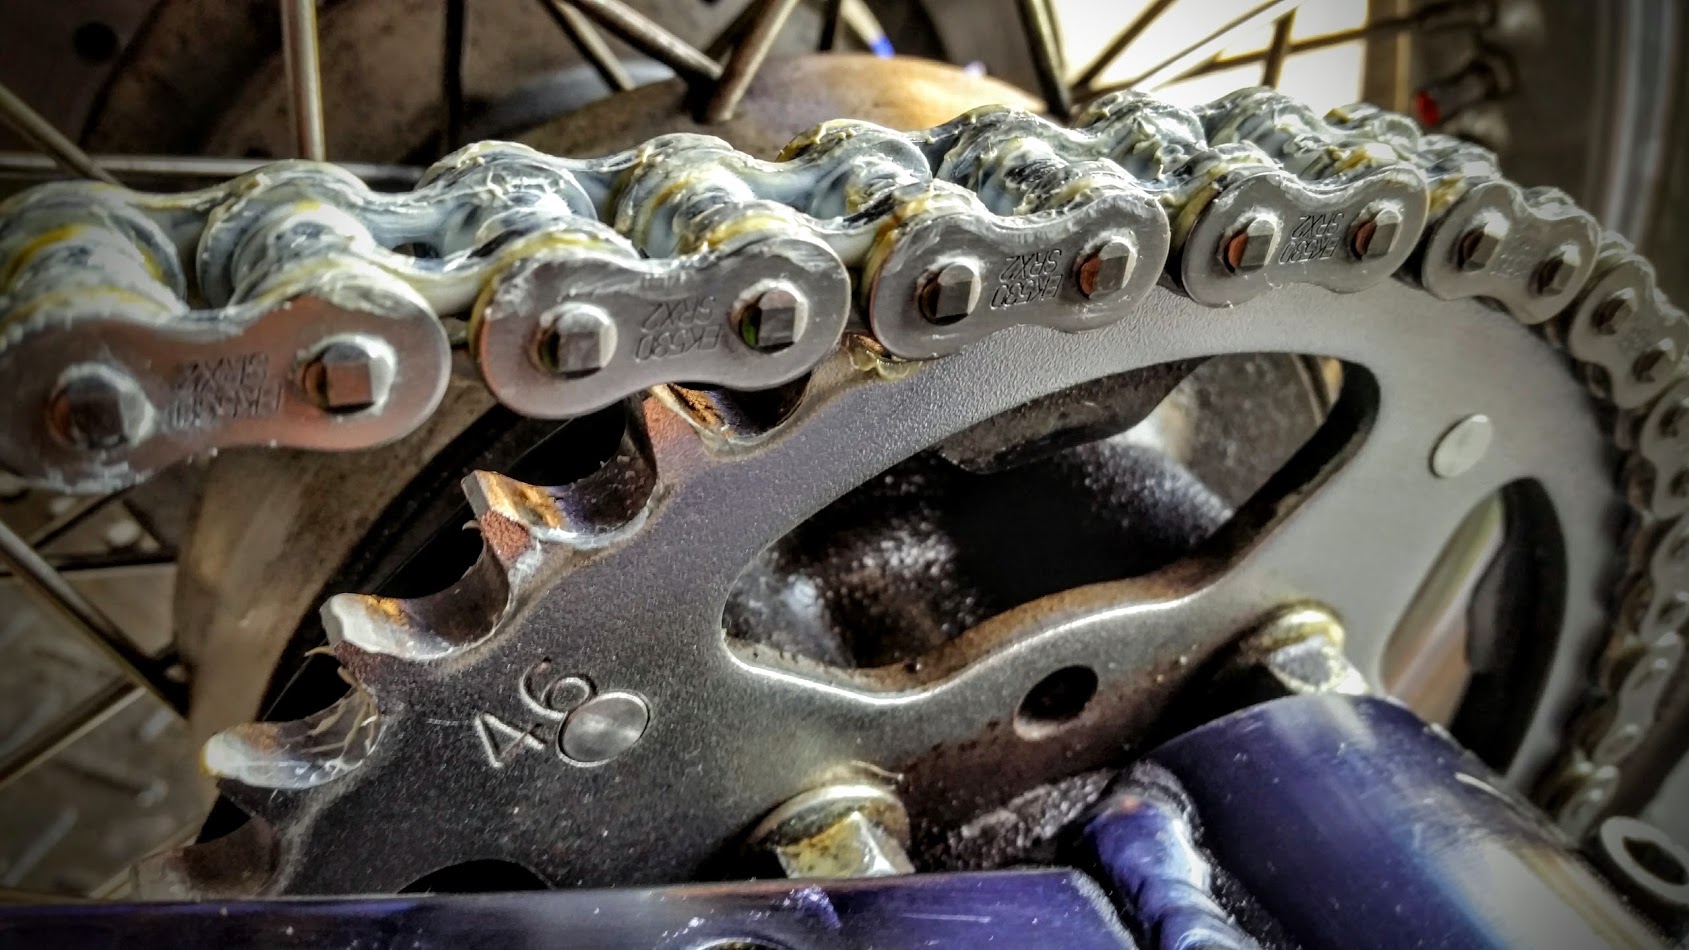
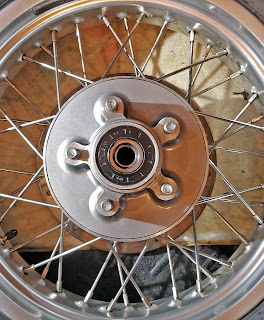
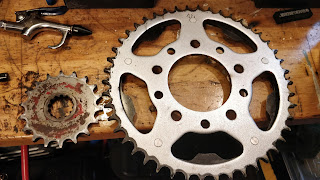
If you take your time and work through it slowly, you'll have a new chain on in no time.  If you want to get into sprockets the rears are remarkably easy to do.  When you remove the rear wheel bolt the wheel drops down and the floating rear caliper on the Ninja 650r simply disengaged and I hung it on the frame.  You can then remove the wheel.  The rear sprocket is held on with your typical nuts and was easy to swap out.

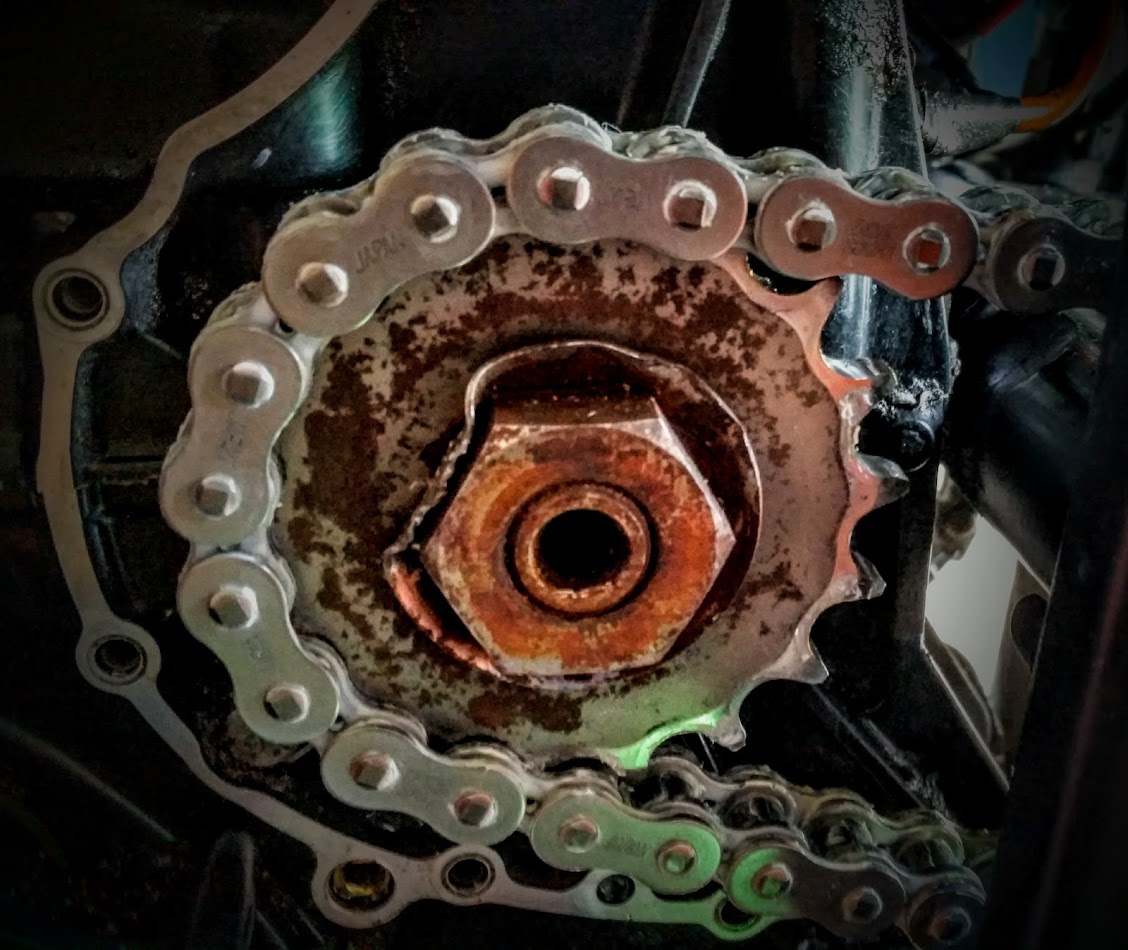
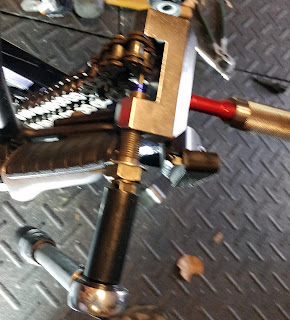
This front sprocket is a f&#*er.
The front sprocket was in good shape, so I gave up on it.  Others online have said that they are pretty straightforward if you have an air gun, but even with a breaker bar I couldn't budge the damn thing and I can pick up a car by the fender.  You remove the front sprocket by bending back the holding washer, putting the bike in gear, stepping on the rear break to hold everything still and removing the nut (it's a good fit on a big 27mm bit).  If there's a trick to this (other than getting a compressor, air tank and air tools), I'd love to hear it.

Follow up with Chain And No Agony for how easily the new chain went on with the right tools.


SOME CHAIN & SPROCKET LINKS THAT MIGHT BE HANDY:

If you've only got a bicycle chain
breaker, file or grind down the rivets
first before you push them out.
If you've broken bicycle chains before you know the basics.  Motorcycle chains are much heavier duty so the process requires stronger tools capable of dealing with stronger rivets.  If you have a bicycle chain breaker you just have to take your time and file down the rivet you're going to push through first.  It took me a couple of minutes of filing to do this.  Lazy people on the internet say buy a Dremel.  If you're lazy, that's what you should do.

VIDEOS

A video on how to break a motorcycle chain (skip to 35sec when the mechanic comes in) in order to re-size it using a motorbike specific tool

A good primer on how to install a master link (and how the pressed, rivet type master links work)

How to measure a motorcycle chain

Hillbilly mechanics: how to do a master link without special tools.

LINKS

Gearing Commander - a handy webpage that lets you compare different sprocket and chain combinations
http://www.gearingcommander.com/

DID company chain guide:

http://www.didchain.com/chainSpecs.html

Motorcycle Chain primer on about.com

http://motorcycles.about.com/od/motorcyclemaintenanc1/ss/Chain_Maint.htm

Wikipedia's history and technically detailed chain description
http://en.wikipedia.org/wiki/Roller_chain

Layout of a roller chain: 1. Outer plate,
2. Inner plate, 3. Pin, 4. Bushing, 5. Roller
An exhaustive history of chains!
ttp://chain-guide.com/applications/1-5-2-motorcycle-chain.html

How Motorcycles Work's awesome chain diagram:


Tuesday 20 September 2016

A Quick Motorcycle Chain Switch

After previous experiences breaking and installing motorcycle chains I figured this time it would be fairly straightforward thanks to a good tool and knowing what I'm doing.  The Tiger's chain had a pretty severe tight spot in it. When I set the tight spot to spec (40mm of slack), the loose part was wobbling around with twice that.  If I set the loose part to spec the tight part would rumble on the sprockets.  You could actually feel the difference in chain tension under acceleration as a surge.

The tool I got last time was quick to set up.  The blue 500 size chain pin pusher slotted right in out of the handle where it had been sitting since my last chain change on the Ninja over two years ago.

The Tiger chain is a 535 sized chain (wider than the Ninja's, but the same pitch length between the links - the Ninja was a 520 chain).  
With the pin pusher piece in place I tightened the outer bolt with a 10mm ratchet and it easily pushed the pins out of the old master link with only mild force on a small ratchet.


With the old chain removed I spent some time cleaning up the sprockets, which were in great condition.  The front sprocket was packed with years of gum from chain lube and it took a while to get it all out, first with a screwdriver and afterwards wiping it up with some WD40.  With it all cleaned off it looked like a bit of rust had found its way onto the front sprocket.


The rear sprocket was only covered in chain oil remnants and cleaning it up was easily done.


If you're not yahooing around and yanking on your chain like a madman all the time sprockets tend to last, especially big, beefy 535 wide ones; this bike has only been owned by gentlemen.  I might swap out the rear 46 tooth sprocket for a 47 tooth one to lower the revs slightly on the next chain, but that's years down the road, and with the sprockets in good shape, it seemed silly to do a full switch now.

A master link came with the chain which is a bit off-putting because Fortnine immediately filled the screen with master links after I purchased the chain, which I took to mean I needed one.  I guess I'll hang on to it, but if the chain I'm buying comes with it letting me know seems like the polite thing to do rather than encouraging an upsell.

The master link that came with the chain had an interesting process for installation.  I'm told this is quite common on bicycles now.  The master link pins have a threaded piece on the end of them.  You thread the long pins on the chain and then alternate tighten the bolts until they won't go any further.


This snugs the outer piece of the master link onto the pins.  When you're done you back off the nuts a few turns and then break them off with a pair of pliers.  It worked well.


A chain so new it's still covered in the wax it was packaged in to stop rust.
With the new chain set to 35mm of sag top and bottom and lubricated with chain wax (preferred because it doesn't make a gooey mess of things, sticks to the chain well and is also a lovely honey colour), it was time for a test ride.  A twenty minute ride in the setting sun up to 100kms per hour demonstrated all sorts of improvement.  The surging feeling was gone making the bike much smoother under acceleration.  In corners that surging could destabalize the bike, it doesn't any more.  The new chain is also noticably quieter.

This time round I think the actual chain removal and installation took about 40 minutes moving slowly and deliberately.  The cleanup of the front sprocket was what took the most time, though it probably did a lot to quiet the new chain (not running through a tunnel of goop on each revolution has to be better).


While I had the tools out I finished the counteract balancing beads install I started earlier in the week by doing the back tire as well.  With beads now in the front and rear tires vibrations through the handlebars are gone and the whole bike is rattle free at speed.  I never really got to try them out on the Concours, but what little I did seemed to work, and seeing as the beads are cheaper than taking in tires to get balanced anyway, why not?  I'm glad I did.

The Tiger is now as arrow straight and smooth as it can be.  It was a joy to ride it home as the sun set on Sunday evening.

Wednesday 16 July 2014

Chain and no Agony

Follow up to Chain & Agony and How to Size and Replace a Motorcycle Chain...


The whole process of breaking the chain and installing it took about half an hour this time around.  The o-ring chain I got was easy to break using the tool I picked up, and installing the new master link on the chain took only moments.  The three in one DRC Chain Tool I got (chain breaker, outer plate presser, rivet presser) was easy to use and looks good doing it.  It might be my favourite tool at the moment.


The chain-breaking tool comes with two sizes of /privet pushing bit.  The blue bit was for 500 sized chains (the Ninja's is
a 520).  You back off the big bolt and install the push pin, then use the smaller outer bolt to push the pin into the rivet on the chain. The tool automatically centres the rivet, so you're true all the way through.
The new chain was a 120 link chain, the Ninja takes 114 links, so that's 6 links off the end.  The hole in the
top is where the chain pin falls out once you've pushed it through.
Close-up of the blue chain bit .  There is a pin inside it that the outer bolt pushes through, pushing the rivet
right out of the chain.  Once the pin falls out the chain falls apart.  You end up with a clean break and two
inner chain links ready to be re-attached on the bike with a master link.
Six links of the 120 link chain removed.  One pin is pushed right out, the other was pushed
out far enough to dismantle the chain.
I installed the master link on the sprocket - it keeps everything lined up and made installation easy.  After
pressing on the side plate (gently, checking that it's in line with the other links and the chain has play in it),
the only tricky bit was installing the retaining clip, it took a few tries.  When you get it though you know for
sure because it makes a very satisfying click.
With the chain back on and lubricated, everything is tight.  The change to how the bike feels is subtle
but very satisfying.  The engine feels much more firmly connected to the back wheel now.  No sags and tight
spots like on the old chain.

I got this mighty DRC Pro chain
tool
at Royal Distributing in
Guelph
.


Now that I've got a handle on this and the right tools for the job, chains don't worry me any more.  This process also emphasized how surgical bike mechanics are.  I started off doing heavy equipment repair as a millwright and then did a couple of years in automotive.  Compared to that kind of work, motorcycle mechanics feel more like surgery than butchery.  Patience and a careful hand are more important than brute force.

Now more than ever I'm looking for an old bike to dismantle and rebuild to get an inside feel for how motorbikes go together.

Friday 11 July 2014

Chain and Agony, or, the End of Local Parts Suppliers

I've got to admit I'm a bit pissed off.  After trying to wrap my head around chains and sprockets online I decided to buy locally and have a chat with the parts desk at my regional dealer.  Since it was my first time doing a chain/sprocket replacement I figured I'd pay the extra cost and get some face to face advice.

Trying to get details out of the parts-desk guy was like pulling teeth.  He seemed frustrated with my questions and didn't offer up much.  I guess the logic there was, 'just bring it in to service.'  I left paying over $300 taxes in for what would have cost me $240 online, but was none the wiser.  I was at least assured that these were the specific parts I needed.

After a series of confusing and frustrating situations, here is the advice I wish the parts guy at the dealer had given me:

The Ninja 650r uses a 114 link chain, he gave me a 120 link chain but told me this was the stock chain especially for my bike.  He's not wrong, but he didn't tell me I'd have to 'break' the chain.  Here is how I wish it'd gone down:


You're going to need one of
these to break and master
link up a motorcycle chain.
It isn't expensive (about
sixty bucks)
Parts guy: "I'm ordering you the chain size for your bike, but it comes with six extra links.  When it comes in I'll get one of the guys to break the chain so it fits your bike specifically.  If you want I'll even ask him to do it when you come to pick it up so you can see how he does it."

He could have sold me a $60 tool (probably for more) and I would have left knowing what I was getting into, instead all I got was the exasperated face.  

When I hung the chain on the bike it was way too long (it was a 120 link chain going on a 114 link bike, but I didn't know that at the time).  I had to go digging to find out why the chain 'specific to my bike' obviously didn't fit.

This experience asks a larger question about brick and mortar stores versus shopping online: why would I spend the gas and time driving there and then pay the extra 20% for the experience if I can pay less online?  If there is nothing value added in me bothering to buy at full retail locally, then why would I do it?

Second up, I wish he'd have offered me some pragmatic advice for doing my own chain work:

Parts guy: "Is this your first motorcycle chain?  It's pretty easy to mess it up.  I'd suggest going for a basic O-ring chain for your first go.  If you botch the job you're only out fifty bucks and you've learned something."

I ended up buying the bells and whistles X-ring chain on his advice, and then breaking it a link too short (after looking up how to do that on that paragon of customer support, the internet).  It's an expensive learning experience breaking a chain so that it doesn't fit my bike.  At least it's still over 110 links and a 520 sized chain, meaning it'll work on a lot of other bikes.  Now I've not got to decide whether to seal it up and wait for an ideal use or try and resell it (at a loss).

One way or another, I don't think I'll be driving down to the local dealer again for parts, I get my questions answered with more patience on the internet, which beggars belief.

Note:  a couple of days later I went online and picked up a basic O-link chain from the same Japanese chain manufacturer from
Canada's Motorcycle (35% cheaper than the equivalent chain from the dealer).  In a matter of moments the chain was on its way (free delivery).  It got here in the same amount of time it took the dealer to order it in (but I didn't have to drive down to the city twice).  I'm all for buying locally and helping out the area economy, but if local business don't realize how they can add value to a local buying experience they're going to kill it stone dead.

Note²:  maybe it's only a motorcycle dealership thing.  I went to RONA to make an order for deck parts and they couldn't have been more fantastic, same with Universal Rentals in Fergus, equally awesome customer service.  Are motorbike shops just too cool to care?

Note³: See the followup post on how to break/shorten/master link a new bike chain for how-tos. 

Sunday 2 January 2022

Changing Motorcycle Chain And Sprockets


I've done chains before but not sprockets.  It's a fairly straightforward bit of work you can do yourself in your shed/garage.  In this case I'm doing both sprockets and chain on my 2003 Triumph Tiger 955i which has over 80k on it.


With the bike on its centre stand I removed the rear tire.


I picked up a chain breaking and installation tool a couple of years ago and it has more than paid for itself.  It has pin sets that push chain pins out to break the chain (it keeps all the hardware in the handle so for the two+ years I don't use it I'm not losing parts).

It also has drop in pads that let me press new rivet chain connectors together.


The new vs. the old front sprocket.  The new one is 19 teeth, the old one 18.


The new front sprocket on the motor.  These are the parts I used:

RK 530 MAX-O O-Ring Chain Natural 114            $101.99
JT Steel Rear Sprocket 46T (530) JTR2010.46    $74.99
JT Steel Front Sprocket 19T (530) - JTF11           $80.19 (all prices CAD)

The '03 Tiger takes a 114 link chain, a 46 tooth rear sprocket and an 18 tooth front sprocket stock.  I saw a suggestion online that going to a 19 tooth front sprocket calms down the bike a touch (it can be jumpy off the line) while also revving a touch slower while cruising which should improve mileage a bit.


Not bad for the original stock rear wheel with over 80k on it, eh?  If you think modern Triumphs aren't well put together, this one was, and with quality parts.
I've had these on the bike since I got it over 30k ago.  Still not in terrible shape.  I've seen sprockets torn to shreds - some people must be very heavy handed on the controls to strip a socket like that.  I've had the Tiger pulling the front wheel off the ground under acceleration so it's not like I'm soft with it (it's getting this drive train maintenance because the old chain had stretched in places).  I'm curious to see and hear how the new parts work.


The new chain and sprockets on.


The connecting link (see it?) is pressed into place with the DRC chain tool which also pushes links together as well as pulling them apart..


The many directions and warnings on the back of the chain box.
The Tiger had a deep maintenance last year, so this year it only needed the chain & sprockets.  It's back under the blanket waiting for a break in the snow for a cheeky early-spring ride.  Next up is doing the brakes on the Kawasaki, then I'm into rebuilding the Amal carbs on the 50 year old Bonneville winter project.

If you're looking for torque settings and parts details for a 2003 Triumph Tiger 955i while doing a sprocket and chain, here they are:

  1. chain sag:  35-40mm
  2. drive chain adjuster (the clamp on the adjustable rings in the swingarm):  35Nm
  3. rear sprocket nuts:  85Nm
  4. front sprocket nut:  132Nm
  5. rear wheel axle bolt:  85Nm
  6. 530 chain with 114 links (if that seems confusing, check THIS out)
  7. 18 tooth front sprocket (though 19 is recommended)
  8. 46 tooth rear sprocket


Monday 23 May 2016

Tiger Chains & Parts

Top gear at 4000rpm has me going
about 100km/hr, so it looks like I have
stock sprockets on the Tiger.
A one tooth more relaxed front sprocket
knocks a couple of hundred RPM off
the bike at 100km/hr and takes the
edginess off low speed throttle.

Chain & Agony: The Return


Now that I'm off a shaft driven bike, I'm back into the black magic that is chain geometry!  A trip to Gearing Commander has me working out the details of an '03 Triumph Tiger 955i's chain and sprockets.  The stock set is a 18T (eighteen tooth) front sprocket and a 46T (forty-six tooth) rear sprocket.  The chain is a 530-50 114.


A number of riders suggested a 19T (nineteen tooth) front sprocket to calm the bike down a bit.  The chain and sprockets are happy right now, but when it finally comes to a change, I think I'll go the 19T way.  Motorbike sprockets run backwards from bicycle ones - the smaller sprocket is attached to the engine, so the more teeth, the bigger the gearing.

LINKS & CHAIN INFORMATION


The 530 114 chain on the Tiger has a pitch of 5/8 of an inch (the 5 is 5 x ⅛" - a 4 series chain would be 4 x ⅛" or half an inch of pitch).  Five-eighths pitch chains have a  roller diameter of 0.400".    The 30 part of the 530 refers to roller width, which in this case is 3 x  ⅛" or 3/8th of an inch.  A 520 chain would have a roller width of 2 x ⅛", or a quarter of an inch.  If you want to understand chain sizes, get a handle on that rule of 8 (all the numbers refer to eighths of an inch).
The 114 refers to the number of links in the chain (its length).


How to change a chain on a Tiger (video)
Triumph Tiger 955i parts list

<- 520 and 530 chains & sprockets widths compared


Tiger Changes of Oil

A fifty dollar US ($300CDN) magnetic
oil drain plug.
Triumph magnetic oil drain plugs.
M14x1.5x16
(that's a metric 14mm width, 1.5mm distance between the threads, 16 mm long drain plug).

Entertaining Triumph oil drain plug banter (and the idea to put hard drive magnets on your oil filter, which is what I'm doing instead of ordering an expensive custom drain plug from The States).

The Tiger has been using a bit of oil (which is evidently within spec) but I don't know what the previous owner's mechanic put in it - putting in not Mobil 1 Synthetic (which Triumph states is the preferred oil) would be a great way to make money on an oil change.  If I swap in the good stuff, then I know what's in it.

I'm also putting on a K&N oil filter with a higher spec than the stock one and putting a couple of hard drive magnets on the bottom of it to catch any metal shavings dancing around in there.

I did the oil change yesterday. I've done thousands of oil changes (it put me through university).  If that oil was changed last fall I'm a monkey's uncle.  The Triumph filter on it had rust on it, the drain plug didn't look like it had been taken off any time recently.  Either the previous owner didn't do it, or his mechanic lied to him.  The oil was black and punky too, looking like it had been in there a long time.

With that all done I'll now look to see how much oil I'm missing every thousand kilometres (it's 3-400ml at the moment - but goodness knows what was in it or for how long).  The moral here is change the oil when you buy a used bike - you can't trust what happened before it was yours and oil is vital to keeping an engine running well.  I'm looking forward to seeing what new, correct oil does for the bike moving forward.


Other than keeping it shiny and lubricating cables and controls, there isn't much more needs doing.

It's supposed to be a beautiful long weekend.  I'm hoping to get out for some time on my very orange Tiger in my very orange Tiger shirt.

Wednesday 25 June 2014

Sprockets, Chains & Walls of Rain

I thought I could make it down to Guelph to order my sprockets and chain and back before the rain hit.  The weather radar said there wouldn't be rain for over an hour.  I left at 2:30 and grabbed some gas in Fergus before heading down Highway 6.  It sprinkled lightly as I went, but it was just enough to take the edge of some truly oppressive humidity.

I got the sprocket and chains sorted out at Two Wheel Motorsport.  The chain drives on motorcycles are one of the first places people play with their geometry.  If you go to look up sprockets and chains for a 2007 Ninja 650r you're buried alive in neon chains and sprockets designed to look like shuriken.  By messing with the length of chain and number of teeth in the sprocket you can essentially gear up your bike, giving it faster acceleration (though it would also be revving over 5000rpm at highway speeds).  

For my first go-around with motorcycle sprockets and chains I went with quality and longevity.  The steel sprockets I got were Afam sprockets designed and built in Europe, they are very high spec pieces.  I stayed away from anything that's neon.  If you're curious, a 2007 Kawasaki Ninja 650r takes a 15 tooth front sprocket and a 46 tooth rear sprocket (that isn't always obvious as people rush to over gear their bikes so they go 0-60 faster).  I also got an X link chain, which offers a number of advantages over an O link chain, though they are more expensive.  The high quality sprockets (front and back) and a high tensile strength chain cost me about $300 taxes in.  They should be in by the end of the week.


Something wicked this way comes!
After wandering around looking at new bikes in the showroom for a few minutes I jumped back on the Ninja and headed back north.  As I turned on to Elora Road the sky got menacing, then it turned positively apocalyptic.

I've ridden through rain a fair bit, especially last summer when I was commuting on the bike.  This one looked turbulent though.  I stopped to zip everything up and take that picture and then I drove into a wall of water.

One of the nice parts of being on a bike is how connected you are to the world.  As I rode toward the darkness I knew this was going to be more than a sprinkle.  The clouds were scalloped and black/green and the temperature dropped ten degrees as I rode under them.  Then the smell of ozone filled my helmet.  I could see across the valley ahead that cars had their headlights on and the wipers were going furiously, behind them the standing wall of rain advanced steadily.


Hosed but home.
As the first big drops hit me I hunkered down on the tank behind the windscreen.  The wind picked up and I had to lean into it to hold my line, and then I rode into the water wall.  I like riding in the rain.  The bike is surprisingly well planted and if you want your visor to clear just turn your head and watch the rain roll sideways across it.  Of course, I like it better when I'm in rain gear, which I wasn't this time.  In about 10 seconds at 80kms/hr in torrential rain I was soaked to the bone, but I was only 10 minutes from home so I could get wet.  Cars were pulling over, the end was nigh.  Trees were bent sideways and it was night-time dark.  I made it the 10 minutes up the highway and turned on to back streets.  I was in my driveway a minute later.

After getting the bike inside and towelling it off I peeled off soaked clothes.  It was the first time I wasn't hot and sweaty all day.  I love riding in the rain.

Sunday 9 January 2022

Brake System Maintenance on a C14 Kawasaki Concours

 I'm busy in the garage these days with the on-going 50 year old Triumph Bonneville restoration project.  It's a big project that will take some time to sort out, but it's -20°C outside with snow squall warnings of 20cm of snow coming, which means it's also regular maintenance time on the two running bikes in the stable.

Tiger's back in hibernation after last week's sprockets & chain maintenance, waiting for a break in another never-ending winter of COVID for a chance to ride.

Last week the Tiger got new chain and sprockets.  I hadn't done the sprockets on it since getting it over 5 years and 40k ago, so I figured it was time when I noticed the latest chain had stretch in it that made it impossible to set the sag properly.  This week it's all about the Concours.

I got the Connie last spring in the middle of the second lockdown.  My son and I rented a van and drove down to The Beaches in Toronto and picked it up from its second owner who hadn't been riding it for several years.  It's a very low mileage bike (under 30k when I picked it up), but I like to cover all the basic maintenance so I can set a 'zero point' for future work.

As you would expect from Kawasaki Heavy Industries, the brakes on the GTR1400/C14 Concours are superbly engineered Nissin calipers.  I'd picked up the pads last summer but they hung on the wall until now because I was putting miles on the thing.  I did find the brakes were squeaking a bit, suggesting the calipers weren't releasing properly - something that can happen in a bike that sits for several seasons.  Like I said before, I don't like riding a bike where I'm not sure of the maintenance, especially on brakes, so it was due.

Doing the pads on the Concours is remarkably easy.  You don't need to remove any body panels and everything is very accessible.  Undo the pin that holds the pads and spring that holds them in and then everything comes apart in your hands.  The pins were rough and there was some odd gunk stuck in the front right caliper.  I cleaned everything up and lubed it and then slotted the new pads into place with the now lubed pins (I think it's a #5 hex head that does the trick).  All very logical.

If you're looking for torque settings for the
brakes on a Kawasaki GTR1400/Concours
C14, here they are.
The rears are just as easy and a similar design with the same pin and caliper bolt sizes (everything is hex metric).  The back was as mucky as the front and I went to lengths to clean up the pressurized caliper slider and lube the pins and areas where the pads move.  The action immediately felt better afterwards.

Last spring when I got the bike I had to sort out a leak in the hydraulic clutch which resulted in entirely new DOT 4 brake fluid (what the Connie uses in both clutch and brakes).  Changing up your brake fluid removes impurities and moisture that can eventually cause real corrosion headaches in your brake system, so after doing the pads I changed up the brakes fluid on both front and rear systems.  The only fluid change left now on the Concours is the antifreeze.  I'll do that at the end of next season.  When I tested it the fluid it was still bright green, looked new and showed good temperature range.

Getting all the air out of the hydraulic clutch so that it felt tight and had positive action was a real pain in the ass last spring.  The good new is that this air-line powered vacuum system did the trick then (it's not crazy expensive) and takes the headache out of bleeding anything with steady, controllable suction.

In the case of the brake system, I set up the vacuum bleeder and then kept adding fluid in the reservoir at the top until it came out clear (the used stuff was darker and cloudier - it looked almost like water once the new stuff made an appearance.

Just a note:  don't keep brake fluid laying around open.  It collects moisture and goes off pretty quickly.  As with all brake fluid changes, I opened the bottle and then immediately used it this time.

The front brakes took less than 10 minutes to completely bleed of old fluid and the rears even less.  If you're doing your own brake/hydraulic fluid maintenance with any kind of regularity, let that hand-pump go and get one of these things (assuming you have an air compressor of course).

With the brakes sorted on the Concours and the sprockets and chain on the Tiger, both are waiting for a break in the weather for a cheeky winter ride to kick off the 2022 season.  As long as I'm not trying to navigate ice on the road, I'm good to go.  An above zero day and some dry pavement is all I need

Now that the regular movers (I was going to call them new but the Tiger is almost 20 years old and the Connie turned ten last year) are sorted out maintenance wise, it's back to the old Bonneville project.  Next up I'm rebuilding the two Amal carbs, then it's rebuilding the ignition system and then (hopefully) hearing the old thing bark for the first time in decades.


Sometimes the Bonneville can feel like it's too big to manage, it needs so much, but with two other working machines I'm never going to be angry with it not being ready, though I would love to have it running in time for The Distinguished Gentleman's Ride on May 22nd.  A '71 Bonneville with some early 70s retro style would be a blast.