
Electronic Ignition Options

Seat:

 |
| Stock (before) |
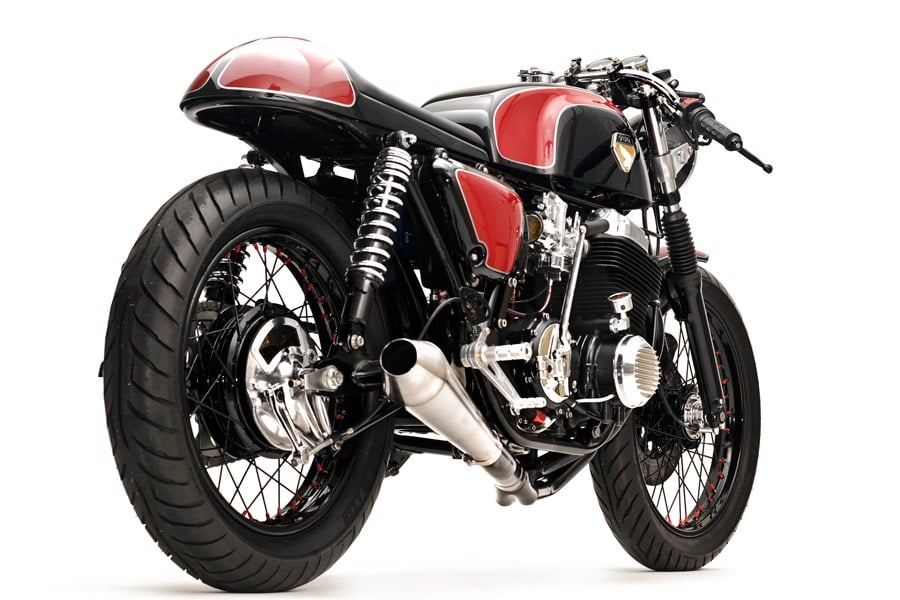 |
| A cafe racer build (after) |
 |
| Austin on his mighty Suzuki DR350 |
 |
| Find a 1990s DR350 Suzuki dual sport bike and prep it for long distance off road work, Mondo Enduro-ize it! |


 |
| an new old Triumph Bonneville |
 |
| What they started with |
 |
| Owning a Fireblade checked a box, taught me many things and was a zero cost experience! |
People who throw big money down on customization that they like seem to think other people will pay extra to adopt their choices and tastes, which never made a lot of sense to me. This goes for houses or in vehicles - just because you're willing to pay a premium to get a certain look, doesn't mean anyone else is, and expecting them to shell out for your choices is a bit naive.
 |
| The Concours was a cagey purchase that still has me well in the black. |
One of the reasons I've always gravitated toward cheap and cheerful 80s and 90s Japanese restos was because the parts are usually easy to find, including hard parts from a breaker if needed, and they're as cheap as chips to buy because people tended to use them rather than put them up on a pedestal.
My first brush with 'vintage' (I think a 51 year old air-cooled Triumph from before the collapse of the British bike industry qualifies as vintage) has me wondering if my approach still works. The cost of parts is much higher than more recent Japanese bikes and this particular Bonneville was half taken apart by a muppet who wanted to be in Easy Rider, so I'm constantly finding parts missing or incorrect. I'm also struggling with missing non-metric tools after having owned metric bikes my entire life.
When I'm reading Practical Sportbikes I enjoy the articles on DIY and the stories of scratchers who got a machine put together with their own hands. When they run one of the 'specials' articles where it's a rich guy with clean hands throwing money at a project, I lose interest quickly. Classic Bike Magazine is similar. When they're talking about an owner keeping an old machine running on ingenuity and guile, I'm all in, but the minute it's a millionaire adding to his collection with another bespoke machine put together by someone else, I've lost interest.

There's a scene in Guy's Garage where Cammy, his professional race mechanic mate, knows how to fix the car they're working on but Guy has his own ideas and keeps bashing away at it wrong. Rather than push the point, Cammy backs off and waits for Guy to realize he's using the wrong tool for the job.
Guy is critical of Cammy for being slack in his approach to work in the book, but I'm left wondering if the truth isn't somewhere in between: what looks like a lack of effort from Guy's point of view is actually a better use of his energy from the professional race mechanic's point of view. There's more to all this than just jumping in to the physical labour, you need to be exercising the grey matter too.
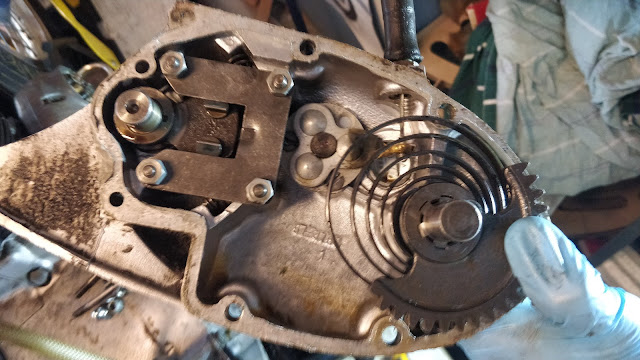
What I'm taking from this latest round of Guy Martin media is that you're more likely to stay engaged with and finish big projects if they make sense to you. To that end, I spent yesterday working out why the kickstarter on the Bonneville wasn't working (the muppet had put it in backwards).
The goal is still to have gone through the whole bike and have it back in working order without breaking the bank. The amount spent on it matters less than whether or not the project is in the black. If a functional '71 Bonneville is worth about five grand, then that's what I'll work to on the budget, while keeping an eye on what engages me most about all this: putting a sidelined bike back into service again... and then riding it!
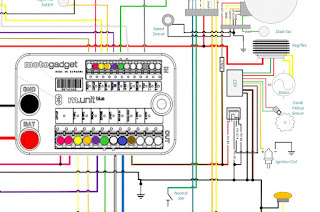
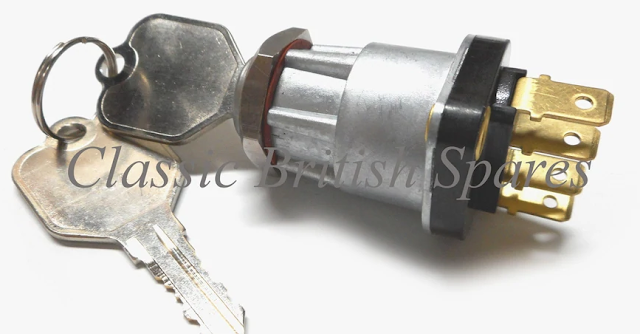
This morning I'm looking at Motogadget's mo.Unit Blue and considering how to best tackle a 51 year old wiring loom that looks to be in good shape but should probably get rebuilt if dependability is the goal. An ignition powered by bluetooth on a smartphone is just the kind of steampunk anachronism that a riding focused buyer would dig. That it's also invisible means it won't hurt the look of the bike (the only change is the ignition key isn't there).
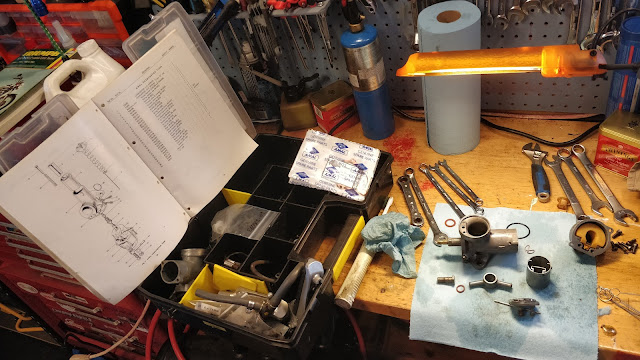 |
| Got into rebuilding the Amal carbs only to discover the muppet who took them apart before didn't install any of the air slider hardware for the choke, so now I'm hunting for hard parts for 51 year old carbs... in a pandemic. Note my anemic imperial socket wrench set. |
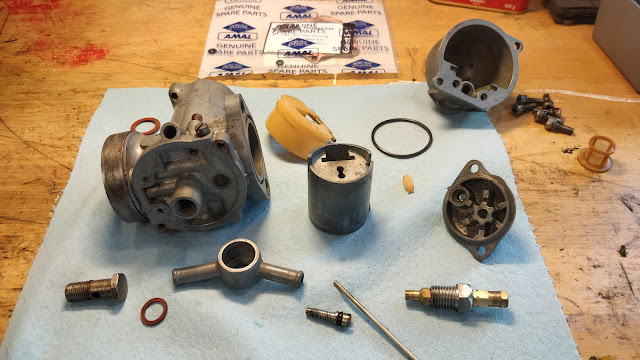 |
| Ready to go and then stopped - neither carb has the air slider or hardware in it. I'd normally call around to the local breakers, find a donor set of carbs and then keep them handy for situations like this. That isn't an option with a 51 year old British bike. |
 |
| It's coming along - slower than I'd like, but it's coming along. When it seems too much I remind myself why I'm doing it: one day soon that engine will turn over for the first time in decades and shortly after that I'll be out riding the thing! |
I'm busy in the garage these days with the on-going 50 year old Triumph Bonneville restoration project. It's a big project that will take some time to sort out, but it's -20°C outside with snow squall warnings of 20cm of snow coming, which means it's also regular maintenance time on the two running bikes in the stable.
 |
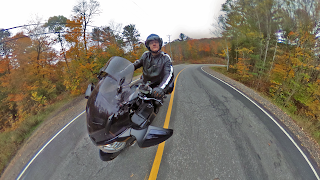
| Tiger's back in hibernation after last week's sprockets & chain maintenance, waiting for a break in another never-ending winter of COVID for a chance to ride. |


 |
| If you're looking for torque settings for the brakes on a Kawasaki GTR1400/Concours C14, here they are. |

 |
| With the brakes sorted on the Concours and the sprockets and chain on the Tiger, both are waiting for a break in the weather for a cheeky winter ride to kick off the 2022 season. As long as I'm not trying to navigate ice on the road, I'm good to go. An above zero day and some dry pavement is all I need |

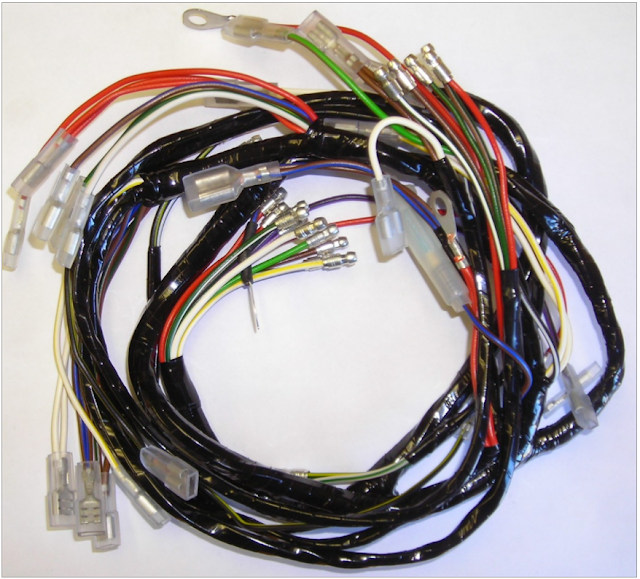
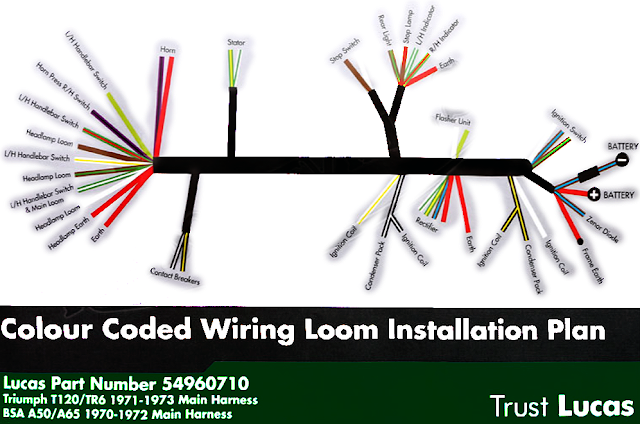
The old Bonnie has an intact loom and many of the original electrical components, but many of these pieces won't have weathered the decades well and I'd be crazy to try and rebuild a hacked on electrical system in a fifty year old bike, so it's all coming out. I'm going to take a page from the custom scene and build a loom from scratch and design and build a complete electrical system from scratch.
This ain't no modern digital machine so the electrical system in it is prehistorically simple. Building a dependable replacement with quality modern upgrades (proper copper wiring, modern connectors, new electronic ignition and coils, etc). The result should be a 1971 Bonneville that is more spritely and dependable than anything that rolled off the line in Meriden in 1971.
Tutorials on creating a motorcycle wiring harness/loom:
BikeExif Tutorial: https://www.bikeexif.com/motorcycle-wiring
Rewiring tutorial: https://www.liveabout.com/making-a-motorcycle-wiring-harness-743591
Tutorial: https://purposebuiltmoto.com/motorcycle-electrics-101-re-wiring-your-cafe-racer/
Resource (costs 20 pounds): https://rupesrewires.com/build-your-own-wiring-loom-pdf-book/
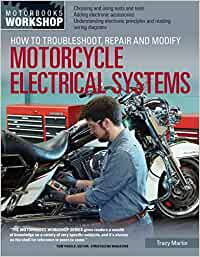
Another good resource ($40): https://www.amazon.ca/gp/product/0760345368/ref=ppx_yo_dt_b_asin_title_o06_s00?ie=UTF8&psc=1
I've purchased and read that last one - it's a gentle introduction to electrical work but I found it a bit simple and wished it had picked up speed as it went. If you've never done any electrical work then it's a good place to start, but that's what I do all day so I was hoping for something with a bit more depth.
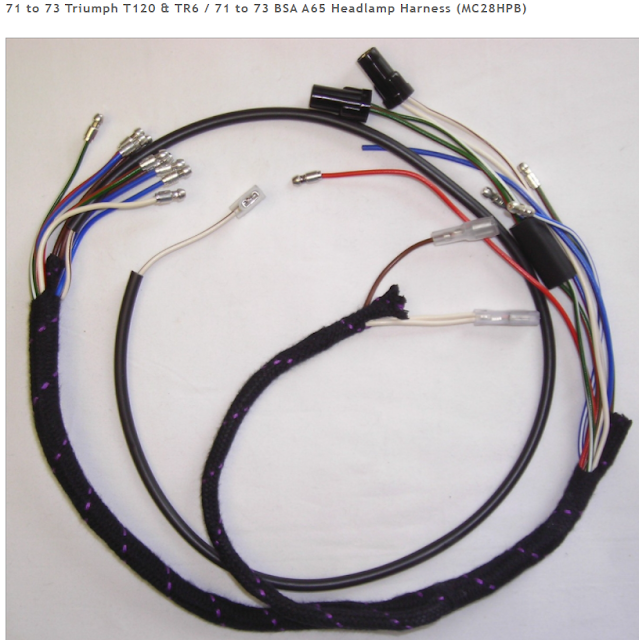
Replacement harness:
http://www.britishwiring.com/MC-28-PP-p/mc28pp.htm
Prebuilt '71 Bonneville wiring harness: https://www.thebonnevilleshop.com/product/lucas-71-72-triumph-bsa-650-twins-main-cloth-wiring-harness-pn-54959629-g-99-1222-g/

Not really what I'm looking for for the Bonnie project, though I'll keep it in mind for a future ground up custom build.
A new ignition barrel with keys looks to be about $80. I'll see if Britcycle has them.
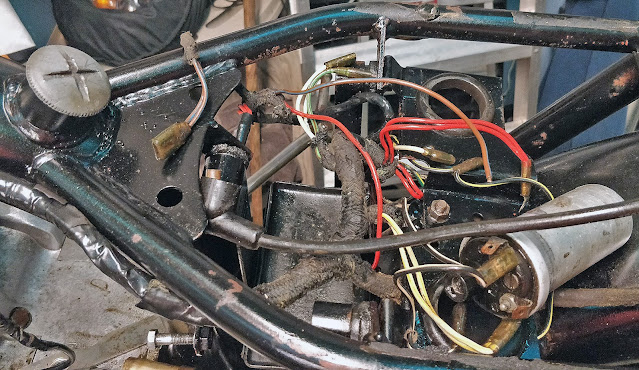 |
| The existing wiring looks like it was taken apart and left that way - I'm tempted to take it all out and just rewire it rather than trust the old mess. |
Electrical Systems Parts List:


https://www.tomcc.org/Triumph/FrameNumbers
https://www.fagengine.com/blogs/tech/triumph-engine-and-frame-numbers
https://triumph-tiger-90.com/dating-your-triumph/
https://www.baxtercyclebooks.com/FB/Triumph_1971_650cc_models/index.html
https://wiringdiagram.2bitboer.com/1971-triumph-bonneville-wiring-diagram/
 |
| Love me some hand drawn drafting! |
Parts
https://vintagetriumphparts.com/?model_filter_id=7
https://www.lowbrowcustoms.com/collections/vintage-triumph-parts
https://www.trojanclassics.com/header-pipes-triumph-tr6-t120-1971-balanced-pair-g
https://burtonbikebits.net/triumph-parts/
https://www.baxtercycle.com/product-category/vintage-triumph/
https://www.thebonnevilleshop.com/
https://kmjonesmotorsports.com/about
British Motorcycle Supply Co. (with Canadian Contact info! Thx Brian!)
http://www.britcycle.com/Catalogues/2014pdfCat.pdf
The old Bonneville needs new tires and inner tubes so I'm wrapping my head around olde fashioned, pre-metric motor-bike tyre sizes.
 |
| Those would be the Dunlop K70s that came with the Bonnieville back in the day. Fortunately Dunlop is still looking after the bike they designed the tire for. |
 3.25 X 19″ front & 4.00 X 18″ rears and used Dunlop K70 tires as standard equipment.
It looks like there are modern Dunlop options for vintage SAE (non-metric) wheels at Revco where I've gotten my last two sets of tires. The handy chart below shows metric and imperial conversions but after some digging I was able to find SAE/pre-metric modern Dunlop K70s that are the exact fit for the bike. Using recent versions of original equipment that give me the benefit of modern rubber durability and grip while still keeping close to the originally engineering intent in Triumph's tire choice is fantastic. I'm not trying to recreate riding in 1971, I'm trying to start with that technology and update where prudent for 21st Century use.

Metric 80/90 90/90 100/90 110/90 120/90 130/90 140/90 | Alphanumeric - NA- MH 90 MJ 90 ML 90 MN90/MP90/MR 90 MT 90 MU 90 | Inch-(Series90) 2.75 3.00/3.25 3.25 3.50 4.00/4.25 5.0 - NA- | Inch-(Series82) - NA- - NA- 3.60 4.10 4.25/82/4.40 5.10 - NA- |
|
| ||||||
Size 120/80V16 130/90H16 130/90V16 500S16 MT90H16 3.00 130/90H16 3.00 140/90H16 140/80VB16 140/90H16 150/80V16 160/80H16 160/80H16 200/60VB16 120/80V18 120/90V18 120/90H16 130/80V18 130/70VB18 150/70VB18 140/70V18 170/60VB18 180/55VB18 230/50 X 15 | Rim 2.75 3.00 3.00 3.00 3.00 3.00 3.50 3.50 3.50 3.50 4.00 4.00 5.50 2.75 2.75 2.75 3.00 3.50 4.00 4.00 4.50 5.50 7.00 to 8.00 | Overall Width 4.7 5.00 5.2 5.2 5.3 5.4 5.8 5.9 6.0 6.2 6.4 6.8 7.9 4.8 4.8 4.9 5.2 5.4 5.9 6.1 6.9 7.0 9.5 | Overall Diameter 23.8 25.4 25.0 26.4 25.3 25.6 25.6 24.8 25.8 25.4 26.1 26.1 25.9 25.9 26.4 26.3 26.3 25.4 26.2 25.7 26.0 26.3 25.3 | ||||||||
Note: Measurements are based on the given rim widths. A rough rule of thumb: Each additional 1/2-inch of rim width will be approximately 1/4-inch more in each tire width.


As GP from Hammy Hamster would say, 'the elephants are against us.' With the outside trying to kill us again, I'm focusing on doing a complete tear down of the 1971 Triumph Bonneville project. I was originally going to see if I could get the bike in motion as it is, but a combination of factors including 1971 Triumph build quality and the early 80s muppet who tried and failed to turn the bike into a chopper's spannering skills have me now approaching this as a frame up restoration.
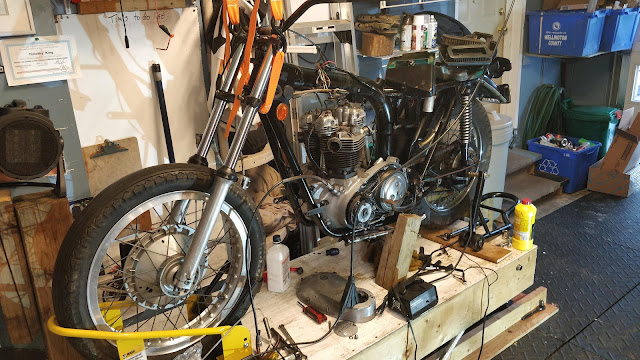
I've been working around the edges which has been good for reconnaissance in determining what state the bike is in, but now that I'm committed to doing the bike from the frame up the first job was to remove the bottom end of the motor and clear the way for a frame restoration:

The bottom end was surprisingly light and easy to lift out of the frame and none of the frame to engine bolts caused any problems. Some were quite loose, so a frame up resto is making more and more sense as I don't trust anything the chopper muppet did to the bike circa 1983.
I've left the frame on the bench as I continue to strip it of accessories. The last time I did some coating work on a project bike it was with Fireball Coatings in Elora but seven years on they seem to have evaporated. I've been looking for alternate (and hopefully better) options and KC Coatings in Guelph looks promising. I intend to get in touch with them and see if we can shot blast and powder coat the Bonneville frame, I just have to make sure they can do it on a complicated oil-in-frame design like this one. Powder coating adds thickness and can cause problems with fasteners and fitting things back together so I need to find out if KC understands that and can can work with this one so that its mechanical pieces will still fit back together.
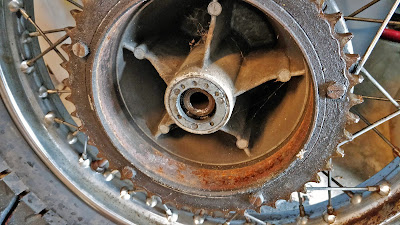
Following the frame I'll sort out both wheels (bearings, tires and inner tubes) before getting the rolling chassis back together and then rebuilding the motor with my swish new 750cc head.
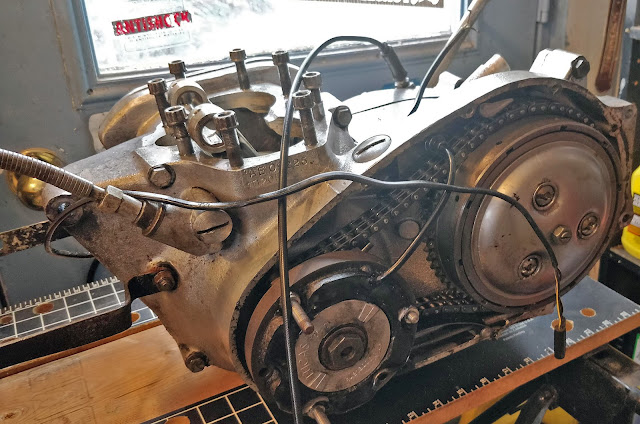 |
| Motor out and on a pop up workbench by the window. It's lighter than it looks. |
 |
| I set up the Black & Decker WorkMate by the back door to the garage to give me somewhere to work on the bottom end of the motor. With the engine split and out of the frame, I can lift the parts off the bike around easily. I might put the bench away and make some space while the project is in pieces. |


https://www.kccoatingsltd.com/contact
Revco is fantastic at shipping (even during a pandemic) and very transparent and communicative with delivery times. Everything I've gotten from them has been expertly packed, is new stock (no old/new tires). They know what they're doing with motorsport tires.
https://purposebuiltmoto.com/how-to-make-a-diy-motorcycle-fender/
If I had more space I'd have welding kit and an English Wheel set up in the workshop and get into a lot more fabrication. I'd go digital too. A industrial sized 3d printer would make me dangerous: https://tkmotorcyclediaries.blogspot.com/2015/11/iihtm-digital-workshop.html
