Showing posts sorted by relevance for query concours carburetor. Sort by date Show all posts

Saturday 13 August 2016

Victory!

After a long wait the o-rings finally came in to the dealer.  I then ended up getting the wrong o-rings (it turns out Kawasaki has like half a dozen different o-rings in this carburetor).  Don't expect to show detailed pictures and get any help from the parts experts either.


With the o-rings and t-fittings in I was able to put the carb back together again (again).  But before doing that I checked the floats one more time (they were all good), and reset the pilot screws to factory specs.  As I was doing that I noticed that the needles were moving when I flipped the carbs.  A quick check of the diagram showed that the spring seat goes above the pin, not below it, which I'd done (quite embarrassing really - I was tempted not to mention it, but my mistake might prevent someone else's in the future, so humility - and humiliation - first).

With the pins and seats the right way around I put the carbs back together yet again.  Installing it is as big a pain in the ass as it ever was, with the fitting of airbox boots being a dark art.


With everything reconnected and double checked, the carburetors were ready to go.  I set the petcock to prime to put a lot of fuel in the empty bowls, hit the choke and turned it over.... and it started and idled properly!

As I used to do, I eased off the idle as the bike ran higher and higher as it warmed up.  After a minute I turned the choke off and it was idling at about 1800rpm.  I dialed back the idle speed to 1000rpm and it was running steady.

So far so good, but the issue was applying throttle - the carbs kept flooding, backfiring rich and then killing the motor, would that happen this time?  No!  It's alive, ALIVE!!!


This video below may be the most satisfying thing I've ever filmed.


I now have two working bikes in the garage.  This has been a long and frustrating process, but I've gotten the rust off some long unused skills.  I'm taking better organization, attention to detail and theoretical understanding with me as I move onto other mechanical projects.

http://tkmotorcyclediaries.blogspot.ca/search?q=concours+carburetor


If it hasn't been replaced, it's been thoroughly gone over.  One carb is complicated,
four carbs is a universe of complications!


Thursday 17 March 2016

Concours Carburetors: Prepping for rebuild

There are three rails holding the four carbs together on a Kawasaki ZG1000 Concours.  Two of them are structural and the other one holds the choke mechanism in place.  Taking them off a twenty two year old carburetor can be trying.  I ended up having to cut a line in one of the retaining bolts and put some heat on it to get it to let go, but all three pieces are out now.

With the four carbs separated I'm now waiting on the rebuild kits.  When they arrive I'll rebuild each carb one at a time (so I don't mix up parts).  All four carbs are cleaned up (a touch of carb cleaner and a toothbrush got 22 years of grime off) and awaiting some new gaskets, float adjusting and rebuilding.  While in there I'll make sure the needles are in good shape and everything has the right geometry.

The first one will be exploratory and slow, by the fourth one I'll be able to rebuild these things in my sleep!


The four carbs separated and cleaned.   Taking a twenty two year old carb apart takes some patience, and some heat.


Cleaned up and ready for a rebuild.

No lost parts this time - everything labelled and organized.
The choke rod (up and down to the right) partially removed - each carb
links to this plate which moves them all when the choke is pulled.


It only takes a bit of carb cleaner and a tooth brush to get the crud off. I blew it dry with the air line afterwards.
Caustic carb cleaner (it melted two pairs of latex gloves - for goodness sake, wear gloves!) isn't recommended on the insides
- I'll use a bit of gas and a clean toothbrush to make sure the innards are perfect when I get in there.

Some Kawasaki Concours ZG1000 carburetor links:

https://snapguide.com/guides/rebuild-kawasaki-concourse-carbs/
https://sites.google.com/site/shoodabenengineering/intake-and-exhaust
http://www.murphskits.com/product_info.php?products_id=130
http://www.randols.net/Connie/#_Toc276312906

Sunday 3 April 2016

Motorcycle Carburetor Rebuild Part Eleventy-Seven (airbox boots)

The carburetor rebuild grinds on.  It took the better part of a week to get the airbox boots in, and when I opened the bag they came in I'd been charged for four but only got three.  I tried contacting Two Wheel Motorsports to ask if the fourth boot was sitting around there, but they didn't get back to me.  

The Concours uses two types of boots to connect the carbs to the airbox and one of the old ones still had pretty good flexibility in it, so I used the three new ones and the best of the old ones.

I tried for the better part of two hours to get the carbs mated to the airbox properly with the stiff, old airbox boots without success.  With my home-made hooked screwdriver (to slip the boots onto the intakes) it took about ten minutes of adjusting to get a good seal on all four carbs.  If you're doing an old carb rebuild, buy some new airbox boots, it'll save you a  lot of frustration and swearing.

The old airbox boots look rough, but the real issue is that the rubber has hardened over time and no amount of heat will soften them up.  The new boots were supple and easily went on the carb air intakes with minimal fuss and bother.
I pay for four and get three.  Fortunately one of the old ones was still pretty supple so I could reuse it.
Ten minutes and the carbs are back in place.  Get new airbox boots if you're rebuilding an old carb!

Friday 1 May 2015

Yamaha PW80

After doing a partial dismantling of my son's new (to us) '04 Yamaha PW80, I put it back together again and learned a valuable lesson in dirt bike ownership:  always turn off the fuel tap.  Other than carb pressure and gravity, there is nothing else stopping your garage from smelling like gas and a puddle forming.

The second dismantling came when it wouldn't start after the flood.  The spark plug was always dodgy, so I've gotten a pair of new ones (no problem finding them at Canadian Tire).


Good advice, straight from Yamaha
A tiny amount of Googling found me the Yamaha shop/operating manual, that covers everything from not carrying dogs on the bike with you to how to tear down the engine.

This is such a simple machine that it's a great way to get a handle on the basic motorbike system.  If you want to get handy with bike maintenance, start with a dirt bike (I started with a Concours...).

The next strip down has been more comprehensive, though to remove the tank, fairings and seat takes all of seven bolts.  The air filter was pretty bad with chunks of mud in the air box.  It's a shame that people treat a bike like that then just chuck in storage.  Why not clean it first?  In any case it's clean now.


The metal shop at school
sorted out the broken muffler.
I've got a busy hands afternoon after work checking the new plugs for spark (it's definitely getting gas) and putting it back together again knowing that I've taken it right down to the engine.  With how it took off last weekend (I impromtu wheelied down the driveway thinking it would barely be able to move me on it), I'm looking forward to seeing how spunky it is with a complete tune up.

With a new plug in it has strong spark - the carb is stinking of gas and it still won't start.  Time to pull the carburetor and sort it out before giving it another go.  Leaving it open overnight doesn't appear to have done it any favours.


The unhappy carburator
A Yamaha PW80 down to the mechanicals


I've got to get my mits on a me-sized dirt bike so we can go into the woods together up at the inlaw's cottage.  That DR600 Dakar is still for sale, I wonder if he'd take a grand for it.  It's a bit more than a mid-sized dirt bike, but it would do the business and also eventually adventure bike for me too.


It'd make a good Swiss army knife bike.


Sunday 28 November 2021

1971 Triumph Bonneville Restoration: Front Fork Rebuild

It's all snow and wind outside so I spent a good six hours in the garage this weekend rebuilding the front forks and the triple tree on the '71 Bonneville winter project.


The forks on the bike had been 'choppered' with massive fork tubes and spacers in them.  The bike came with new stock fork tubes so after a cleanup both front forks got rebuilt with stock fork tubes.  I'll put the chopper ones up for sale and see if it'll make a dent in the new parts order I got in.

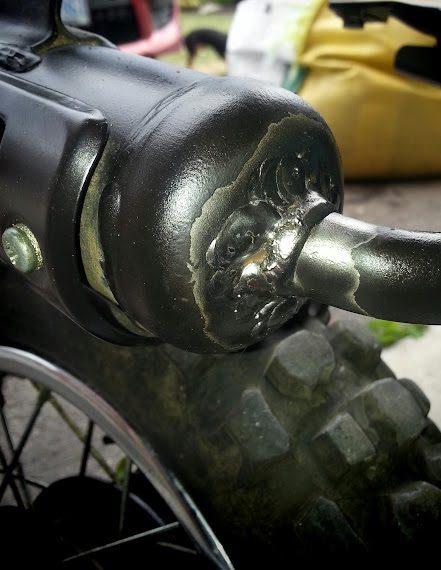
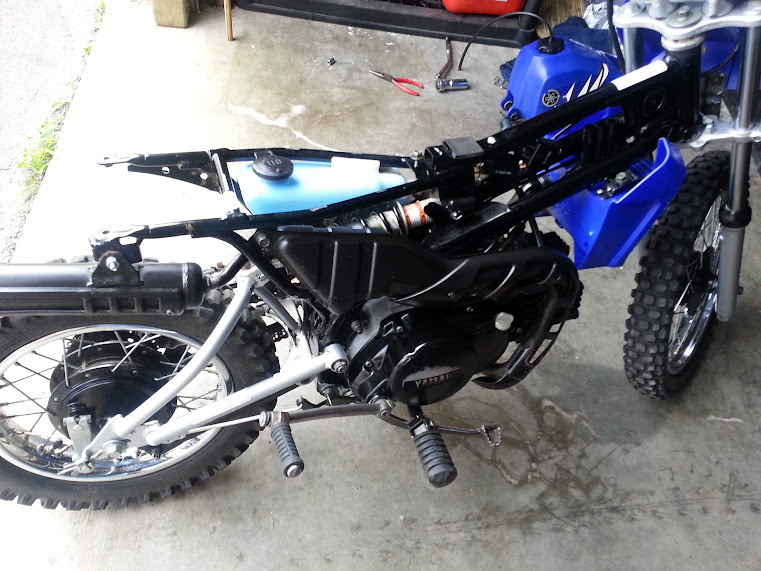
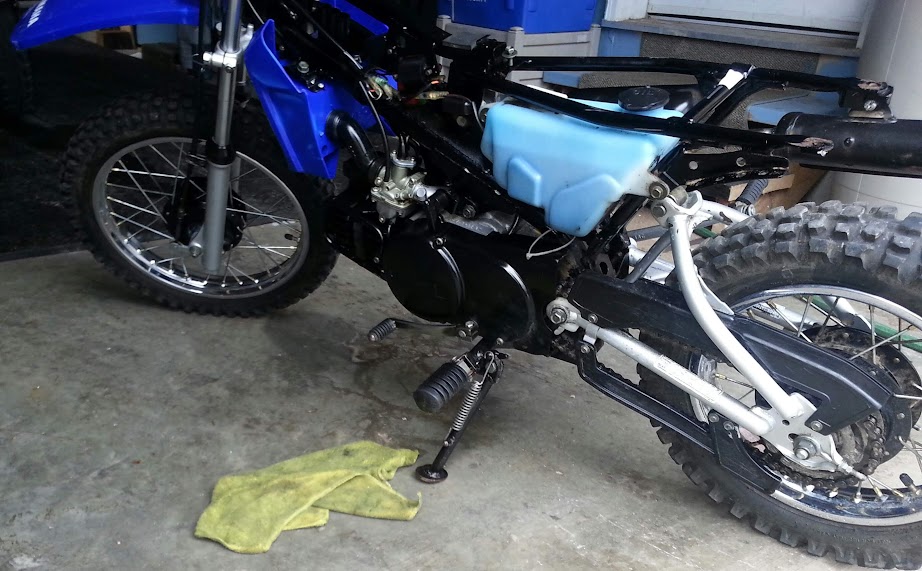
The internals on the forks were in good shape (it has always been stored inside).  After a cleanup they went back together again nicely.  The picture on the right gives you an idea of just how long those fork tubes were (almost as long as the whole shock!).

The right side front fork went right back in no problem, but  the left side one won't fit in the lower triple tree mount (it has a bolt that squeezes it on but the circular clamp is too tight.  I've tried heating it up and wedging a screwdriver in the gap to respread it enough to accept a fork.  I shouldn't complain, this is the only thing that's being difficult on this fifty year old machine so far.

The lower fork unit as it came out of the giant chopper tubes.

The same piece cleaned up.

Parts diagram from the '71 Triumph's parts manual.

Meanwhile, the first parts order came in from British Cycle Parts.  They were great helping me clarify what I needed to get started.  The order was about $450 including shipping and got here quickly (within a week), one box from their Canadian warehouse and the other from their U.S. one.  I haven't started installing anything yet, but I now have what I need to rebuild the Amal carbs, sort out the electrical system and take apart the motor to prep it to run for the first time.

Motor gasket set!

Electronic ignition system and coils!

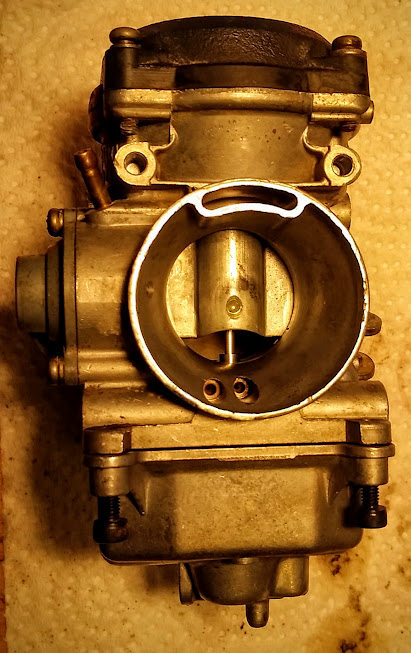
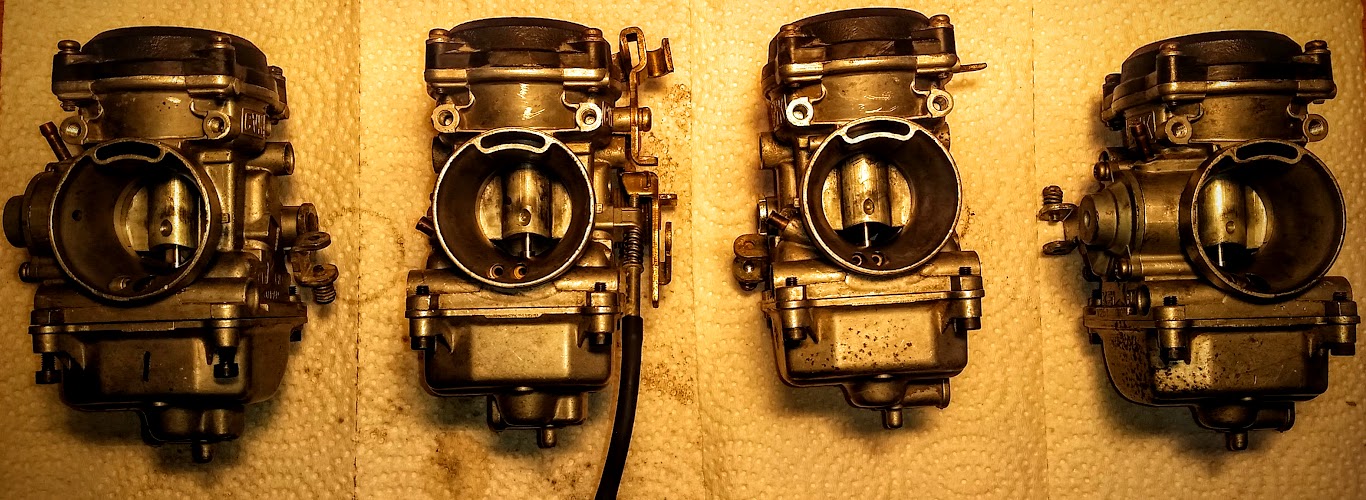
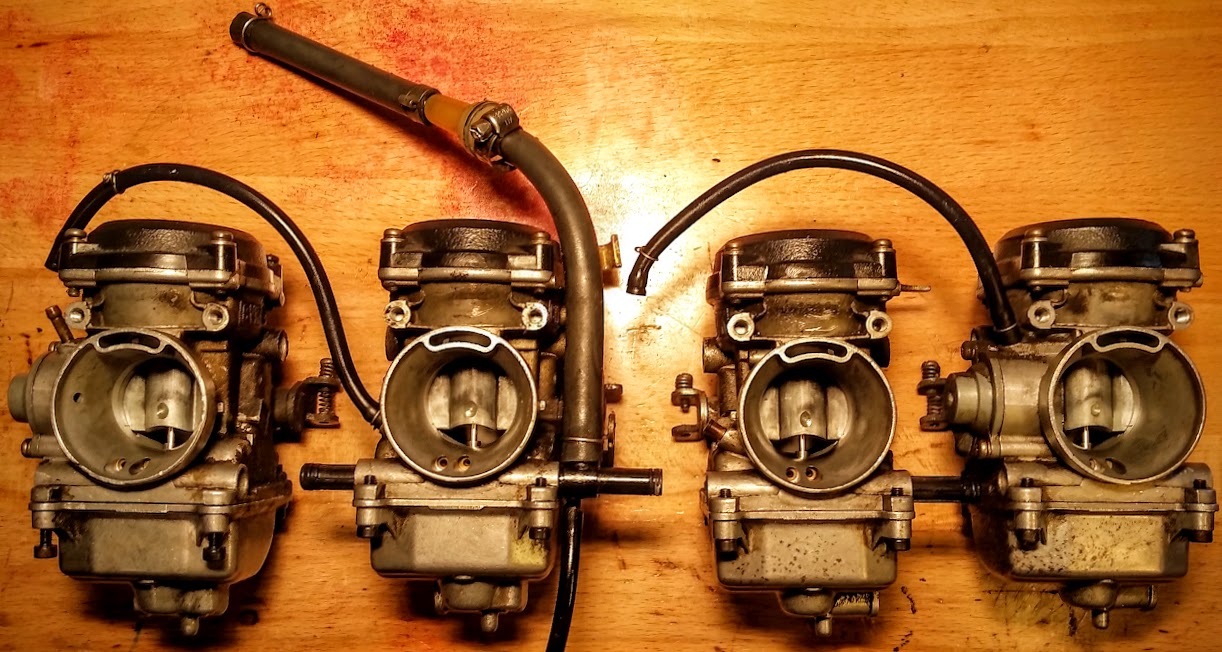
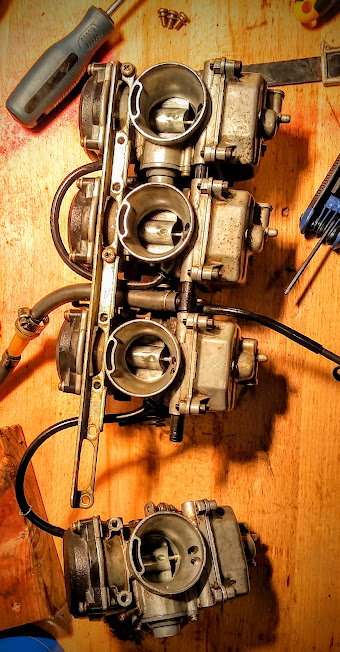
Amal carburetor rebuild kits!

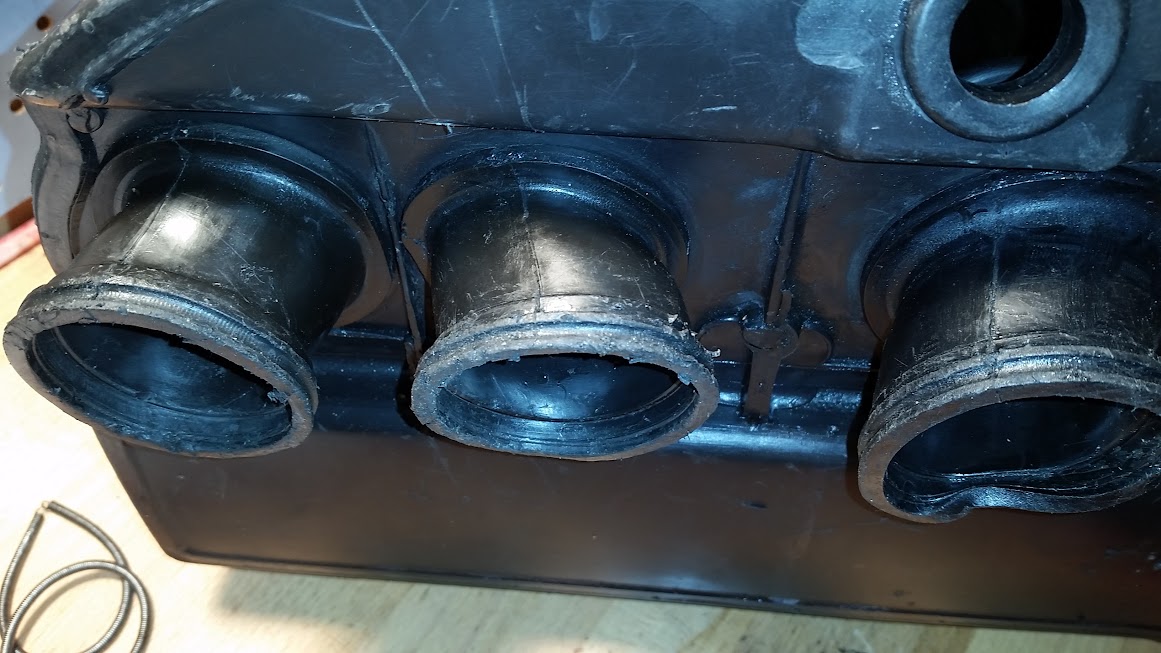
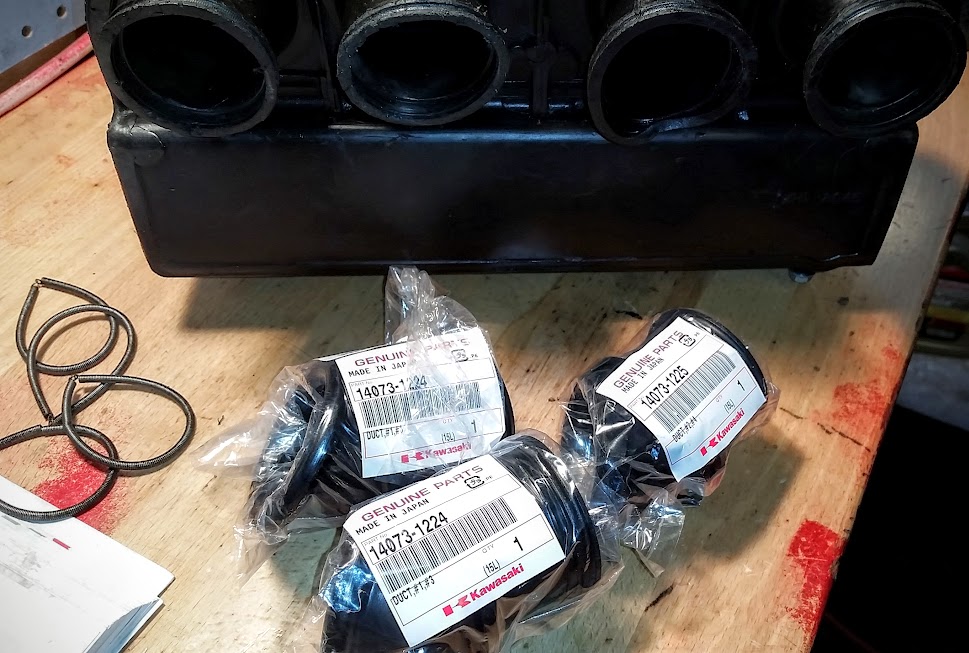
Rubber bits!  This time 'round I got a new kickstart rubber & the gear shift rubber.

That's a stock style new rubber to replace whatever the f*** was on it.

The monkey who was choppering the bike put massive footpegs on the rear peg position,
but that doesn't make any sense on a chopper (they're usually feet up and forward).
These are the stock footrests.

Stock foot rests (and hardware)!

The plan is to rebuild the carbs, get the motor sorted, install the upgraded ignition system (which I suspect will also involve creating a new electrical loom) and then see if I can get it all to run.  Once I've got it a step closer to running I'll be back in touch with BritCycle to get the other bits and pieces I need to get it rideable.  The plan is still to get it to a place of getting a safety and putting it on the road next season.

I'm not a big fan of lost causes and I wrench to ride, so the point is to get the Bonneville back into service. After watching a lot of Henry Cole on TV, I like the idea of a 'rat bike', which also means I can focus on the mechanics rather than how it looks.  If I can get the mechanics sorted to the point where I can ride it, I'll do a season with it rough but rideable and then consider my options.  I got the bike and spares for $1500 and I've just put another $450 into it.  I think I can get it roadworthy for under $4000 and a non-running barn find bike of similar era was going for a grand more than that a few weeks ago online, so no matter what the Bonnie project won't ever drip red.

In a perfect world I'll get it sorted and some one will offer me more than I've put into it (cost, not time, I'm happy to put time in keeping bikes on the road).  Whether that's once it's roadworthy or once it's been cleaned up too, I'm easy.  Meanwhile the Bonneville is doing what I wanted it to:  giving me an opportunity to go deep on a motorcycle restoration and learn a lot in the process.

The motor's getting cleaned up and recommissioned.

Once the (now stock) forks are back in I'll wheel it out for a deep clean on the motor
and then start with the electrics before rebuilding the carbs.  With any luck the old Bonnie
will be to the point of starting by the new year.

Somewhere in between all this deep surgery, the Concours needs new brake pads and the Tiger has some new sprockets and a chain to install.  To be honest, these minor maintenance jobs are something to look forward to after the deep diving into the restoration project.

Last winter was a deep maintenance round on the Tiger, but even that pales in comparison to the scale and scope of the Bonneville restoration.  Practical Sportsbikes and Classic Bike are both magazines focused on hands-on motorcycle mechanics and both have talked about the dreaded project stallout that can happen when it all gets too much.  I'm taking the advice of both mags and breaking this up into chunks and then solving things subsystem by subsystem.  The small wins help me feel like like the project is progressing and prevent the dreaded project-stallout from being overwhelmed by the whole thing.

On the upside, the fact that we got 15cm of snow over the weekend isn't really on my mind as I'm keeping track of many things-to-do in the garage.
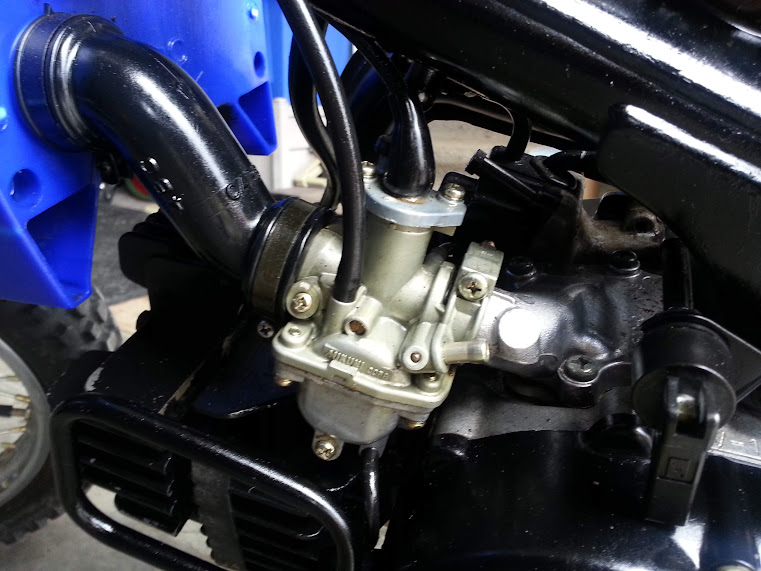
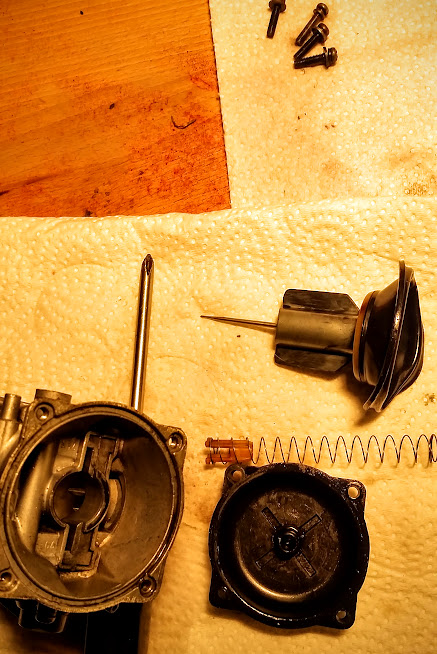
Sunday 14 June 2020

One Tight, Not Too Tight

Now that the CBR900RR Fireblade project is sorted and on the road, I'm finding myself doing what the original intent was in getting it:  learning from a different type of motorcycle.  Unlike the heavy industry Kawasaki Concours, or the SUV of motorcycling Triumph Tiger, the 'Blade was built to a different design brief. The other bikes were over engineered heavy to last, but the the Honda is a feather.

That philosophy is at odds with the heavy handed git who owned it before me and managed to maintain it into such a state of disrepair that it kept it off the road for years.

From the rear brake cylinder that was assembled backwards and over tightened, to the over tight wheels and the slipping clutch I've just adjusted to actually be at spec rather than over-tightened, I'm finding the Honda was a victim of a heavy hand and unsympathetic mechanical inclination.

When I was a teen my dad was talking me through a head gasket repair on one of my first cars.  We weren't minted, so the only way I was driving was if I could keep an old car on the road; mechanical training was an implicit part of vehicle ownership for me growing up.  As we were tightening the head back on he made a point of talking me through the bolt pattern - always tightening opposite bolts so it would seat evenly, and then said something that I've never forgotten as we started tightening down the head:  "always one tight, not too tight."  I guess the guy who abused this lovely piece of Honda engineering into years in a garage never got such good advice.

Mechanical sympathy is an important part of maintaining any machine, but especially a motorcycle, where if you are cack-handed you can end up seriously hurting yourself when it breaks.  In that way, motorcycle mechanics are a lot like aircraft mechanics, it's a do it right or it can go very wrong kind of situation.

Part of that sympathy is taking the time to understand what the engineers who designed the machine want you to do in terms of looking after it.  In the case of the CBR900RR, Honda would like you to leave 10-20mm of play at the end of the clutch lever - this one was set so you could strum it like a guitar string.  This play is to ensure that the clutch fully disengages when you let go of it.  An over tightened clutch cable means it's always set to be slightly pulling and engaging the clutch.  Making it too tight isn't just a failure of the hands, it's a failure in thinking that wounds the machine.  In this case, the over-tightened clutch cable explains why the 'Blade was slipping RPMs when I opened it up.  A sympathetically tuned motorbike will give you a purity of interaction that allows you to more fully understand the machine.  This is one of the reasons why I value technical fluency so much, it puts your ability to operate technology into focus in a way that the technically ignorant will never realize.

***

Meanwhile, in the land of Tim where he's trying to keep a 17 year old European and a 23 year old Japanese bike rolling during the perilously short Canadian riding season, the Tiger's stalling when hot continues.  I've ordered a replacement air idle control valve from Inglis Cycles, who have once again exceeded expectations during a pandemic by sourcing the part from Triumph in the UK and getting it to me in about a week.

One of the nice things about the Tiger is that it's fuel injected, so all that carburetor management is taken care of, but the evil end of computerized fuel injection is that after seventy six thousand kilometres it's finally gone wrong, and an electronic system like that can go wrong in a lot of different ways. 

I'd never gotten into the Tuneboy Software that came with the Tiger (the original owner installed it along with a Power Commander), because if it ain't broke, don't fix it.  But now that it's broke, I got going on it the other evening.  Getting into the bike via a computer was pretty cool.  The software is Y2K retro-hip and the connection was straightforward.  The 20+ pages of instructions weren't really needed (I'm handy with computers).  Windows 10 automatically recognizes what you're plugging in (back in the day, WinXP would have needed drivers installed), and the software is responsive and quick to connect.  It occasionally drops connection, but unplugging it and plugging it in again resolved that each time.


The compact disk (told ya, Y2K hip!) had all of the stock maps for my year of Triumph Tiger 955i engine on it, so I saved what was on there in case it was some kind of cool specialty map the previous owner had worked out (dude worked at a nuclear power plant, so don't underestimate his tech skillz), and then I flashed it with the stock numbers, which took about 20 seconds and returned a confirmed result.  There is a slight lag, but otherwise this is easy to use stuff.

I then played with the diagnostics tool for a bit, hoping for some data that will help me isolate the hot idle stalling fault.  The software says there are no errors (promising that this is that mechanical failure then), and the only thing that looks out of place is a strange return on the engine temperature.  It seems to read accurately and then show -40, even when the fan is coming on, but if the fan is coming on and the temperature gauge on the dash is reading normally, I suspect this is something to do with how the software syncs with the on board computer rather than an actual fault, but I'm going to keep it in mind.

The problem with an idle fault on a fuel injected bike is that the engine management system is taking in data from a number of sensors and using it to balance engine activity, like idling, based on that information.  I've got the mechanical component that regulates idle on the bike incoming, and I hope that resolves the issue, but what I fear is that it's something else, and with these complex electronics systems could mean that anything from a dozen different sensors or relays to a loose or broken wire.  With any luck, it's that idle air control valve and I'm back on the Tiger... and the Honda, just not at the same time.