Showing posts sorted by relevance for query carburetor. Sort by date Show all posts

Wednesday 12 August 2020

Triumph Tiger 955i Engine Remapping

There are a number of posts on this blog about working out the kinks in my 2003 Triumph Tiger 955i,
and 
this is another one.  I've been playing with the Tuneboy engine management software that came with the bike, which works well, is put together well and is easy to use.  In working with the Tuneboy kit I discovered TUNEECU, a more open-source option for programming your own engine maps.

If you've never wrapped your head around engine maps, they're not very complicated.  Tuneboy does a good job of explaining how it works in their primer that comes with their software.

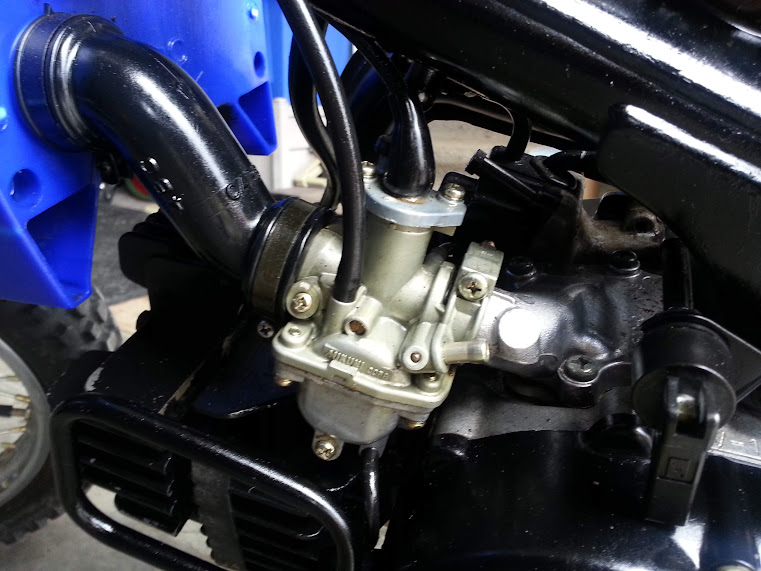
Back in the day you had a carburetor that used screws and jets to set the amount of fuel that got metered into the engine.   If you changed altitude you had to start swapping hard parts (usually the jets that sprayed fuel) to keep the bike running right, and sooner than later you had to manually trim the whole thing to keep it running right.  Electronic fuel injection took that all away.  A computer under the passenger seat on the Tiger takes inputs from sensors in the air-box (barometric pressure), in each of the three injectors , the fuel pump, radiator (engine temperature) and a crankcase sensor to constantly adjust things to use the most effective amount of fuel to make the bike go.  Put another way, carburetors are a mechanical, low resolution solution to feeding fuel into an engine.  Electronic fuel injection is a responsive, high resolution fix to the problem of delivering the right amount of fuel to a motor.

Tuneboy map editor - you can change settings and tell
the ECU (electronic control unit) what to do under
certain circumstances.

A fuel map is a spreadsheet of numbers.  Sensors feed the computer what RPM the engine is turning at and how much throttle is being asked for and based on the number in the fuel map, the computer delivers a set amount of fuel.  The 'fuel map' is literally a map that directs the computer to deliver a set amount of fuel.  If you're at high RPM and have just shut off the throttle, a smart EFI system will cut fuel delivery entirely, saving both fuel and emissions, something a carb couldn't manage.  If you suddenly give the bike a handful of throttle at low RPM, the map will direct the fuel injectors to deliver an optimal amount of fuel as it picks up speed, whereas a carb will always just send a mechanically set amount of fuel based only on how much wrist you're giving it.

In Tuneboy's system, you can change fueling and ignition maps, and modify things like idle speeds. The issue has been that the only maps I can find for Tuneboy are the stock ones from Triumph, which were set up to favour fuel economy and emissions over smoothness and drive-ability.  Meanwhile, TUNEECU (if you can navigate their 90's style web design and atrocious apostrophe use) offers you modified tunes that can smooth out your lumpy OEM map.

Of special interest to me were custom edits that made the list and have been on there for 9 years.  I don't know who Deano from South Africa/SA_Rider is, but they know their stuff.  The map on there does wonders for your Tiger's smoothness and pickup.  It might use a bit more fuel if you're heavy handed, but the difference in motor operation is impressive and worth it.

I was unable to find a digital tool to transpose the HEX files from TuneECU into my Tuneboy DAT format, so I opened up the modified HEX file and transposed the numbers over to the Default Tuneboy 10120 Triumph engine map and resaved it.  You can find that modified Tuneboy DAT file with the TuneECU South African mode here.

Finding this stuff isn't easy, and it's only getting harder as these old bike recede into the past, so I'm hoping this post help you find what you need to get your Tiger purring again.  It did wonders for mine.

Even though the old vacuum pipes held vacuum, I swapped them out for some similarly sized clear fuel line I had (you can see them going from above each injector to the idle stepper motor.  The TUNEboy software also comes with a diagnostics tool (with very cool 90s graphics!) that lets you test the radiator fan, idle stepper motor (which moves up and down modulating the vacuum in that black thing to the left/bottom in the picture) and the RPM gauge.

LINKS

You can find TUNEboy here:  https://www.tuneboy.com.au/
It comes with a cable that'll connect to your Triumph and is easy to get going, and comes with all the stock tunes.  It also lets you tune on a dyno, if you're minted.  It ain't cheap, but the minted guy who bought my bike new was, so he sprung for it and I'm still enjoying his largess over a decade later.

TuneECU can be found here:  https://www.tuneecu.net/TuneECU_En/links.html  Try to get past the out of control apostrophe use - they're better at software than they are at the speaking English goodly.
The older version is free, but finicky with Windows' old serial port drivers.  You can buy the app on the Android store for fifteen bucks, which seems perfectly reasonable.  You can then connect via bluetooth from a phone or Google tablet, though I understand you miss some connectivity that way.

It gets tricky these days finding the On Board Diagnostics (OBD) serial cable you need to connect the bike to the PC.  You can buy 'em from the UK, where people like fixing things.  CJ Designs in Wisconsin will sort you out with one too:  https://cjdesignsllc.com/?s=TuneECU

The modded engine maps for Triumphs on TuneECU can be found here: https://www.tuneecu.net/Custom_Tune_list.html

The TuneECU page goes into detail about how you might use the TUNEboy cable, but it requires so much messing around with knocking default Windows drivers out of the way and forcing others on that I wouldn't bother (I didn't).

Saturday 26 March 2016

Icy Days & Carburetors

It's been ice-storm icy here
Without warm weather beckoning (we've been in the middle of an ice-storm here) I'm in less of a panic about not having a bike to ride.  With an extended long weekend thanks to power failures and such, I've been hammering through four carb rebuilds.

The K&L kit I got came with a new bowl gasket, new pilot jet, washer and o-ring, and a new float jet.  Breaking down each carburetor one at a time (so I don't mix up parts), I cleaned out the carbs and blew them out with compressed air and then put them back together with the new parts.


Those little rubber bits
get crusty after 22 years
on a bike...
Adjustment wise I reset the float height (17mms with the float unweighted - held sideways).  I also reset the pilot jets to two turns out from snug.  The pilot jets varied from almost five turns out to under three turns out.  I'm curious to see how this affects fueling.  The manual suggested resetting them to what they were, and I did record them, but the factory setting is 2 turns from snug, so that's what I reset them to.  I'm not sure why I'd reset them to what they were when they weren't working well.

The carb rebuilds weren't particularly difficult, but they were a bit tedious (you're basically doing the same thing four times).  Things have ground to a halt again as I've found that I need o-rings to replace the old, broken ones that sealed the fuel lines between carbs.  With some new o-rings I should be good to put them all back together again and re-vacuum tube them with new tubing.


Rebuilding the first carb - it took a bit longer as it was more exploratory

The second videos hows the final two carbs and then discovering the need for o-rings -both videos are based on photos taken every 10 seconds compressed into a video running at one photo every 1/10th of second.

As an aside, I thought it would be a good idea to go through Motorcyclesuperstore.ca, but they seem to have pulled back from offering Canadian customers a clear view of their prices.  You used to be able to buy in Canadian dollars and there were no surprises.  When you buy now they charge in U$D, so you've got to do some math to figure out how they compare to Canadian retailers.  It looked like they came out about twenty bucks ahead of an equivalent Canadian order, until I got the COD message with border taxes.  Suddenly that twenty bucks turned into paying an extra ten.  I liked motorcyclesuperstore.com, their customer service went above and beyond, but their lack of clarity around pricing of orders to Canada puts them in the same category as any other US distributor.  I'm not happy with canadasmotorcycle.ca's 'easy' returns (they charge you for shipping), but I'm not playing roulette with customs costs again.  I'm afraid that's the last time I'll use motorcyclesuperstore.  I need to start looking into other Canadian based motorcycle retailers.


Two down, two to go...
The pilot jet (centre) - has a spring, washer and o-ring underneath.
The float bowl off and being cleaned out - the floats are held in a pin at the bottom - the float jet hooks on a tab in the middle

Carb Photos:

https://goo.gl/photos/kPhLXuQnb8HmdQFs9


Friday 1 May 2015

Yamaha PW80

After doing a partial dismantling of my son's new (to us) '04 Yamaha PW80, I put it back together again and learned a valuable lesson in dirt bike ownership:  always turn off the fuel tap.  Other than carb pressure and gravity, there is nothing else stopping your garage from smelling like gas and a puddle forming.

The second dismantling came when it wouldn't start after the flood.  The spark plug was always dodgy, so I've gotten a pair of new ones (no problem finding them at Canadian Tire).


Good advice, straight from Yamaha
A tiny amount of Googling found me the Yamaha shop/operating manual, that covers everything from not carrying dogs on the bike with you to how to tear down the engine.

This is such a simple machine that it's a great way to get a handle on the basic motorbike system.  If you want to get handy with bike maintenance, start with a dirt bike (I started with a Concours...).

The next strip down has been more comprehensive, though to remove the tank, fairings and seat takes all of seven bolts.  The air filter was pretty bad with chunks of mud in the air box.  It's a shame that people treat a bike like that then just chuck in storage.  Why not clean it first?  In any case it's clean now.


The metal shop at school
sorted out the broken muffler.
I've got a busy hands afternoon after work checking the new plugs for spark (it's definitely getting gas) and putting it back together again knowing that I've taken it right down to the engine.  With how it took off last weekend (I impromtu wheelied down the driveway thinking it would barely be able to move me on it), I'm looking forward to seeing how spunky it is with a complete tune up.

With a new plug in it has strong spark - the carb is stinking of gas and it still won't start.  Time to pull the carburetor and sort it out before giving it another go.  Leaving it open overnight doesn't appear to have done it any favours.


The unhappy carburator
A Yamaha PW80 down to the mechanicals


I've got to get my mits on a me-sized dirt bike so we can go into the woods together up at the inlaw's cottage.  That DR600 Dakar is still for sale, I wonder if he'd take a grand for it.  It's a bit more than a mid-sized dirt bike, but it would do the business and also eventually adventure bike for me too.


It'd make a good Swiss army knife bike.


Sunday 14 June 2020

Motorcycle Destinations: Mostly Ironheads In Elora, ON.

There was a time when every motorcyclist was also an amateur mechanic.  Getting your hands dirty was the only way to keep early motorcycles running.  We're over a century into the evolution of the motorized bike now and, as in all places, digitization has taken over.  Modern mechanics are now called technicians and have to be as adept at communicating with the computers on a modern motorcycle as the old school types were at diagnosing a mechanical fault with their senses.  Both are complicated, but in quite different ways.  There are obvious advantages to modern bikes in terms of efficiency, ease of use and dependability, but motorcycling is inherently a compromise in convenience, and many of the iconoclasts who escape the clutches of automotive transport to ride in the wind question the replacement of human skill with automated assistance.

Back in the day the motorcyclist themselves performed many of the tasks that a modern day technician does, so what was left to the old school mechanic?  What you'd typically find in a pre-war motorcycle repair shop looked more akin to a machinist's bench than the antiseptic, electronically focused diagnostics bay of a modern day garage.  That ability to manufacturer your own parts and diagnose problems without computer support, using only your senses and your hands might seem simplistic and archaic, but it was nothing of the sort.  There is a secret art to working with pre-electronic, analogue motorcycles that trips up many modern technicians who, while adept in leveraging digital tools to diagnose digital machines and replace parts, struggle to diagnose and repair mechanical faults.

***

If you're into restoring older machinery, this vanishing skill set is hard to come by, but I'm fortunate to live near one of these rare, independent, locally owned shops.  Lloyd Gadd is the owner and operator of Mostly Ironheads in Elora, Ontario.  With decades of experience in mechanics, he approaches motorcycle repair old school.  His shop is part machinists, part mechanics and part historical ode to The Motor Company.  Lloyd focuses on older Harley Davidsons, but as the name of the shop implies, it's not an exclusive focus.  Lloyd is also a qualified mechanic who can do everything from MoT safeties to changing a tire.

I was in there most recently getting last winter's Fireblade project safetied, and in the process Lloyd's prompt service got me looking at a better way to do motorcycle tires that will save me a significant amount of money.  While I was over there I also did a round of photography to give you a sense of what goes on in this old school shop.


Multiple engine rebuilds of air cooled Harley twins were ongoing in this small but dense workspace.

Unlike like most modern shops that simply refuse to work on long term mechanical or machinist driven repairs in favour of high turnover/quick to repair parts replacement, Mostly Ironheads will actually machine parts and rebuild a motor from the ground up.

It's a whole other level of mechanical commitment when you are prepared to turn your own parts out.

Lloyd has a number of customer projects on the go, and also makes a point of collecting older and vintage parts.  If you're fan of Harley Davidson you should make a point of riding up to Elora and checking out what's on hand - in many cases you'll see parts that are so rare that you may never have seen them before, even if you're into classic hogs.

Lloyd told me the story of a 1950s Harley racing motor he'd come across.  Only one of the two heads is accurate, but he's on the lookout for a replacement - though seven decades old serviceable racing parts don't survive well, as you can imagine.  When he has this rare piece of motorcycling history back together it'll be one of the few remaining complete Panhead racing motors in existence.  You might think that's a one off, but not in this shop.  Even if you're not into HD, this place is an ode to moto-mechanical history and worth a stop.  Air cooled bikes have an aeronautical aesthetic to them that modern bikes often miss.


The machining needed to sort this head out is impressive.  It had worn down below spec so is now being built back up and reground to specifications.  When you can machine your own parts, you're as much an engineer as you are a mechanic.


 Being a restorer, Lloyd is always on the lookout for parts, and the shop is an ongoing work in progress, with parts coming in and getting sorted and stored until needed.  Previous customers, online and estate sales and various other connections like the Harley Owners Group mean Mostly Ironheads are able to draw in older parts, often found in boxes of 'stuff' that get dropped off.

Lloyd mentioned a customer who dropped off a box of stuff while clearing out space at home.  In the process of going through it they discovered an unopened complete carburetor assembly still in the original factory packaging from the mid-sixties!  There is a joy in bringing a piece of history like this back to life, and the joy is alive and well at Mostly Ironheads.  If you're in Southern Ontario, it's an easy ride up north of Guelph to the shop.


This is that racing motor - one of the heads is incorrect, but the rest is intact and very rare!
 These are the cam lobes for that racing head compared to a typical one.  Not only is the racing cam lobe lighter with hollowed shaft, but it's also heavier duty in terms of strength.  Here and here are good primers on cam profiles if you're curious.  Whereas the right side regular cam is designed for long term use and efficiency, the more radical racing came on the left is designed to stay open longer, rev high and produce more power, though it wouldn't idle well, get good mileage or run smoothly.  But when you're aiming for all out speed, you'll put up with that just so you can wind it up and go.  You're unlikely to see mechanical history like this anywhere else in Ontario.


In addition to the restoration work going on, you'll also find an eclectic mix of older, finished air cooled Harleys ranging from customized choppers to more standard rides.  If you're into older, air cooled machinery, this will really float your boat.

Lloyd's area of interest extends from post war bikes all the way up to the last of the air cooled, carburettor fed bikes.  If you're into graphic design, you'll see everything from post war art deco to sixties and seventies disco and eighties futurism in the logos and bike designs.

There are some core elements to Harleys (like v-twin engines), that evolve slowly, but design wise they're much more in tune with their times than you might have assumed.


Sunday 28 November 2021

1971 Triumph Bonneville Restoration: Front Fork Rebuild

It's all snow and wind outside so I spent a good six hours in the garage this weekend rebuilding the front forks and the triple tree on the '71 Bonneville winter project.


The forks on the bike had been 'choppered' with massive fork tubes and spacers in them.  The bike came with new stock fork tubes so after a cleanup both front forks got rebuilt with stock fork tubes.  I'll put the chopper ones up for sale and see if it'll make a dent in the new parts order I got in.

The internals on the forks were in good shape (it has always been stored inside).  After a cleanup they went back together again nicely.  The picture on the right gives you an idea of just how long those fork tubes were (almost as long as the whole shock!).

The right side front fork went right back in no problem, but  the left side one won't fit in the lower triple tree mount (it has a bolt that squeezes it on but the circular clamp is too tight.  I've tried heating it up and wedging a screwdriver in the gap to respread it enough to accept a fork.  I shouldn't complain, this is the only thing that's being difficult on this fifty year old machine so far.

The lower fork unit as it came out of the giant chopper tubes.

The same piece cleaned up.

Parts diagram from the '71 Triumph's parts manual.

Meanwhile, the first parts order came in from British Cycle Parts.  They were great helping me clarify what I needed to get started.  The order was about $450 including shipping and got here quickly (within a week), one box from their Canadian warehouse and the other from their U.S. one.  I haven't started installing anything yet, but I now have what I need to rebuild the Amal carbs, sort out the electrical system and take apart the motor to prep it to run for the first time.

Motor gasket set!

Electronic ignition system and coils!

Amal carburetor rebuild kits!

Rubber bits!  This time 'round I got a new kickstart rubber & the gear shift rubber.

That's a stock style new rubber to replace whatever the f*** was on it.

The monkey who was choppering the bike put massive footpegs on the rear peg position,
but that doesn't make any sense on a chopper (they're usually feet up and forward).
These are the stock footrests.

Stock foot rests (and hardware)!

The plan is to rebuild the carbs, get the motor sorted, install the upgraded ignition system (which I suspect will also involve creating a new electrical loom) and then see if I can get it all to run.  Once I've got it a step closer to running I'll be back in touch with BritCycle to get the other bits and pieces I need to get it rideable.  The plan is still to get it to a place of getting a safety and putting it on the road next season.

I'm not a big fan of lost causes and I wrench to ride, so the point is to get the Bonneville back into service. After watching a lot of Henry Cole on TV, I like the idea of a 'rat bike', which also means I can focus on the mechanics rather than how it looks.  If I can get the mechanics sorted to the point where I can ride it, I'll do a season with it rough but rideable and then consider my options.  I got the bike and spares for $1500 and I've just put another $450 into it.  I think I can get it roadworthy for under $4000 and a non-running barn find bike of similar era was going for a grand more than that a few weeks ago online, so no matter what the Bonnie project won't ever drip red.

In a perfect world I'll get it sorted and some one will offer me more than I've put into it (cost, not time, I'm happy to put time in keeping bikes on the road).  Whether that's once it's roadworthy or once it's been cleaned up too, I'm easy.  Meanwhile the Bonneville is doing what I wanted it to:  giving me an opportunity to go deep on a motorcycle restoration and learn a lot in the process.

The motor's getting cleaned up and recommissioned.

Once the (now stock) forks are back in I'll wheel it out for a deep clean on the motor
and then start with the electrics before rebuilding the carbs.  With any luck the old Bonnie
will be to the point of starting by the new year.

Somewhere in between all this deep surgery, the Concours needs new brake pads and the Tiger has some new sprockets and a chain to install.  To be honest, these minor maintenance jobs are something to look forward to after the deep diving into the restoration project.

Last winter was a deep maintenance round on the Tiger, but even that pales in comparison to the scale and scope of the Bonneville restoration.  Practical Sportsbikes and Classic Bike are both magazines focused on hands-on motorcycle mechanics and both have talked about the dreaded project stallout that can happen when it all gets too much.  I'm taking the advice of both mags and breaking this up into chunks and then solving things subsystem by subsystem.  The small wins help me feel like like the project is progressing and prevent the dreaded project-stallout from being overwhelmed by the whole thing.

On the upside, the fact that we got 15cm of snow over the weekend isn't really on my mind as I'm keeping track of many things-to-do in the garage.