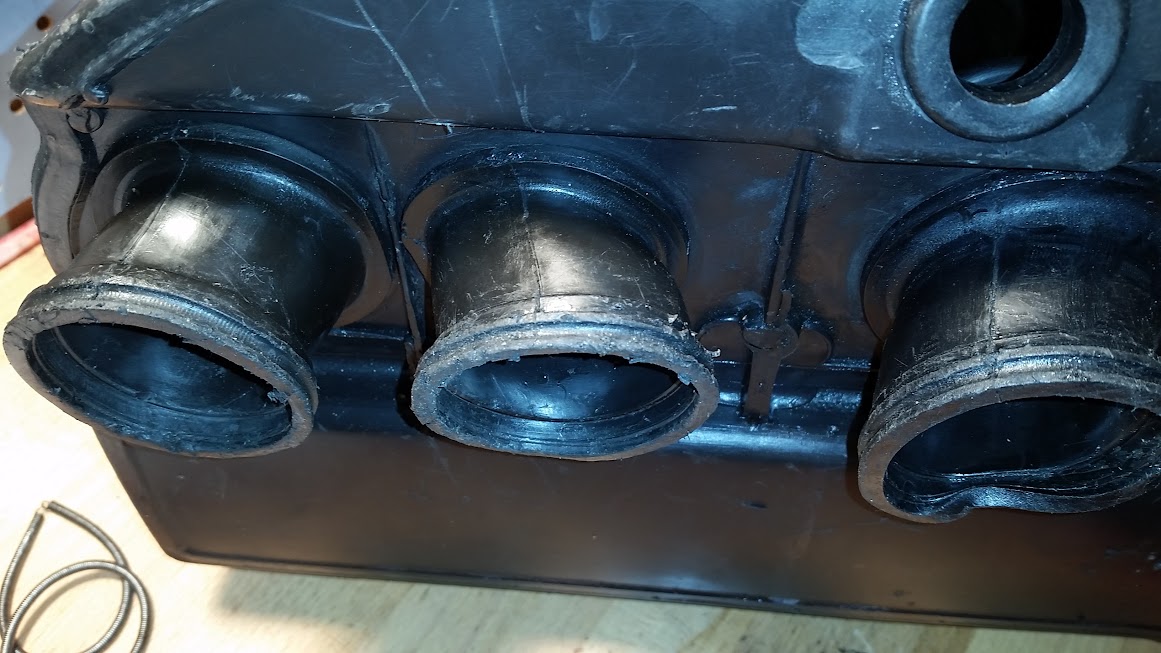
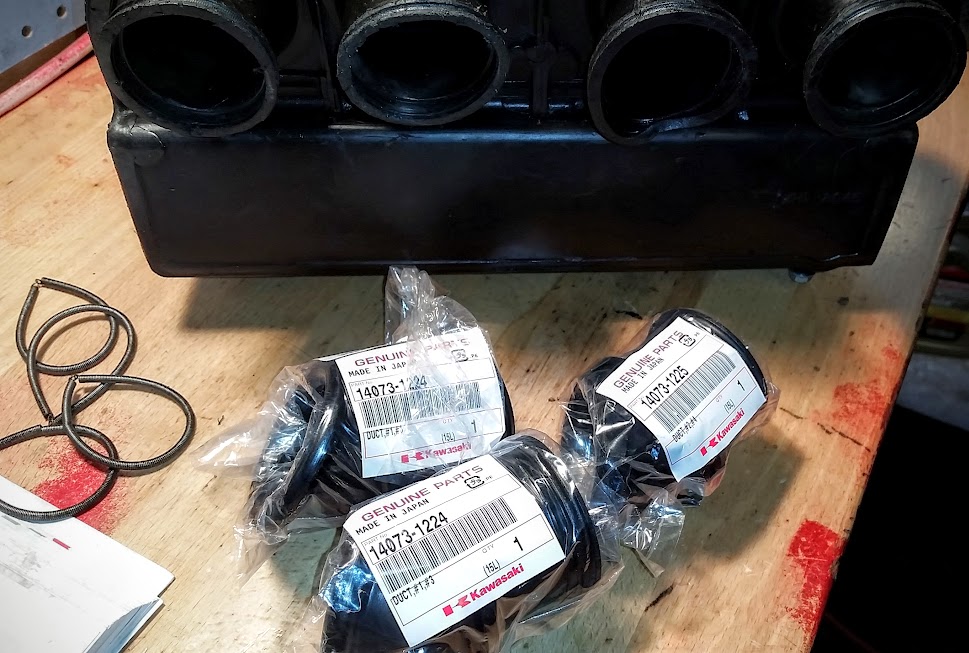
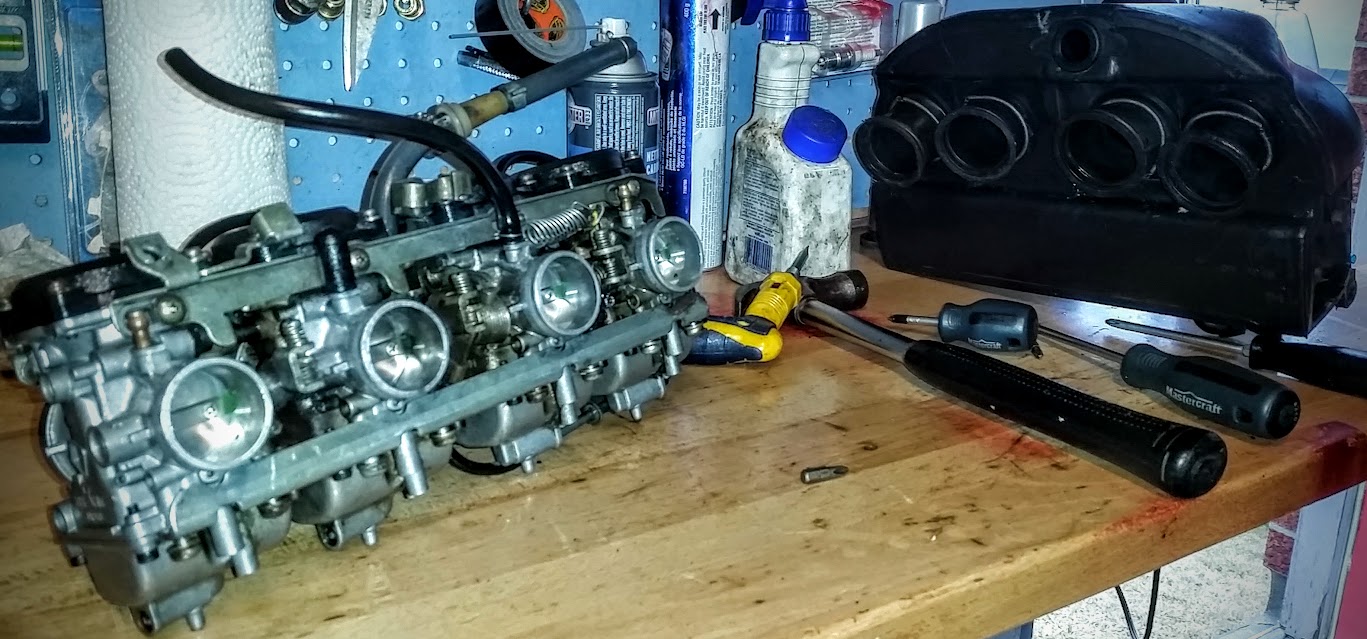
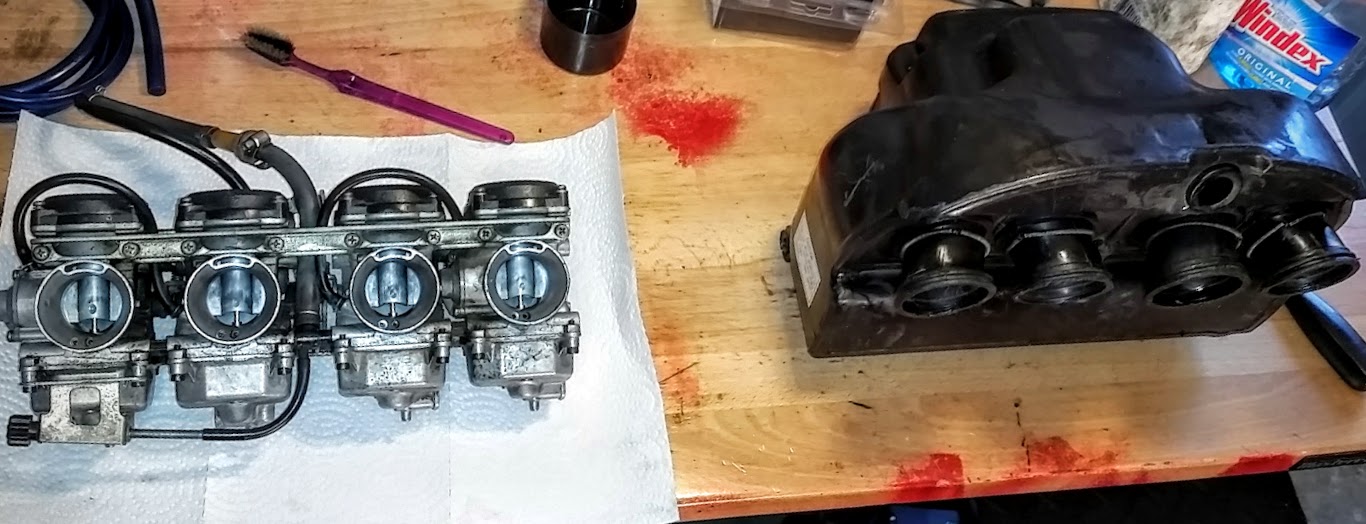
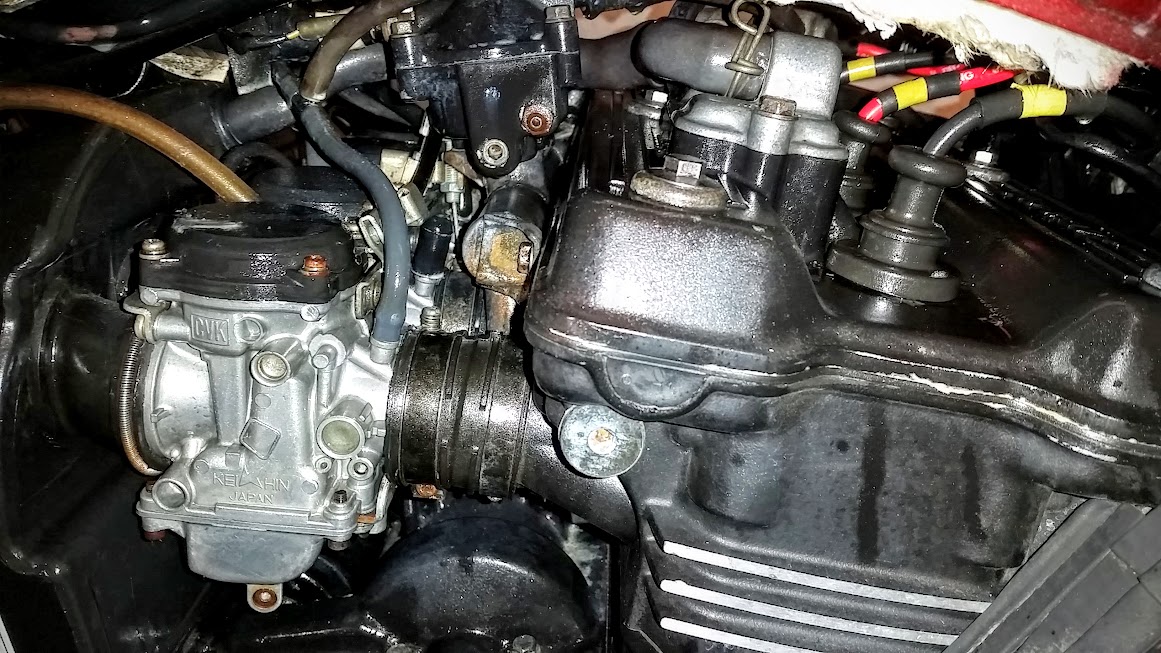
The carburetor rebuild grinds on. It took the better part of a week to get the airbox boots in, and when I opened the bag they came in I'd been charged for four but only got three. I tried contacting Two Wheel Motorsports to ask if the fourth boot was sitting around there, but they didn't get back to me. The Concours uses two types of boots to connect the carbs to the airbox and one of the old ones still had pretty good flexibility in it, so I used the three new ones and the best of the old ones. I tried for the better part of two hours to get the carbs mated to the airbox properly with the stiff, old airbox boots without success. With my home-made hooked screwdriver (to slip the boots onto the intakes) it took about ten minutes of adjusting to get a good seal on all four carbs. If you're doing an old carb rebuild, buy some new airbox boots, it'll save you a lot of frustration and swearing.
The old airbox boots look rough, but the real issue is that the rubber has hardened over time and no amount of heat will soften them up. The new boots were supple and easily went on the carb air intakes with minimal fuss and bother.
I pay for four and get three. Fortunately one of the old ones was still pretty supple so I could reuse it.
Ten minutes and the carbs are back in place. Get new airbox boots if you're rebuilding an old carb!
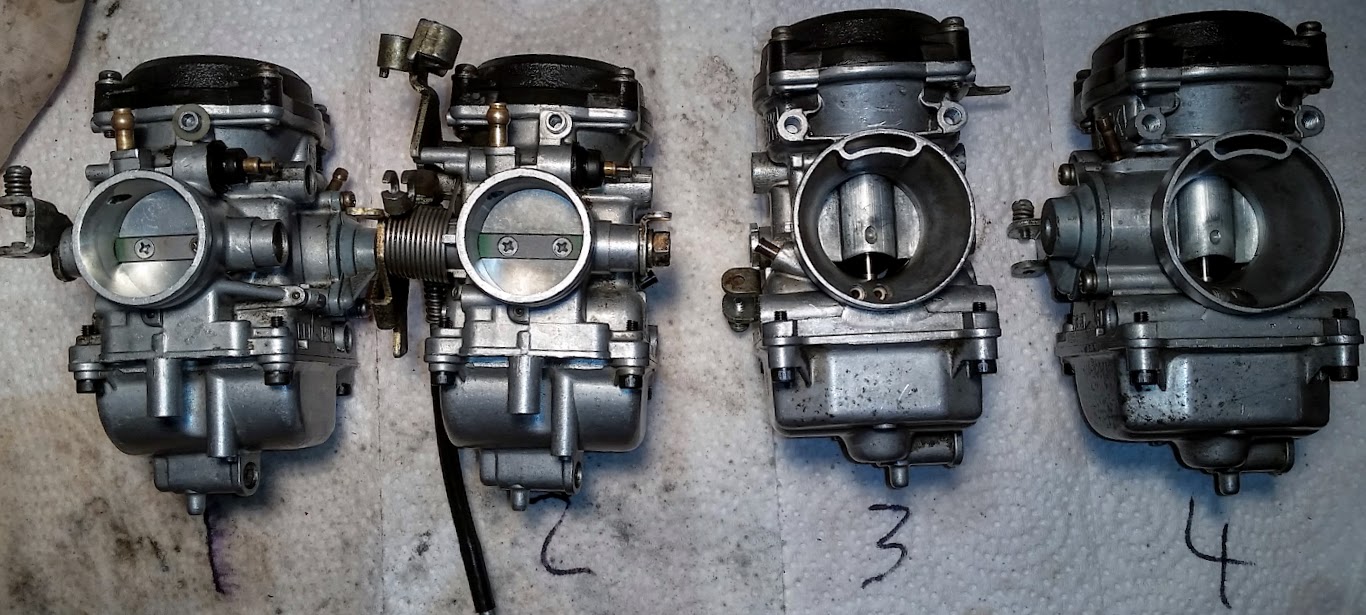
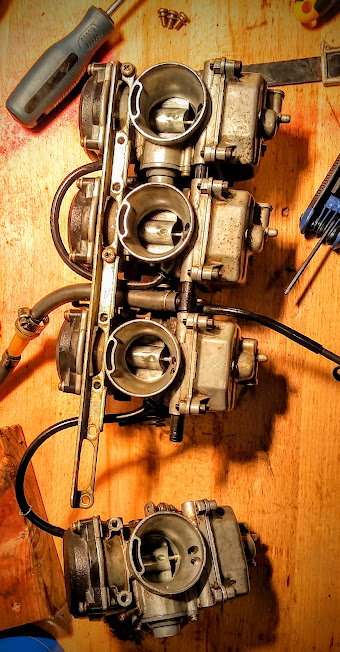
Without warm weather beckoning (we've been in the middle of an ice-storm here) I'm in less of a panic about not having a bike to ride. With an extended long weekend thanks to power failures and such, I've been hammering through four carb rebuilds. The K&L kit I got came with a new bowl gasket, new pilot jet, washer and o-ring, and a new float jet. Breaking down each carburetor one at a time (so I don't mix up parts), I cleaned out the carbs and blew them out with compressed air and then put them back together with the new parts.
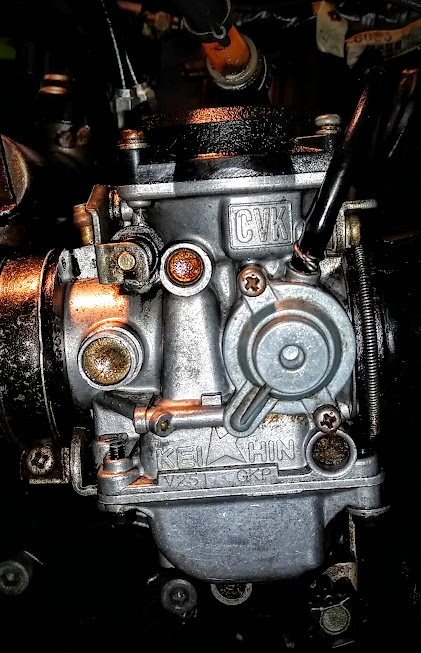
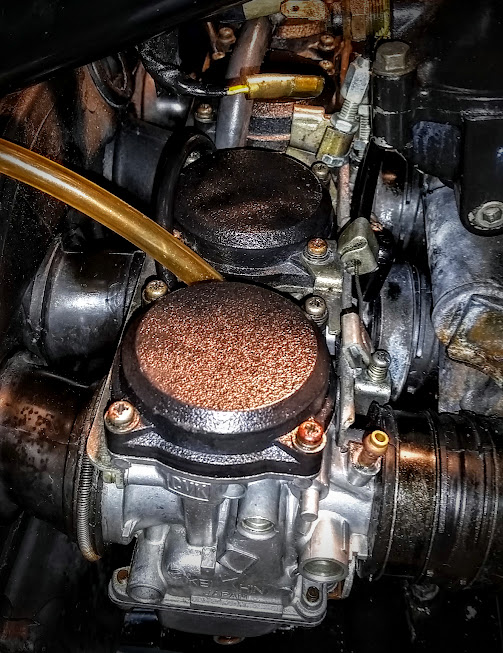
Those little rubber bits get crusty after 22 years on a bike...
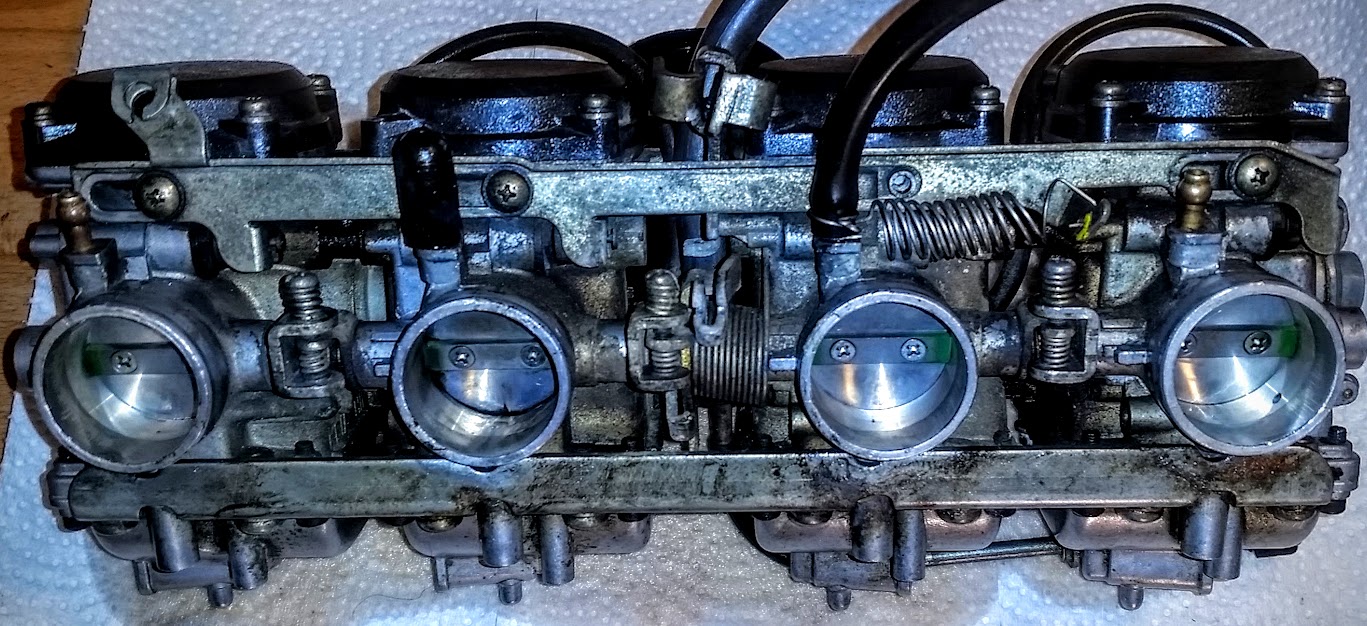
Adjustment wise I reset the float height (17mms with the float unweighted - held sideways). I also reset the pilot jets to two turns out from snug. The pilot jets varied from almost five turns out to under three turns out. I'm curious to see how this affects fueling. The manual suggested resetting them to what they were, and I did record them, but the factory setting is 2 turns from snug, so that's what I reset them to. I'm not sure why I'd reset them to what they were when they weren't working well.
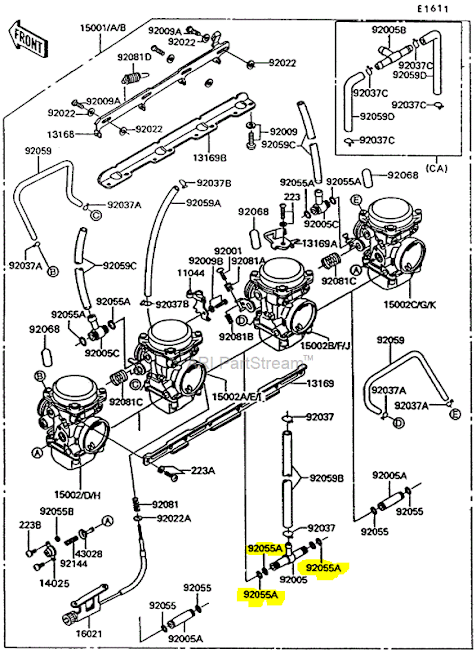
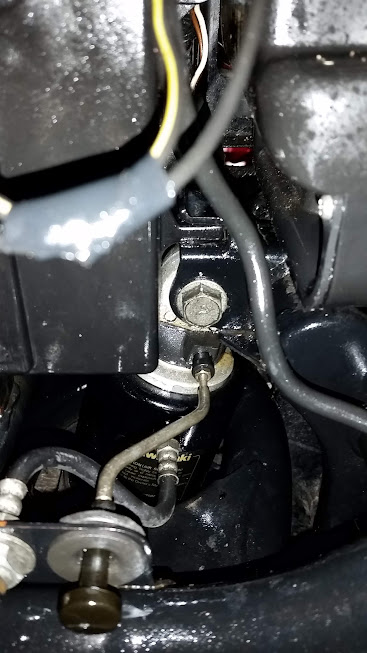
The carb rebuilds weren't particularly difficult, but they were a bit tedious (you're basically doing the same thing four times). Things have ground to a halt again as I've found that I need o-rings to replace the old, broken ones that sealed the fuel lines between carbs. With some new o-rings I should be good to put them all back together again and re-vacuum tube them with new tubing.
Rebuilding the first carb - it took a bit longer as it was more exploratory
The second videos hows the final two carbs and then discovering the need for o-rings -both videos are based on photos taken every 10 seconds compressed into a video running at one photo every 1/10th of second.
As an aside, I thought it would be a good idea to go through Motorcyclesuperstore.ca, but they seem to have pulled back from offering Canadian customers a clear view of their prices. You used to be able to buy in Canadian dollars and there were no surprises. When you buy now they charge in U$D, so you've got to do some math to figure out how they compare to Canadian retailers. It looked like they came out about twenty bucks ahead of an equivalent Canadian order, until I got the COD message with border taxes. Suddenly that twenty bucks turned into paying an extra ten. I liked motorcyclesuperstore.com, their customer service went above and beyond, but their lack of clarity around pricing of orders to Canada puts them in the same category as any other US distributor. I'm not happy with canadasmotorcycle.ca's 'easy' returns (they charge you for shipping), but I'm not playing roulette with customs costs again. I'm afraid that's the last time I'll use motorcyclesuperstore. I need to start looking into other Canadian based motorcycle retailers.
Two down, two to go...
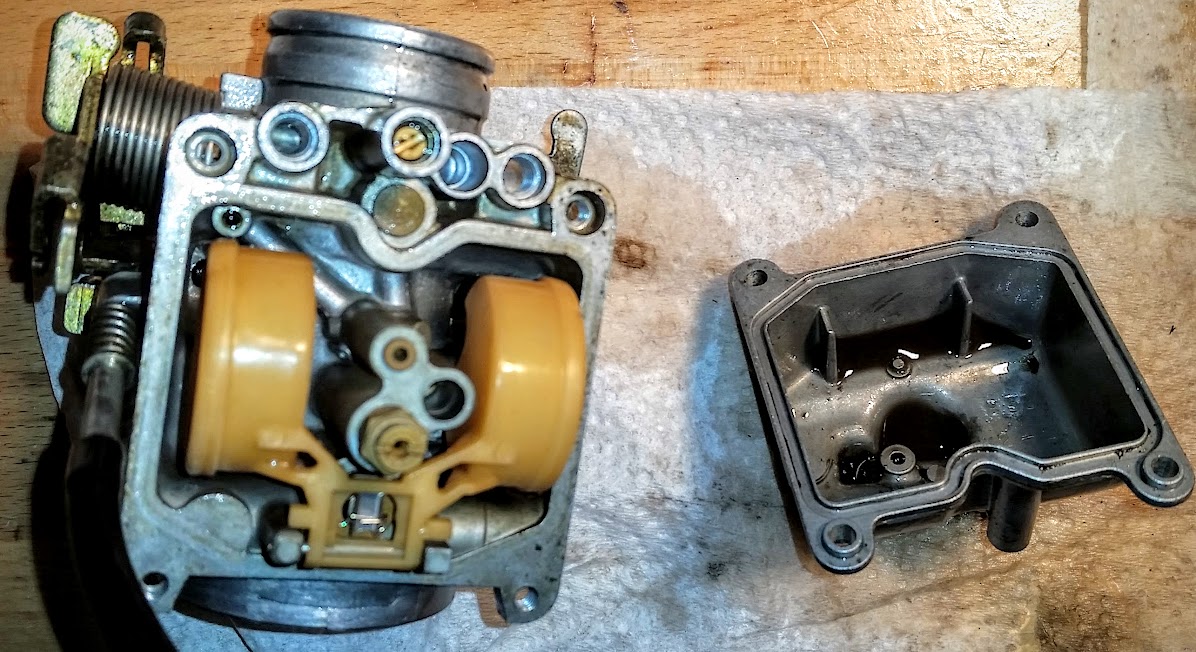
The pilot jet (centre) - has a spring, washer and o-ring underneath.
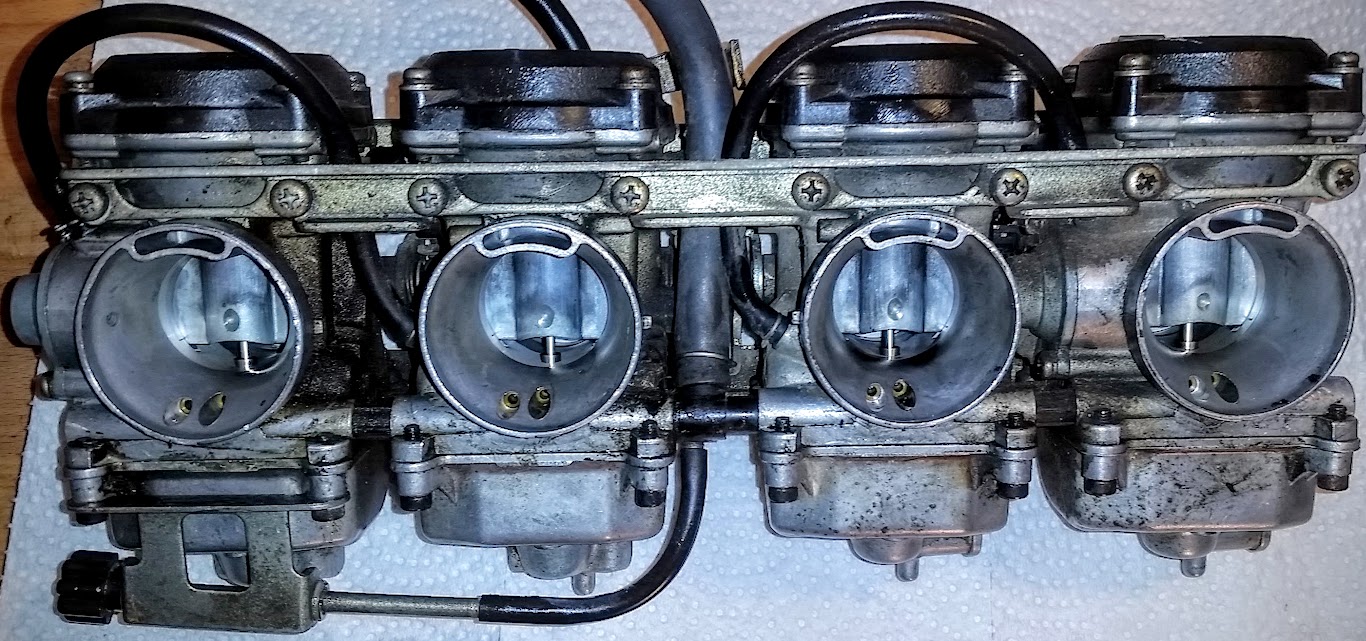
The float bowl off and being cleaned out - the floats are held in a pin at the bottom - the float jet hooks on a tab in the middle
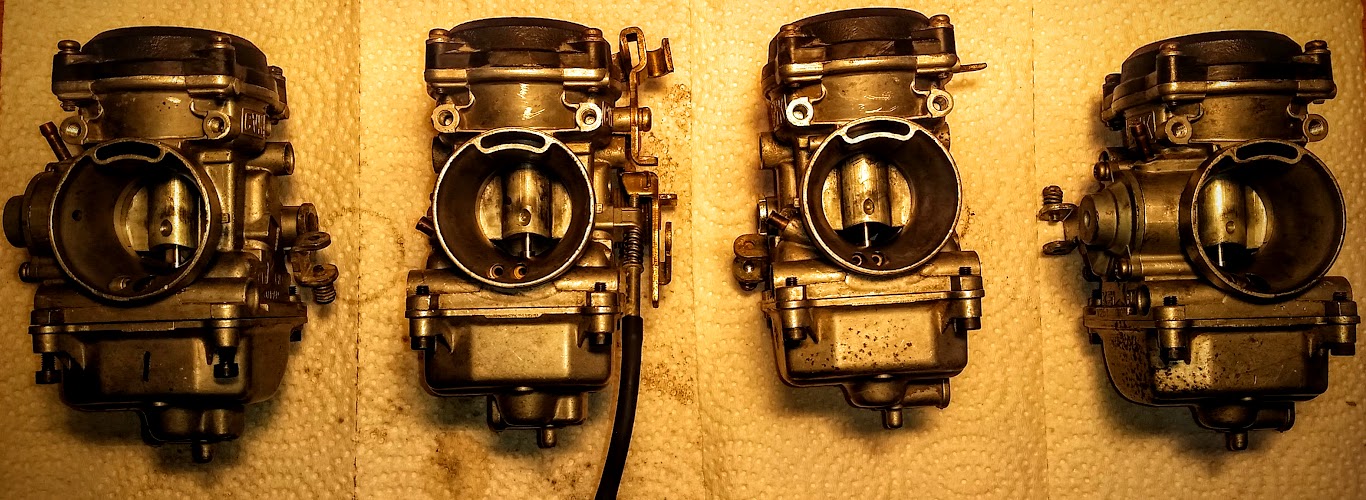
There are three rails holding the four carbs together on a Kawasaki ZG1000 Concours. Two of them are structural and the other one holds the choke mechanism in place. Taking them off a twenty two year old carburetor can be trying. I ended up having to cut a line in one of the retaining bolts and put some heat on it to get it to let go, but all three pieces are out now. With the four carbs separated I'm now waiting on the rebuild kits. When they arrive I'll rebuild each carb one at a time (so I don't mix up parts). All four carbs are cleaned up (a touch of carb cleaner and a toothbrush got 22 years of grime off) and awaiting some new gaskets, float adjusting and rebuilding. While in there I'll make sure the needles are in good shape and everything has the right geometry. The first one will be exploratory and slow, by the fourth one I'll be able to rebuild these things in my sleep!
The four carbs separated and cleaned. Taking a twenty two year old carb apart takes some patience, and some heat.
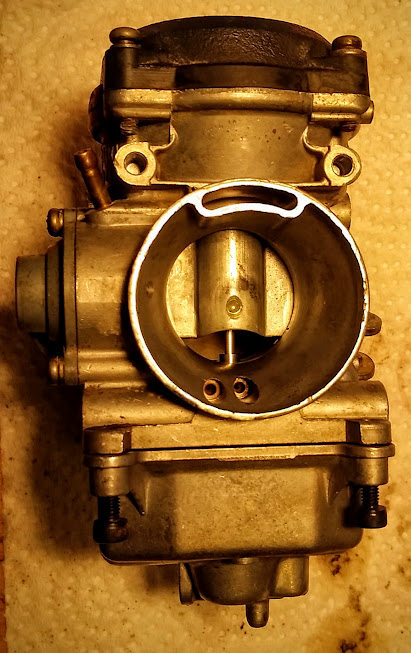
Cleaned up and ready for a rebuild.
No lost parts this time - everything labelled and organized.
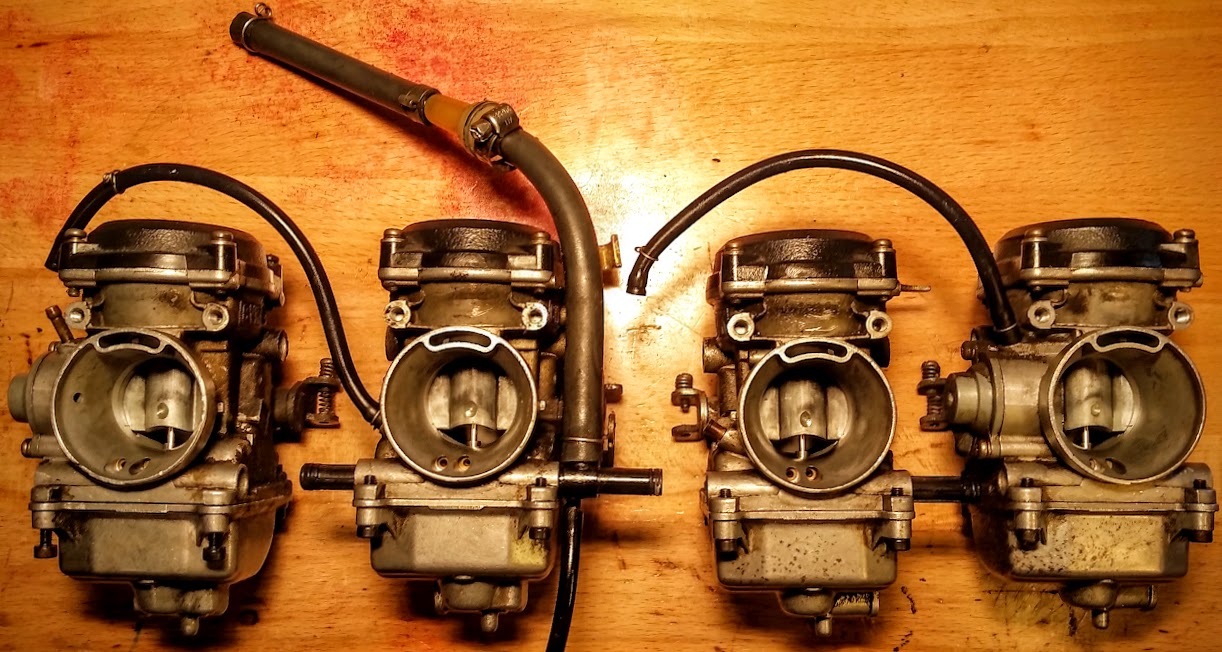
The choke rod (up and down to the right) partially removed - each carb links to this plate which moves them all when the choke is pulled.
It only takes a bit of carb cleaner and a tooth brush to get the crud off. I blew it dry with the air line afterwards. Caustic carb cleaner (it melted two pairs of latex gloves - for goodness sake, wear gloves!) isn't recommended on the insides - I'll use a bit of gas and a clean toothbrush to make sure the innards are perfect when I get in there.
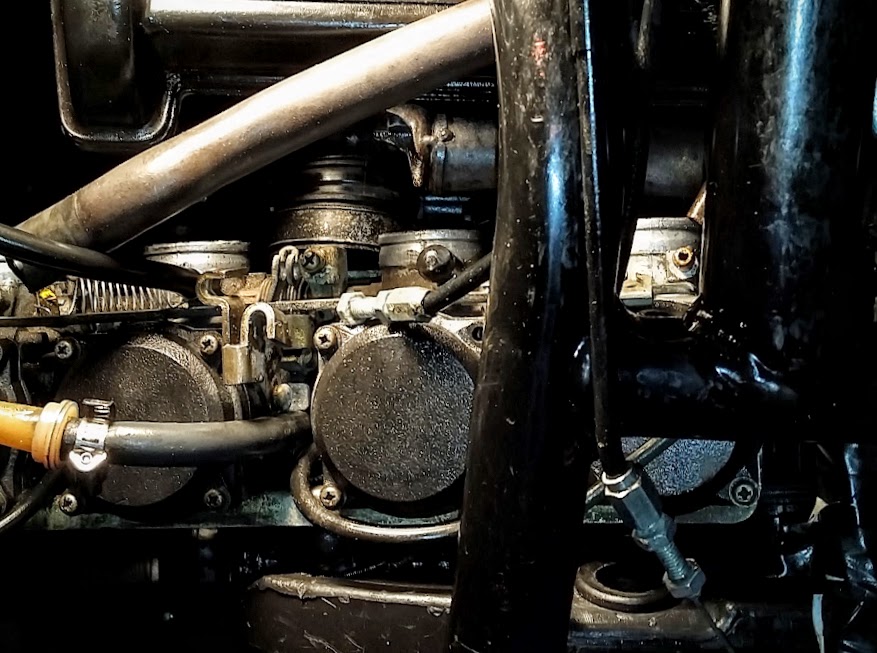
The Concours' carburetor has become cursed by demons. These carbs tend to not come back from sitting very well, though last year they didn't have this problem. When I put them away they were running well, but no longer. Yesterday I pulled the tank again and went over the vacuum tubes in detail - no breaks, no problems. After putting it all back together again I took it out and had the same hesitation on throttle and back firing. The bike feels seriously down on power too. I was hoping to send the carbs down to Shoodaben Engineering in Florida for a spa session with Steve. His prices are more than fair, but after having an economist (whatever the hell that is) as a Prime Minister for eight years, Canada's dollar is in the toilet and my $500US carb repair would cost north of $800 with shipping, customs and the exchange rate. I paid $800Cdn for the bike in the first place. So I'm rebuilding carbs! In spite the many terrifying stories of carb removal on a Concours, I found the process pretty straight forward (thanks to Steve's video). Warm up the rubber on the airbox to carb, they get nice and soft, and you wiggle the whole thing free. With the carb on the bench, parts are ordered ($200Cdn for 4 kits - 1 for each carb) and I'm beginning to break it down to rebuild each.
The model was made with the OccipitalStructure Sensor 3d Scanner. I'm trying different editing programs. I used the 3d Builder integrated into Windows 10 to edit out the extra bits captured by the scanner. It's quite easy to use and has some pretty good editing tools. If you're trying 3d modelling for the first time it's not a bad place to start (and it's included in Windows 10!).
The file is shared on Sketchfab, which I find to be an easy way to do presentation editing and sharing of a 3d model. We're using Blender in class, so I'll be cranking out some Blender motorcycle models in the next couple of weeks. The trick is going to be to get them looking life like rather than digitally modelled. I wonder how you model patina...
The wheels are off the Concours. Tomorrow they're off to school to have the tires off and the bearings pressed out, then it'll be over to Erin for some wheel magic at Fire Ball Coatings. If this goes well Fire Ball are going to be my go-to for advanced paint treatments. In the meantime I've been going over the bits and pieces, getting it cleaned up. I suspect I might be the first person into the rear drive hub in many moons. The Bridgestone on the front was manufactured in November, 2007 - that's eight years and two months ago! Ipads weren't invented when this tire was made! I'm not experienced or fussy enough to tell the difference between new and old/mismatched rubber, but I hope new tires are going to transform this bike's handling.
The rear Dunlop was manufactured in March, 2011 - four years and nine months ago. Not as bad as the Bridgestone but having two different branded tires on the bike isn't ideal either.
Even though the Dunlop is almost five years old and I have put 10,000 miles on it (plus whatever the guy before me did), it's still got the rubber nipples on it - that's one tough tire.
Removing the rotors was a pretty straightforward process. I aim to clean them up and maybe paint them or at least clear coat the middles before putting them back on. I saw a TV show on current bike customizing trends and they said they had Axel Rose came in and bought a 'distressed' Harley - a new bike that is scuffed up to give it character (patina in the tongue of customizers). I come by my patina more honestly.
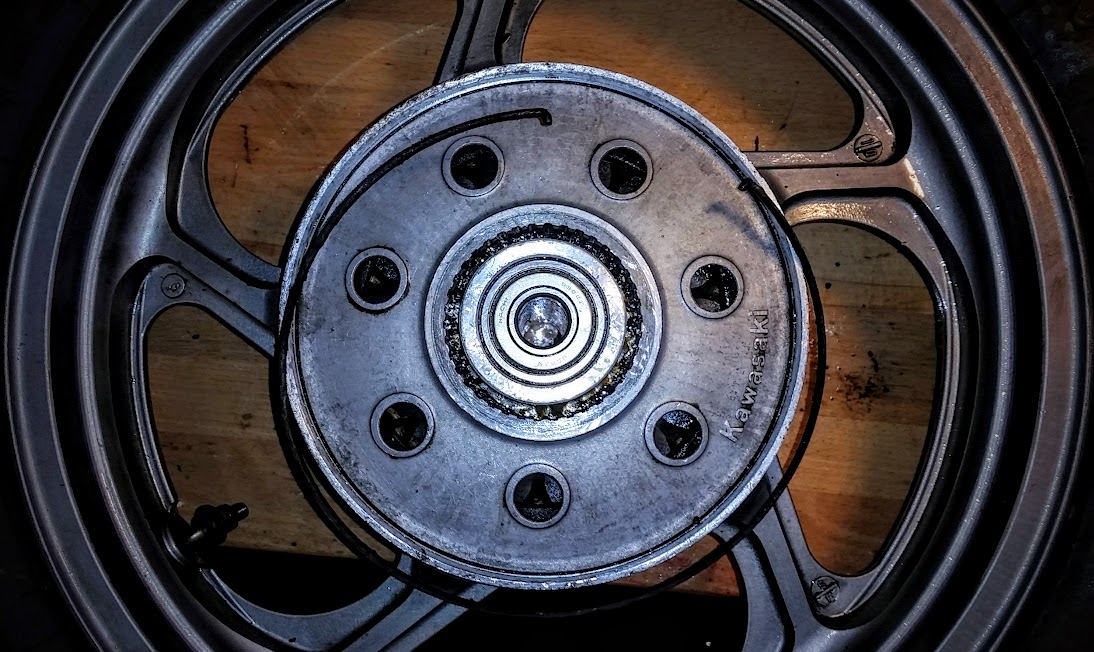
The cover inside the drive side of the rear rim - pretty grimmy, but getting cleaned up.
The rubber weighted piece under this cover (and the cover itself) were in there good, it took a fair bit of cleaning and wiggling to get the cover out.
The shaft drive with the rim off. Doesn't look too bad. I'll give the rear sub frame a clean and lube while everything is off.
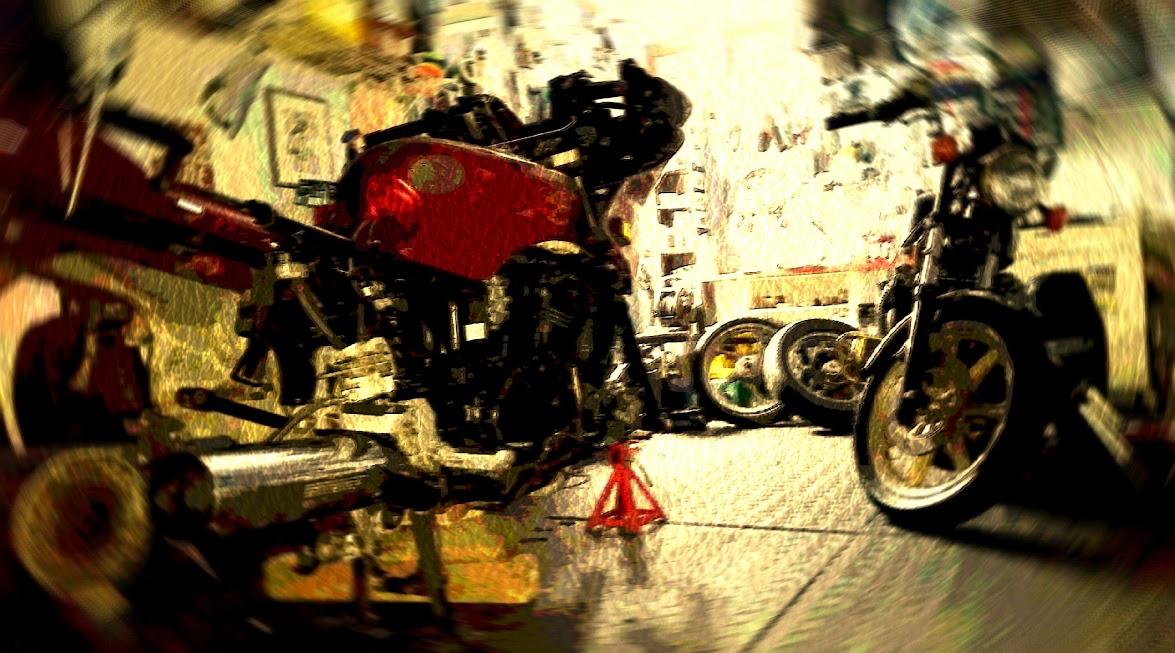
Concours ZG1000 looking like something out of Star Wars, and ready for a hover conversion!
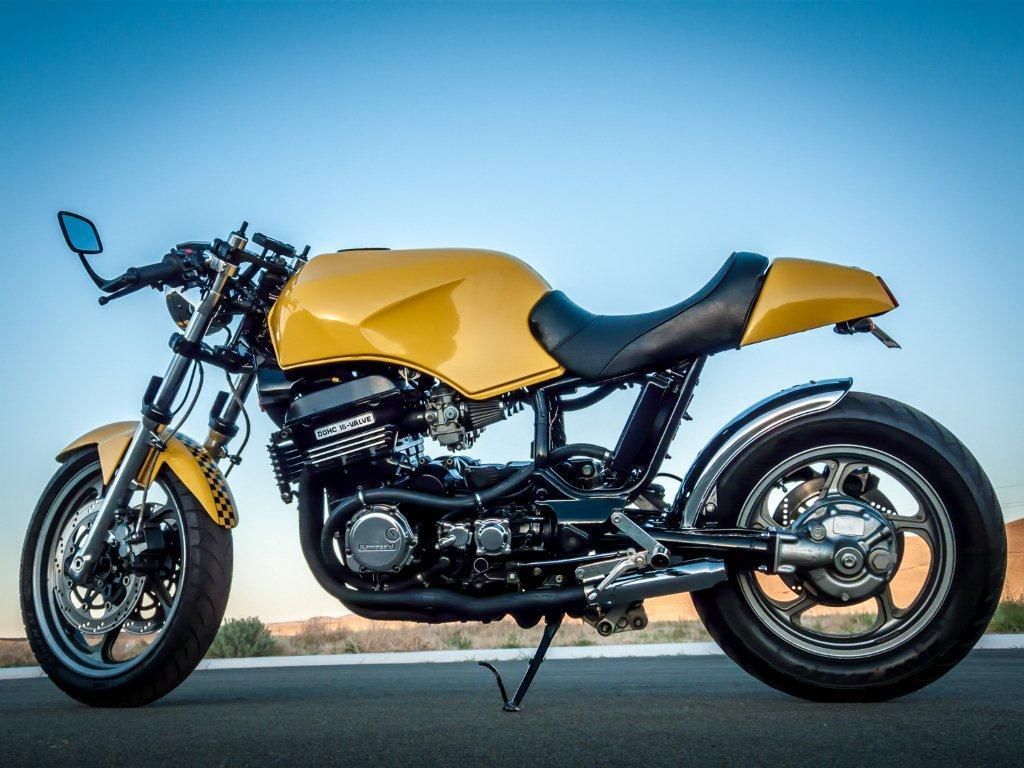
Candy gold on the left looks pretty spectacular, but my old warrior is getting the plain gold. Fire Ball Coatings has me thinking about a project bike that I could really bling out though: power coated frame, candy coated rims... the works!
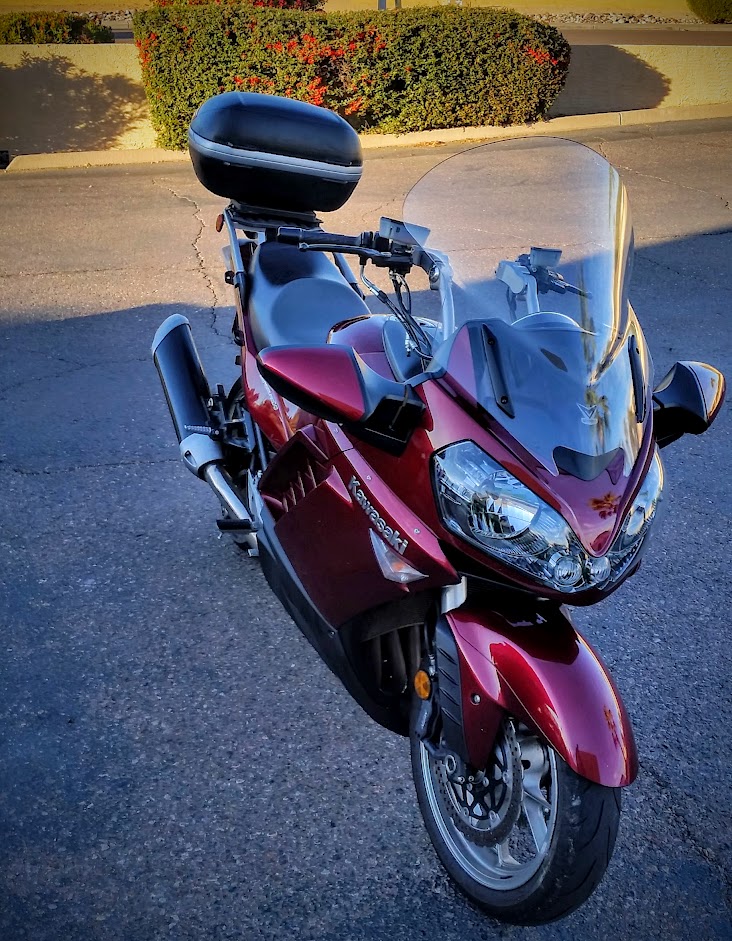
It was a cold and windy ride through the Superstition Mountains yesterday. The route we took after taking Gaylen's advice at azride.com gets you out of the city and into the desert quickly and lets you bypass most of the urban sprawl east of Phoenix. Our trusty mount was a Kawasaki Concours 14. I thought it would be interesting to compare my 20 year old Concours to a younger one. After I got myself turned around and rode ten minutes the wrong way into Phoenix, we got moving in the right direction and soon found ourselves on the Bush Highway, a twisty, bumpy highway that doesn't go anywhere - I guess that's why they named it that.
It took me some time to get used to this unfamiliar bike. The gear shift was very close to and felt lower than the foot peg which made for awkward shifts, and the brakes felt very (dare I say over?) assisted unlike the old-school hydraulic brakes on my classic Concours. When you applied the front brake you stopped in a hurry causing my pillion to plough into the back of me a number of times until I got really ginger with brake application. The other off-putting part was that each time I used the front brake it was accompanied by a loud electrical whining noise like a cicada chirping. Sometimes it would stop when I let go of the brake, sometimes it would keep whining afterwards. I was unsure if this was a Concours 14 thing (doubtful) or an azride.com maintenance thing. CoG didn't suggest any known brake electrical noise problems so I suspect this is a maintenance issue. The azride.com website didn't mention what year the Concours was (unlike other rental sites which tell you it's a 2015 but show you a five year old bike), but based on the body the bike we had was a pre-2011 model. Maybe it's starting to get cranky in its old age.
Taking a water break on the Bush Highway. It was about 15°C, comfortable riding weather. Up in the mountains it was 5°C when we stopped for lunch.
After owning three Kawasakis I have to say, man do they know engines. Every one I've owned or ridden has had a jewel of an engine and this Concours was no different. Passing through the tunnel leading out of Superior, the engine sounds echoing off the walls were spine tingling - it sounded like something straight out of MotoGP.
With that big wobbly wind screen up high you're in a big air bubble, but it looks ungainly. Fortunately you can lower the screen in town to restore a sportier look.
The engine didn't disappoint in power either. My Connie does the business with carburators and 300 less ccs, but what this bike does with the monsterous ZX14 1300cc lump is truly ominous. I've ridden fast bikes before and this is one of the fastest.
On mountain roads this newer Concours felt smaller than my bike though they weigh the same. The newer bike is much narrower and quite wasp wasted compared to the chunky older model. That monumental engine that produces sixty more horsepower than my bike probably helps with that feeling of lightness too.
Wind-wise, I was able to ride in jeans all day into single digit Celsius temperatures without a problem. The heat that pours off my Concours was absent on this one, though it was a cold day so it wasn't something I'd notice anyway. The windscreen is electrically adjustable and at the top it stopped all but the top of my head getting hit by wind (I'm 6'3" and I had given up on windshields doing anything for me). My bike gets me squarely in the shoulders and up all the time. I didn't like how much the windscreen wobbled at speed, it looked flimsy, not to mention goofy in its highest position. Once I was back in town I lowered it back to a less Jurassic Park look. Goofy or not though, it made a cold ride through the mountains much more bearable. A transformable windshield is a piece of magic, though a more solid feeling one with manual adjustment would do the job better. I'd rather not have the added weight and complexity of the electrical one.
You can see just how ridiculously high the risers are in this view of the Concours back in the lot. The big googly-eyed headlights don't do much for me either.
I've got a 32" leg and find my bike a bit cramped. The ZG1400 was a bit more relaxed in the legs. After a couple of hours in the saddle I had no problems. The ergonomic problems began where azride.com made changes. The huge risers they installed on this Concours looked like comedy units off a 1970s banana seat bike - huge bull horn things that put the grips right under my nipples, or so it felt. They pushed me so far back that I was riding more on my tailbone - cruiser style - than I otherwise would have. The narrow Concours 14 seat wasn't build for this contortion and it became quite uncomfortable. It makes me wonder how the stock handle bars would have worked. I have low risers on my old Concours and have a slight forward lean, which I prefer to a bolt upright or reclined stance.
No fancy paint, electrical wind screens or whining electronics, but it's a solid old thing that does the business with gusto. I'm still wishing for the bike bag to magically whisk my bike along.
All of the electrical noise from the brakes and fuel injection made me cross. I don't mind electronics (I teach computer engineering), and my Ninja had EFI that was bullet proof, silent and efficient, but when the electronics are whirring away it is intrusive and just reminds you of another expensive thing that will break on you. I don't feel that this Concours 14 gave me a fair idea of what the breed is capable of. I'd especially like to try a newer one to get a better sense of the machine. Maybe Kawasaki will be doing a riding tour again next year and I can try a 2016 model. That whacky old-guy handle bar riser (and accompanying sore ass) conspired to make me long for my own bike. It might not have the heat management, or easier reach to the ground (which I don't need anyway), or fancy moving windshield, but my old Concours feels solid, is usually the fastest thing on the road when you twist the throttle and offers a satisfying mechanical simplicity that I missed on this electronically whinny newer machine.
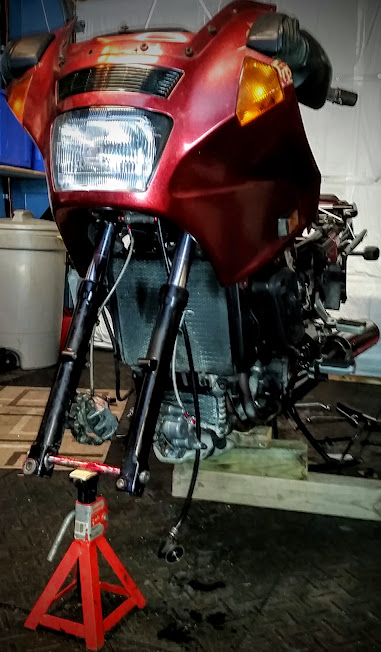
It's accumulating outside. While that's happening, I'm in the garage busy stripping the Concours down to its underskirts. Once that's done I'll give it a final cleanup before getting into the brakes and bearings. While the wheels are off I'm going to look into getting them refinished. Fireball Performance in Erin does wheels, so I'll see if I can drop off the rims while they're off the bike. I'm curious to see just how magical a transformation that can be, and what it costs.
The partially stripped Concours. It made me wonder what a stipped Connie would look like... pretty fantastic as it happens:
Strange that I've been through the Yamaha's carbs in detail, but never the Connies...
With her skirts off, the Concours still looks good for a 21 year old motorbike that spent too much time outside. A drop of coolant on the back of the block has me in full suspicion mode - I'm hoping it's a bit of overflow splash, but mechanic's skepticism tells me it'll be a leaking water jacked and a lot of gasket work - the coolant reservoir isn't low...


